how to connect laptop to lg tv via wifi

Title: How to Cast Windows Laptop Screen on LG Smart TV Wirelessly Connect & Mirror
Channel: Fix369
How to Cast Windows Laptop Screen on LG Smart TV Wirelessly Connect & Mirror by Fix369
connect laptop to lg tv via wifi, connect laptop to lg tv wireless, how to connect laptop to lg smart tv wirelessly
Laptop to LG TV Wireless: The SHOCKINGLY Easy Trick!
Wireless Wonders: Unleash Your Laptop on Your LG TV — The Secret's Out!
Ever wished you could effortlessly project your laptop screen onto your stunning LG TV? You're not alone. So many of us crave that seamless integration, the ability to stream movies, browse photos, or even work on a bigger display. And the best part? It’s incredibly easy. Forget tangled wires and complicated setups. Truly, the solution is simpler than you'd imagine.
The Wireless Revolution: Setting the Stage
The era of wired connections is gradually fading. We’re embracing the freedom of wireless everything. This shift makes connecting your laptop to your LG TV a breeze. First, confirm your TV supports screen mirroring. Most modern LG TVs do. Hence, your TV likely has this feature. Take a look at your TV's specifications. You should find details about wireless connectivity. Also, check your laptop's capabilities. Generally, it's equipped with the necessary hardware.
Unveiling the Magic: The Screen Mirroring Method
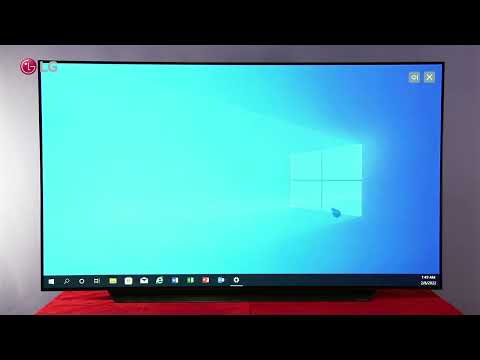
Screen mirroring is your key. This technology lets you duplicate your laptop's screen onto your TV wirelessly. Think of it as a digital mirror reflecting everything you do. For starters, ensure both devices are on the same Wi-Fi network. This is absolutely critical for a smooth connection. Then, it is time to dive into the process on your LG TV. Locate the "Screen Share" or "Screen Mirroring" option. It’s usually found in the settings menu. You'll recognize the icon soon enough. It typically displays two screens with an arrow.
Windows Warriors: Connecting Your Laptop
If you have a Windows laptop, the process is straightforward. Press the Windows key plus "K". Alternatively, go to your "Devices" settings. You'll see an option for "Bluetooth & other devices." Click on "Add Bluetooth or other device." Select "Wireless display or dock." Your LG TV should appear in the list. Select your TV. Follow the on-screen prompts to connect. You're nearly there!
Mac Mavericks: The AirPlay Adventure
Mac users, rejoice! Apple's AirPlay makes this process incredibly simple. First, ensure your TV is AirPlay-compatible. Many newer LG TVs support this feature natively. If your TV is ready, click the AirPlay icon in your menu bar. This icon resembles a rectangle. Select your LG TV from the list. Then, the mirroring will commence.
Troubleshooting Troubles: Smooth Sailing Ahead
What if things don't go perfectly? Don’t panic! There are a few common hiccups. First, check your Wi-Fi connection. Ensure it's stable. Also, restart both your laptop and your TV. This often clears up minor glitches. Then, update your TV's firmware. Outdated software can cause issues. Furthermore, check for any interference. Other electronic devices can sometimes disrupt the signal. Finally, consult your TV's manual or LG's support website.
Beyond the Basics: Elevating Your Experience
Once connected, the possibilities are boundless. You can stream movies and TV shows. Display your family photos on a large screen. Give impressive presentations. Play games with friends on the big screen. Moreover, customize your settings. Adjust the display resolution for optimal viewing. Experiment with different sound settings.
Enhancing Image Quality: Maximizing the Visuals
Image quality is paramount. You want a crisp, vibrant display. Hence, adjust your display settings. Typically, you can adjust the resolution and aspect ratio. Choose the highest resolution your TV and laptop support. Also, tweak the picture settings on your TV. Experiment with brightness, contrast, and color. Finally, close unnecessary apps on your laptop. This frees up resources for smooth streaming.
The Benefits Abound: Why Wireless Matters
Wireless connectivity offers many advantages. It streamlines your entertainment setup. You eliminate the clutter of wires. It provides flexibility in your viewing location. You can enjoy content from anywhere in the room. Wireless is ultimately convenient. It simplifies setup and use. That’s why it is so popular.
Final Thoughts: Your Wireless Journey Begins Now!
Connecting your laptop to your LG TV wirelessly is easy. It's a convenient way to enjoy your content on a bigger screen. Following these simple steps transforms your viewing experience. Embrace the freedom of wireless technology. Enjoy your favorite content with ease. You'll wonder why you waited so long!
Windows 11 WiFi Nightmare? FIX Your SLOW Internet NOW!Laptop to LG TV Wireless: The SHOCKINGLY Easy Trick!
Hey there, tech explorers! Ever wished you could sprawl on your couch, laptop in hand, and watch your favorite shows or presentations on the big screen of your LG TV, without the messy tangle of wires? Believe me, we’ve all been there, wrestling with HDMI cables that seem to have a mind of their own. Well, get ready, because we're about to unveil a secret, a shockingly easy trick to connect your laptop to your LG TV wirelessly. We'll spill the beans on how to do it, making your entertainment setup smoother than a freshly paved road. Buckle up, because this is going to be fun!
1. Ditching the Cables: Why Wireless?
Let’s be honest, who likes cables? They’re the bane of our existence – a trip hazard, a dust magnet, and a general aesthetic nightmare. They clutter our living spaces, making our otherwise beautiful home entertainment systems look like a rat's nest of technological despair. Going wireless is like finally trading in your clunky old car for a sleek, futuristic model. It's about freedom, flexibility, and the pure joy of a clean, uncluttered space. Plus, with a wireless connection, you can move your laptop around the room, even into the kitchen for a quick snack break, without missing a moment of your content. It's pure entertainment nirvana, as easy as pie.
2. The Hidden Superhero: What You Need (Spoiler: It's Easier Than You Think!)
Forget complicated gadgets and expensive installations. The beauty of this trick lies in its simplicity. All you really need are a few key elements, and you're golden!
- Your Laptop: Obviously! This is where your movies, presentations, or whatever entertainment you choose to be.
- An LG Smart TV: This is the star of the show. Make sure your LG TV is a smart TV, meaning it has built-in Wi-Fi capabilities. Most modern LG TVs do.
- A Stable Wi-Fi Connection: Consider Wi-Fi the invisible thread that binds everything together for this trick to work.
- A little bit of patience and curiosity: A pinch of both helps to ensure that all goes well.
See? Not so daunting, right? It's like gathering ingredients for a delicious recipe – simple, accessible, and completely within your reach and ability when you can follow the right steps.
3. Unveiling the Magic: The Screen Mirroring Lowdown (It's Easier Than You Think!)
The secret weapon in our arsenal is screen mirroring, also known as screen casting or SmartView, depending on your laptop’s manufacturer. It’s like having a magical mirror that projects your laptop screen directly onto your LG TV. Now, here's how to activate this magical screen-mirroring trick:
Option A: Windows 10/11 Users:
- Ensure Your TV Is Ready: Make sure your LG TV is turned on and connected to your Wi-Fi network.
- Open the Action Center: Click the notification icon (the speech bubble) in the bottom-right corner of your screen.
- Click “Connect”: This option should appear in the Action Center.
- Select Your TV: A list of available devices will appear. Choose your LG TV from the list.
- Confirm the Connection: Your laptop will now try to connect to your TV. You might see a prompt on your TV to allow the connection. Accept it and voila!
Option B: Mac Users:
- Make Sure Your TV Is Ready: Again, turn on your LG TV and ensure it's connected to your Wi-Fi network
- Check Your Menu Bar: If you see the "AirPlay" icon (a rectangle with a triangle in it) click on it. If not, then move on to the "System Preferences."
- Open "System Preferences": In the Apple menu (top left), click "System Preferences" and select "Displays".
- Select Your TV: A list of available devices will appear. Choose your LG TV from the list.
- Confirm the Connection: Your laptop will now try to connect to your TV. You might see a prompt on your TV to allow the connection. Accept it, and that's all!
4. Fine-Tuning Your Experience.
Screen mirroring is powerful, but it's not always perfect. Here are a few tips to smooth out the wrinkles:
- Optimize Your Wi-Fi: A strong, stable Wi-Fi signal is critical. If your signal is weak, move closer to your router or consider upgrading your router.
- Close Unnecessary Apps: Running multiple apps simultaneously can slow down the mirroring process and cause lag. Close any programs you’re not using.
- Adjust Display Settings: On both your laptop and TV, you can adjust the display settings to optimize the picture quality and screen resolution. Experiment with the settings until you find what looks best to your eyes.
- Consider a Dedicated App (Optional): Some manufacturers offer dedicated apps for screen mirroring. These apps might offer a more stable connection and additional features. Check your LG TV's app store for options.
5. Troubleshooting: When Things Go Wrong (Don’t Worry, It Happens!)
Even the best plans can hit a snag, right? If you're having trouble getting things to work, don't panic. Here are a few common issues and how to solve them:
- No TV Found. Double-check that both your laptop and your LG TV are connected to the same Wi-Fi network. Also, ensure your TV is turned on!
- Poor Connection: If you experience lag or stuttering, try moving your laptop closer to the TV or router. You can also try restarting both devices.
- Audio Issues: If you don't hear sound, double-check your audio settings on your laptop and TV. Make sure the output is set to your TV. The most common reason for sound not working is that the source sound is set to your internal laptop speakers.
6. Beyond Screen Mirroring: Exploring Other Options.
While screen mirroring is the simplest method, there are other ways to connect your laptop to your LG TV wirelessly:
Using Media Servers
Many LG TVs support DLNA (Digital Living Network Alliance) media servers. If you use a media server like Plex or Kodi, you can stream your movies, music, and pictures directly to your TV without screen mirroring. This is generally a robust method, particularly for large media libraries.
Connecting Via a Wireless Adapter
In some cases, a wireless adapter might be necessary. This is less common with modern smart TVs.
7. The Perks: Why Wireless is a Game Changer.
We've already touched on some of the benefits, but let's recap why going wireless is so fantastic:
- Freedom and Flexibility: Watch movies, stream presentations, and browse the web from anywhere in the room.
- Clean and Tidy: Say goodbye to cable clutter!
- Easy Setup: The whole process takes just minutes.
- Entertainment On-Demand: Instantly access your favorite content on the big screen.
8. Optimizing Your Experience: Display and Resolution Settings.
One of the amazing things about wireless screen sharing is that it extends the freedom to configure what is being displayed. The screen quality is something you can tailor to your own viewing preferences. Here are a few tips to help:
- Adjust Resolution: Open your computer's display settings and adjust the resolution to match your TV. This makes the images appear clearer and more crisp
- Image or Video Enhancement Settings Explore the display setting and the settings on your LG TV to get it just the way you want it
- Screen Orientation: You can control the orientation of the content being displayed. Is it rotated on the screen the way you want it?
9. Enhancing Usability: The Best Practices to Enjoying a Seamless experience.
- Update your Software Make sure your laptop and TV are updated to the latest software to eliminate unexpected technical glitches.
- Wi-Fi Interference: Avoid placing your laptop near other devices that might interfere with the signal.
- Regular Maintenance: Sometimes a reboot of devices can solve any lingering problems.
10. Maximizing Performance: Ensuring a smooth and uninterrupted view.
- Network Bandwidth: Be sure that your network can handle the traffic.
- Close Unwanted Programs: To avoid slow performance, close down any applications that you aren't using.
- Screen Resolution: Adjust your screen resolution to the highest quality resolution of your TV.
11. Screen Mirroring vs. Other Methods: Which is Best?
Screen mirroring is the simplest and quickest way to connect, perfect for streaming videos or sharing presentations. However, other methods like using a media server might be better if you're working with a large library of media files.
12. The Future of Wireless Entertainment: Trends and Developments.
Wireless technology is constantly evolving. We can expect improvements in speed, stability, and ease of use. We might even see the emergence of new, innovative ways to connect our devices to our TVs. Stay tuned!
13. Embracing the Tech: Tips for Beginners and Tech Enthusiasts..
If you're new to wireless screen sharing, don't be intimidated. Start with the
Laptop WiFi Hack: Instant Mobile Hotspot Connection!LG WebOS TVs How To Connect A Laptop To You LG TV - WebOS 6.0
By LG USA Support LG WebOS TVs How To Connect A Laptop To You LG TV - WebOS 6.0 by LG USA Support
How to share your PC or laptop screen wirelessly on LG TV
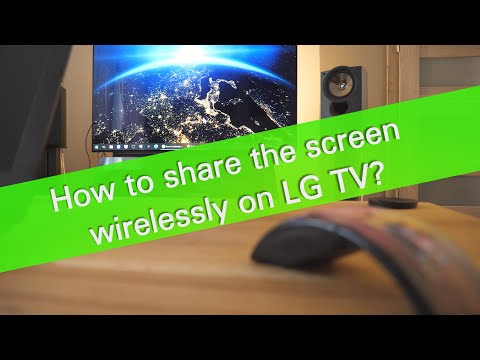
By TV Calibration with Darko How to share your PC or laptop screen wirelessly on LG TV by TV Calibration with Darko
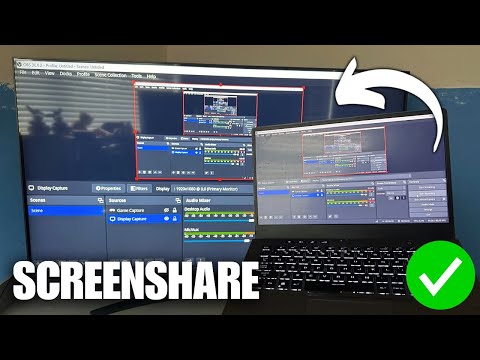
How to Connect & Mirror Laptop Screen on Any Smart TV Wirelessly No App

By MJ Tube How to Connect & Mirror Laptop Screen on Any Smart TV Wirelessly No App by MJ Tube
Title: How To Share Laptop Screen To LG Smart TV Wirelessly
Channel: Your Fix Guide
How To Share Laptop Screen To LG Smart TV Wirelessly by Your Fix Guide
Working With Laptop
Here's the article designed to outrank competitors, formatted in markdown as requested:
Title: Mastering the Art of Sourdough: A Journey From Starter to Sublime Loaf
The aroma. The texture. The taste. Sourdough, a bread as old as civilization itself, represents more than just sustenance; it's an experience. It’s the embodiment of patience, of connection to the natural world, and of the simple joy found in a perfectly crafted loaf. This is not just a guide; it's a journey. A journey into the heart of sourdough, where we'll explore every facet of this magnificent bread, from nurturing your own vibrant starter to achieving that signature tangy flavor and airy crumb. Prepare to transform your kitchen into a sourdough sanctuary.
Cultivating Your Flourishing Sourdough Starter: The Foundation of Excellence
The soul of any exceptional sourdough lies within its starter. Often affectionately called a "mother," this living culture of wild yeasts and beneficial bacteria is the engine that drives the entire bread-making process. Creating a robust starter takes time, dedication, and a willingness to learn from the subtle cues your starter provides.
The Initial Embrace: Combining Flour and Water. The genesis begins with equal parts of unbleached all-purpose flour and non-chlorinated water. This is the initial feed, a humble beginning to what will eventually become a powerful leavening agent. The ratio, typically 1:1 by weight (e.g., 50 grams flour, 50 grams water), sets the stage for fermentation. Stir thoroughly, ensuring all flour is hydrated, and cover loosely.
The First Signs: Observing Early Activity. Over the first few days, you'll observe subtle changes. Tiny bubbles may begin to appear on the surface, a testament to the wild yeasts at work. Discard half of the mixture on days 3-5 and replenish with equal parts flour and water, this discarding process promotes healthy growth by removing spent byproducts and providing fresh nutrients. The discard can be used in other recipes such as pancakes or crackers, reducing waste and maximizing its utility.
The Feeding Regimen: Establishing a Consistent Routine. Once you observe consistent bubbling and a slight increase in volume after feeding (usually within 24 hours), establish a regular feeding schedule. Every day, discard half the starter and feed with the same ratio of flour and water. The timing of feeding is crucial; feed when the starter has roughly doubled in size and then begins to recede slightly. This indicates it's at its peak activity.
Identifying Readiness: The Float Test and Beyond. After about 7-14 days, your starter should be fully developed. To check, drop a teaspoon of the starter into a glass of water. If it floats, it’s ready to bake. However, it's best to observe the starter's texture and activity. It should be bubbly, airy, and have a slightly sour, tangy smell. This combination strongly indicates a healthy and active starter.
Choosing the Right Flour: The Cornerstone of Flavor and Structure
The type of flour you choose significantly impacts the final product. Experimentation is key to discovering your preferred flavor profile and texture.
All-Purpose Flour: A Versatile Starting Point. Unbleached all-purpose flour is a reliable choice for beginners. It provides good gluten development and a relatively neutral flavor, allowing the sourdough’s natural tang to shine.
Bread Flour: Enhancing Structure and Rise. Bread flour, with its higher protein content, results in a stronger gluten network. This leads to a taller loaf with a more open crumb structure, perfect for those seeking a substantial bread.
Whole Wheat Flour: Embracing Flavor and Nutrition. Incorporating whole wheat flour adds depth and complexity, offering nutty undertones and a slightly coarser texture. However, the bran present in whole wheat can affect gluten development, requiring careful hydration and handling. Start with a blend of all-purpose and whole wheat to balance flavor and functionality.
Spelt Flour: A Delightful Alternative. Spelt flour, an ancient grain, offers a subtle sweetness and soft, delicate crumb. Its lower gluten content requires careful handling and may benefit from a bit of bread flour for added structure.
The Essential Ingredients: Beyond Flour and Water
While the core of sourdough is elemental, understanding the role of additional ingredients is critical to controlling the process and improving the final result.
Water: The Hydration Catalyst. Non-chlorinated water is essential. Chlorine can inhibit or kill the beneficial microbes in your starter. The water temperature is also critical; around 70-75°F (21-24°C) is an ideal range for dough fermentation.
Salt: The Flavor Enhancer and Dough Regulator. Salt not only enhances the flavor but also controls fermentation. It slows down the yeast activity, allowing the gluten to develop properly and giving the bread its characteristic structure. Fine sea salt or Kosher salt are the best options.
Optional Add-ins: Elevating the Experience. Seeds (sesame, sunflower, poppy), herbs (rosemary, thyme), nuts (walnuts, pecans), or even cheese can add layers of flavor and texture. Incorporate these ingredients during the final shaping stage, or preheat them in the oven and sprinkle them on top a few minutes before the bread is done baking.
The Bread-Making Process: A Step-by-Step Guide to Sourdough Perfection
With your starter flourishing and ingredients selected, it's time to bring it all together.
Autolyse: The Foundation of Gluten Development. Autolyse involves combining flour and water and letting them rest for 30-60 minutes before adding the starter and salt. This allows the flour to fully hydrate, streamlining gluten development, resulting in a more extensible dough and improving the bread’s oven spring.
Mixing and Kneading: Developing the Gluten Network. Incorporate the active starter and salt into the autolysed dough. Mix thoroughly, but avoid overmixing. Use a combination of hand mixing and stretch-and-fold techniques to develop the gluten structure.
Bulk Fermentation: The First Rise. Place the dough in a lightly oiled bowl, covered, and let it rise at room temperature. This initial fermentation phase can take anywhere from 4-12 hours, depending on the temperature and the activity of your starter. Periodically perform stretch-and-fold techniques every 30-60 minutes during the first few hours of bulk fermentation to strengthen the dough.
Shaping: Crafting the Perfect Form. Gently shape the dough into your desired form (boule, batard, etc.). Be careful not to degas the dough excessively. The technique is key to a beautiful, well-risen loaf.
Proofing: The Final Rise. Place the shaped dough in a banneton basket or a bowl lined with a floured cloth and refrigerate overnight (12-18 hours) or proof it at room temperature for a shorter duration (2-4 hours). This crucial step allows the flavors to develop and adds to the depth of complex flavors.
Baking: From Dough to Deliciousness. Preheat your oven to a high temperature (usually 450-500°F/232-260°C) with a Dutch oven inside. Carefully place the proofed dough into the preheated Dutch oven. Bake covered for the first 20-30 minutes, then uncover and bake until the crust is golden brown and the internal temperature reaches 200-210°F (93-99°C).
Troubleshooting Common Sourdough Challenges
Even experienced bakers encounter occasional issues. Here are solutions to some of the most common problems:
Flat Loaf: Undercooking or under-proofing. Ensure proper proofing time and a fully heated oven. A weak starter can also lead to this issue; strengthen it by feeding regularly.
Dense Crumb: Over-proofing or insufficient gluten development. Monitor the dough and manage shaping carefully. Ensure that your starter is active.
Sour, Tangy Flavor: Sourdough should be sour, but a too strong flavor might indicate over-fermentation or an imbalance in the starter's culture. Experiment by adjusting fermentation times.
Cracked Crust: The oven's temperature was either too high or the loaf was not scoring properly before baking. Score the dough deeply.
Uneven Crumb: Dough that was not evenly shaped. Make sure the dough is properly shaped and the proofing is done correctly.
Storing and Enjoying Your Masterpiece: Preserving the Flavor
Once your sourdough loaf is cooled, resist the urge to slice into it immediately. This allows the flavors to fully develop.
Storage Strategies: Store the loaf at room temperature in a bread box or tightly wrapped in a cloth bag. Sourdough bread stays fresh for several days. For longer storage, consider freezing the sliced or whole loaf.
Enjoying the Fruits of Your Labor: Sourdough is delicious on its own, toasted, or used in sandwiches. Pair it with your favorite cheeses, olive oil, or a hearty soup for a truly satisfying experience.
The art of sourdough baking is a journey of discovery, a constant learning experience, a testament to the transformative power of patience and passion. As you embark on this adventure, embrace the challenges, celebrate the successes, and relish the simple pleasure of sharing a warm, freshly baked loaf with those you care about. Happy baking!
