how to use your mac laptop as a wifi hotspot

Title: How to share internet connection from Mac
Channel: Mac2iPhone
How to share internet connection from Mac by Mac2iPhone
Mac WiFi Hotspot: Secret Trick to Get Online ANYWHERE!
Turn Your Mac into a Mobile WiFi Powerhouse: Ditch the Dead Zones!
Ever found yourself staring at a blank screen, yearning for the sweet embrace of the internet? We've all been there. Suddenly you're stranded, cut off from emails, social media, and that vital cat video. But what if I told you there was a secret weapon, a hidden Mac trick that lets you get online just about anywhere? Well, there is! That secret weapon is your Mac, and it's about to become your personal WiFi hotspot.
Unleashing the Power Within: Your Mac's Hidden Talent
Your Mac is more than just a sleek computer. It's a versatile tool, packed with features you may not even know about. One of these is the capability to act as a WiFi hotspot. It's surprisingly easy. Forget expensive mobile hotspots or relying on unreliable public WiFi. Your Mac offers a better solution. Therefore, prepare to take control of your internet experience.
Setting Up Your Mac Hotspot: A Simple Guide
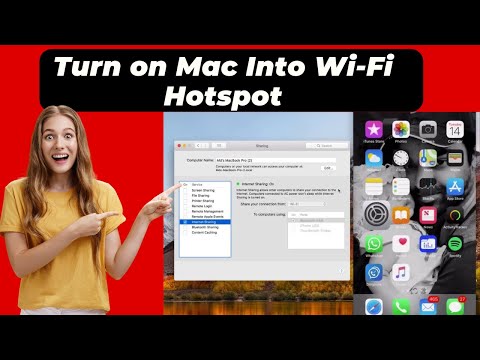
Let's dive into setting up your Mac as a WiFi hotspot. First, you'll need to access your System Preferences. You can find this by clicking the Apple icon in the top left corner of your screen. Next, select "Sharing." Afterward, you will see a list of sharing services. Now, select "Internet Sharing." It’s that simple.
Sharing Your Internet Connection: The Key Steps
Now comes the exciting part: configuring the sharing settings. Choose "Share your connection from" and select the source of your internet. This is typically your Wi-Fi connection or Ethernet port. Then, under "To computers using," check "Wi-Fi." Don't worry; we'll configure this next.
Click the "Wi-Fi Options" button. Here, you'll name your hotspot. Choose a memorable name, then create a strong password. A strong password is crucial for security. Therefore, select WPA2 Personal as the security option. It offers the best protection. Finally, click "OK" to save your changes.
Activating and Connecting: Bringing Your Hotspot to Life
Back in the "Internet Sharing" window, check the box next to "Internet Sharing" to enable your hotspot. You may get a prompt asking if you want to allow other devices to connect. Click "Start." As a result, your Mac is now broadcasting a WiFi signal!
Look for the network name you created on your other devices. Enter the password you set up. Then, you're connected and ready to go. You have successfully created your own personal WiFi hotspot.
Troubleshooting: Common Roadblocks and Solutions
Sometimes, things don't go as planned. Don't worry if you encounter any issues. For instance, if your other device doesn't see your hotspot, make sure Wi-Fi is enabled on your Mac. Check your Mac's firewall settings, as they might be blocking connections. Double-check the password you entered.
If you still have trouble, try restarting your Mac. Furthermore, ensure your internet connection is working correctly on your Mac. Ultimately, troubleshooting is about working through the steps. This process allows you to get everything working.
Beyond Basic Connectivity: Enhancing Your Hotspot Experience
Once your hotspot is active, you can customize it further. Navigate back to "Sharing" in System Preferences. Click on "Internet Sharing" again. You can then monitor connected devices. You can also limit the number of devices that can connect.
Consider how much bandwidth each connected device is using. Additionally, you can create a guest network for added security. A guest network allows controlled access. These extra steps improve your overall experience.
Mobile Freedom: Anywhere, Anytime Access
Imagine the possibilities. Picture yourself working from a park, a café, or even a remote cabin. Your Mac hotspot makes it a reality. Suddenly, you're not confined to your home or office. You're empowered to work and connect wherever you are.
Consider your productivity levels soaring. You can finally ditch the frustrating search for public Wi-Fi. You are in control.
Security First: Protecting Your Hotspot
While convenience is excellent, security is paramount. Always use a strong password. Keep your Mac's software updated. Avoid sharing your hotspot with untrusted devices or individuals. These simple steps protect your data.
Furthermore, enable your Mac's firewall. Consider using a VPN for added security. These precautions will keep you safe on the internet. So, be proactive.
The Verdict: Embracing Internet Freedom
Your Mac is more than just a computer. It is a versatile tool. Learning this simple trick unlocks a world of possibilities. You can transform your Mac into a powerful WiFi hotspot. Therefore, embrace the freedom of internet access anywhere!
Laptop WiFi Nightmare? FIX Your Network Driver Adapter NOW!Mac WiFi Hotspot: Secret Trick to Get Online ANYWHERE!
Oh, the sweet freedom of Wi-Fi! We’ve all been there, haven’t we? Stuck in a coffee shop, desperately trying to catch up on emails, and the network’s slower than a sloth in molasses. Or maybe you're traveling, miles from civilization, and your phone's data plan is clinging to life. The thought of a decent internet connection feels like a distant dream. But hold onto your hats, because we're about to unlock a secret weapon – your trusty Mac – and show you how to transform it into a Wi-Fi hotspot that’ll get you online anywhere (well, almost!).
Unleashing the Power: Your Mac as a Wi-Fi Superhero
Think of your Mac as the ultimate internet Swiss Army knife. It's got the processing power, the beautiful screen, and, crucially, the ability to create its own Wi-Fi network. Forget about hunting for public Wi-Fi hotspots that are dodgy, unreliable, or riddled with security vulnerabilities (shudder). With your Mac, you're in control. You're the Wi-Fi overlord! This isn’t some complicated tech mumbo jumbo; it’s a remarkably simple process.
Why Your Mac Makes the Ultimate Hotspot: A Quick Overview
So, why choose your Mac over, say, your phone's hotspot feature? Well, there are a few compelling reasons:
- Superior Range and Stability: Macs generally have more powerful Wi-Fi antennas, meaning a stronger, more reliable signal, especially in areas with weaker existing Wi-Fi.
- Battery Life Advantage: While it's true creating a Hotspot drains the battery, Macs often have more substantial batteries than phones, giving you a longer usage time.
- Full-Fledged Software: Imagine using your Mac's larger screen and keyboard for work or streaming instead of the limitations of a phone. It's a game-changer!
- Security First: Connecting through your Mac provides an additional layer of security, as you control the network's encryption and password.
The Secret Trick: Setting Up Your Mac Hotspot Step-by-Step
Now, for the good stuff! This is where the magic happens. We'll break down the process in a simple, easy-to-follow guide.
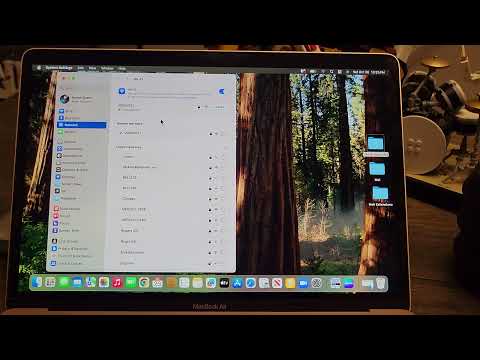
Access System Preferences: On your Mac, click the Apple menu (the little apple icon in the top-left corner of your screen), then choose "System Preferences." (In newer versions of macOS, this is called "System Settings.")
Navigate to Internet Sharing: Within "System Preferences" (or "System Settings"), click on "Sharing."
Select Internet Sharing: In the left-hand menu of the "Sharing" pane, you'll see a list of options. Click on "Internet Sharing."
Choose Your Internet Source: In the "Share your connection from" dropdown menu, select the source of your internet connection. This will likely be "Wi-Fi" if you're already connected to a Wi-Fi network, or "Ethernet" if you're using a wired connection. If you are sharing your cellular data from your iPhone, connect your iPhone to your Mac with a USB cable, and select "iPhone USB" as the internet source.
Select How to Share: Check the box next to "Wi-Fi" to enable Wi-Fi hotspot functionality.
Configure Wi-Fi Options: Click the "Wi-Fi Options…" button. This is where we customize your network!
- Network name: Give your hotspot a memorable name (e.g., "MyMacHotspot", or the name of your favorite coffee). Make sure it’s unique and doesn’t reveal personal information!
- Channel: It's best to use the default channel, but if your Wi-Fi is slow, you can experiment with other channels. However, most of the time, you will be ok.
- Security: The most secure option is "WPA2 Personal" or "WPA3 Personal." This encrypts your traffic and protects it from prying eyes. Set a strong password.
Start Sharing: Click the check box next to "Internet Sharing" to turn your Mac's Wi-Fi hotspot on. A green light will let you know it's active.
Connect Your Devices: On your phone, tablet, or other devices, go to your Wi-Fi settings and select the network name you created. Enter your password, and voila! You're connected to the internet through your Mac. Easy peasy, right?
Troubleshooting Common Hotspot Headaches: Don't Panic!
Sometimes, things don't go as planned. Don't worry; it's completely normal! Here are some common problems and how to solve them:
- My device can't find the hotspot: Double-check the network name and make sure Internet Sharing is enabled on your Mac. Also, ensure your device's Wi-Fi is turned on.
- I'm connected, but there's no internet: Verify that your Mac is connected to the internet. Try restarting your Mac and your device. Check if your internet source, like your phone's data plan, is active. Also, ensure your Mac's firewall isn't blocking traffic.
- The connection is slow: Interference from other devices, distance from your Mac, or a weak signal from your internet source can cause slow speeds. Try moving closer to your Mac or reducing the number of connected devices. Consider switching to a less congested Wi-Fi channel on your Mac (refer to “Wi-Fi Options” above).
Boosting Your Hotspot's Performance: Pro Tips
Want to squeeze even more juice out of your Mac hotspot? We got you!
- Positioning is key: Place your Mac in a central location to maximize signal coverage. Think of your Mac as a lighthouse, and you want to hit the highest waves.
- Limit connected devices: The more devices connected, the slower the speed. Keep it to the essentials.
- Close unnecessary applications: Background processes can consume bandwidth. Shut down programs you're not using.
- Update your macOS: Keeping your operating system up-to-date ensures optimal performance and security.
Beyond the Basics: Exploring Advanced Uses
This is more than just a way to access the internet, This is your portable office, your streaming hub, and your digital lifeline.
- Travel Adventures: Imagine turning your hotel room into a Wi-Fi zone for all your devices. Picture yourself working remotely from a remote cabin, connected to the world because of your Mac.
- Emergency Connectivity: In an emergency, your Mac hotspot can be a lifesaver. If the main internet connection goes down, you can still stay connected at home.
- Sharing the Love (and the Bandwidth): With a bit of consideration, you can easily share your internet with friends.
Safety First: Security Reminders
Security is paramount, especially when using a hotspot.
- Use a strong password: This is your first line of defense against unauthorized access.
- Enable Firewalls: Make sure your Mac's firewall is enabled to protect your data.
- Be cautious of public Wi-Fi: Never transmit sensitive information or make financial transactions without using a secure, encrypted connection.
Mac Hotspot vs. Tethering: What's the Difference?
Tethering, which is generally offered by mobile providers, and the Mac Wi-Fi hotspot are similar, but there are key differences. Tethering utilizes your phone's data, while a Mac's hotspot uses the internet connection your Mac already has.
Hotspot Limitations: Understanding the Fine Print
While awesome, your Mac hotspot isn't perfect. It relies on your existing internet connection. If your home connection is slow, the hotspot will be too. Also, running a hotspot drains your Mac's battery, so be mindful of your power levels.
Conclusion: Embrace the Wi-Fi Everywhere Life!
So, there you have it! Your Mac, the unsung hero of internet connectivity. We've transformed it from a mere computer into a powerful Wi-Fi hotspot that can get you online almost anywhere. Whether you're a globetrotter, a remote worker, or simply someone who values staying connected, this secret trick is an absolute game-changer. So go forth, embrace the Wi-Fi everywhere life, and never be without a connection again!
FAQs
1. Can I use my Mac as a hotspot even if I don't have Wi-Fi?
Yes! You can still create a hotspot. Use your iPhone to act as a mobile hotspot or plug your Mac into your iPhone to use an Internet connection. Make sure your iPhone has a data plan! Alternatively, if you have an internet connection available via Ethernet cable, you can share that connection through your Mac's Wi-Fi hotspot.
2. How much data does using a Mac hotspot consume?
Data usage depends heavily on your online activities. Streaming videos, downloading files, or video conferencing consumes a lot of data. Browsing the web and checking emails use a smaller amount. If you have data caps, monitor your usage closely.
3. Does creating a hotspot drain my Mac's battery?
Yes. The extent of battery drain depends on how many devices are connected, your internet speed, and your usage patterns. It's always wise to
WiFi Nightmare? Fix Your Laptop's Connection NOW!How to Turn Your Mac Into a Wi-Fi Hotspot How To Enable Wifi Hotspot On Mac

By Technical Fix How to Turn Your Mac Into a Wi-Fi Hotspot How To Enable Wifi Hotspot On Mac by Technical Fix
How to Turn Your Mac Into a Wi-Fi Hotspot

By thecoderworld How to Turn Your Mac Into a Wi-Fi Hotspot by thecoderworld
How to Turn Your Mac into a Wi-Fi Hotspot and Share Internet Connection
By Research Rocks How to Turn Your Mac into a Wi-Fi Hotspot and Share Internet Connection by Research Rocks
Title: Wifi On, But No Internet - Macbook Air Step-by- Step
Channel: Tech Troubles HQ
Wifi On, But No Internet - Macbook Air Step-by- Step by Tech Troubles HQ
Laptop Wifi Connect
Here is the title: The Ultimate Guide to Crafting a Compelling Brand Story
The Ultimate Guide to Crafting a Compelling Brand Story
Embarking on the journey of building a compelling brand story can feel like navigating uncharted waters. It’s an endeavor that demands not just creativity, but also a deep understanding of your target audience, your brand's core values, and the intricate art of persuasion. This comprehensive guide serves as your compass, providing the tools and insights necessary to craft a brand narrative that resonates with your audience, fosters loyalty, and ultimately, drives success.
Understanding the Power of Storytelling in Branding
Stories are woven into the fabric of human experience. They are how we connect, how we learn, and how we remember. A brand story, therefore, is far more than a simple marketing tool; it's a conduit for establishing an emotional connection with your audience. It gives a face and a voice to your brand, transforming a faceless entity into a relatable and memorable presence. A well-crafted story has the power to:
- Humanize Your Brand: By sharing experiences, challenges, and triumphs, your brand story can create a feeling of authenticity and transparency.
- Build Trust and Loyalty: A consistent and genuine narrative fosters trust, leading to increased customer loyalty and advocacy.
- Differentiate from Competitors: In a crowded marketplace, a unique and compelling story acts as a powerful differentiator, setting your brand apart from the competition.
- Inspire Action: A powerful story can motivate your audience to engage with your brand, whether through purchasing, sharing, or simply following your journey.
Defining Your Brand's Core Identity: The Foundation of Your Story
Before you can begin crafting your brand story, you must first define your brand's core identity. This involves a deep dive into your brand's purpose, values, and mission. This groundwork is critically important because it's what will ensure that you are authentic and will make your brand story successful.
- Identify Your Brand's Purpose: Why does your brand exist? What problem are you solving? What impact do you aim to make on the world? Pinpointing your purpose gives your story direction and meaning.
- Define Your Core Values: What principles guide your brand? What are your non-negotiables? Your values should be reflected in every aspect of your brand story, from the content you create to the way you interact with your customers.
- Craft Your Mission Statement: Your mission statement encapsulates your brand's overall goals and objectives. It provides a clear roadmap for your story, outlining what you aim to achieve.
- Understand Your Target Audience: Who are you trying to reach? What are their needs, desires, and aspirations? A deep understanding of your audience is essential for tailoring your story to resonate with them effectively.
- Outline Your Brand Personality: If your brand were a person, what would they be like? This is the tone of your story. Are they friendly, professional, innovative, or something else?
Unveiling Your Brand Story: Crafting the Narrative
Once you've established your brand's core identity, it's time to craft the narrative. This involves transforming your brand's purpose, values, and mission into a compelling story that resonates with your target audience.
- Choose Your Storytelling Approach: There are several angles you may focus on.
- The Origin Story: The journey of how your brand was created, the challenges you faced, and the lessons you learned.
- The Hero's Journey: Your brand as the hero, overcoming obstacles to achieve a specific goal.
- The Transformation Story: How your brand helps a customer to transform their life.
- The Customer-Centric Story: Focusing on your customers and spotlighting their experiences.
- Develop Your Story's Structure: Consider using the classic storytelling elements:
- Setting: Where and when does your story take place?
- Characters: Who are the main characters in your story (including your brand and your customers)?
- Conflict: What problem or challenge does your brand aim to solve?
- Plot: What are the key events and turning points in your story?
- Resolution: How does your brand bring about a positive outcome?
- Focus on Emotional Connection: Tap into the emotions of your audience to create a lasting impact. Use storytelling techniques that evoke empathy, inspiration, and excitement.
- Show, Don't Tell: Instead of simply stating facts, use vivid language and descriptive details to bring your story to life.
- Keep it Concise and Engaging: Your story should be clear, concise, and easy to follow. Engage your audience with captivating visuals and engaging content.
Bringing Your Brand Story to Life: Content Creation and Distribution
A great story is only as effective as its delivery. You must make your story accessible and engaging, so it's visible for your target audience. This means selecting the right channels and mediums.
- Develop Your Content Strategy: This involves choosing the right formats for telling your story.
- Website Content: Create a dedicated "About Us" page, blog posts, and case studies that showcase your brand story.
- Video Marketing: Create short films, video ads, or behind-the-scenes content to bring your story to life.
- Social Media: Use social media platforms to share snippets of your story, engage with your audience, and showcase your brand's personality.
- Email Marketing: Use email newsletters to share updates, success stories, and personal messages with your subscribers.
- Podcasts: Host a podcast to share your story and connect with your audience in a personal way.
- Create High-Quality Content: Invest in high-quality visuals, well-written copy, and engaging storytelling to capture your audience's attention.
- Choose the Right Channels: Select the channels where your target audience spends their time. For instance, if your brand is centered around photography, you may want to utilize Instagram often and feature your content on Pinterest.
- Be Consistent: Share your story consistently across all channels to build familiarity and reinforce your brand message.
- Encourage Audience Participation: Encourage your audience to engage with your story by asking questions, running contests, and soliciting feedback.
Measuring Your Brand Story's Impact: Tracking Key Metrics
Measuring the impact of your brand story is crucial for understanding its effectiveness and making necessary adjustments. There are a number of metrics you may use.
- Website Traffic: Track website visits, page views, and time spent on your "About Us" page or other story-related content.
- Social Media Engagement: Monitor likes, shares, comments, and follower growth on social media platforms.
- Brand Mentions: Track mentions of your brand on the web, including social media and online news sources.
- Customer Feedback: Collect customer reviews, testimonials, and surveys to gauge customer satisfaction and sentiment.
- Sales and Conversions: Track sales, leads, and conversions to measure the impact of your brand story on your bottom line.
- Brand Awareness: Conduct brand awareness surveys to assess how well your brand is recognized and understood.
- Analyze Data Regularly: Use these metrics to measure your story's effectiveness.
Examples of Compelling Brand Stories
- TOMS Shoes: TOMS tells the story of a company founded on the principle of "One for One," where for every pair of shoes purchased, a pair is donated to a child in need. This simple, yet powerful, story resonates with customers who want to make a difference. The company's origin and purpose are clearly outlined and are reflected in their marketing efforts.
- Airbnb: Airbnb’s narrative centers around “belonging,” where the story is focused around the idea of providing a unique and authentic travel experience around the globe. Their story focuses on community and shared experiences. They have built their story around providing access to people and places.
- Dove: Dove is known for its storytelling, focusing on realistic portrayals of beauty. Dove’s narrative champions the idea that true beauty is for everyone. The company challenges standard beauty ideals, showcasing their belief that self-esteem and confidence can be cultivated by their products.
Refining and Evolving Your Brand Story
Your brand story should not be set in stone. Instead, it should be a dynamic narrative that evolves over time as your brand grows and changes.
- Gather Feedback: Regularly solicit feedback from your audience and employees to identify areas for improvement.
- Stay Relevant: Keep abreast of industry trends, cultural shifts, and customer preferences to ensure your story remains relevant.
- Adapt to Change: Be prepared to adapt your story in response to changing circumstances, such as new product launches, market trends, or company changes.
- Continuously Improve: Regularly review your story, content, and strategies and make adjustments as needed to optimize performance.
- Always Be Authentic: The cornerstone of every successful brand story is authenticity. Stay true to your values and mission, and your story will resonate with your audience.
Crafting a compelling brand story is an ongoing journey, but the rewards are well worth the effort. By investing in storytelling, you can cultivate connections, build loyalty, and differentiate your brand in the marketplace. Embrace the power of story, and watch your brand flourish.
