replacing a wifi card in a laptop

Title: How do I replace the wireless card in my HP laptop Where is the wireless card on a HP laptop
Channel: Suraj Computers
How do I replace the wireless card in my HP laptop Where is the wireless card on a HP laptop by Suraj Computers
how to replace a wifi card in a laptop, can you replace a wifi card in a laptop, how to install a wifi card in a laptop, replacing wifi card in dell laptop, replacing wifi card in hp laptop, replacing wireless card in laptop, can you change wifi card in laptop, cost to replace wifi card in laptop
Laptop WiFi Card Replacement: The SHOCKINGLY Easy DIY Guide!
Laptop WiFi Card Replacement: Unleash Your Inner Tech Hero!
Ah, the dreaded slow Wi-Fi. It’s a familiar foe, isn't it? That buffering icon, the frustrating lag… it's enough to make you want to chuck your laptop out the window. But before you resort to drastic measures, consider a surprisingly simple solution: replacing your laptop's Wi-Fi card. I know, the words "laptop" and "replacement" can sound intimidating. However, believe me, it's a task that's far easier than you think!
Is Your Wi-Fi Card the Culprit? Unmasking the Problem.
First, let's determine if the Wi-Fi card is indeed the source of your woes. After all, troubleshooting is key. Are you experiencing consistently terrible connection speeds? Does your laptop struggle to find or connect to Wi-Fi networks? Perhaps it drops connections frequently. These could point to a faulty Wi-Fi card. Furthermore, if you've tried basic troubleshooting steps – restarting your router, updating drivers – but the problem persists, the Wi-Fi card deserves a closer look. Also, other network issues could be at fault.
Gathering Your Arsenal: Tools You'll Need.
Now, let's gather your essential tools. Thankfully, you don't need a specialized workshop. In reality, the required tools are quite basic. You'll primarily need a small Phillips head screwdriver. Keep in mind, these laptops often use tiny screws. A magnetic screwdriver can also be a lifesaver here. Moreover, you will need a replacement Wi-Fi card. Doing some research to match your laptop model perfectly is always crucial. Finally, having a static wrist strap is good to protect the sensitive electronics.
Unlocking the Beast: Laptop Disassembly, The Gentle Approach.
Okay, time to crack open your laptop. Don't panic, it’s not brain surgery! Power off your laptop completely and unplug it from the power source. This step is very essential. Now, turn your laptop over and locate the access panel. This panel often houses the hard drive, RAM, and, thankfully, the Wi-Fi card. Usually, there's a screw or two securing this panel. Carefully remove these screws. Then, gently slide the panel away.
Exposing the Wi-Fi Card: Finding the Treasure.
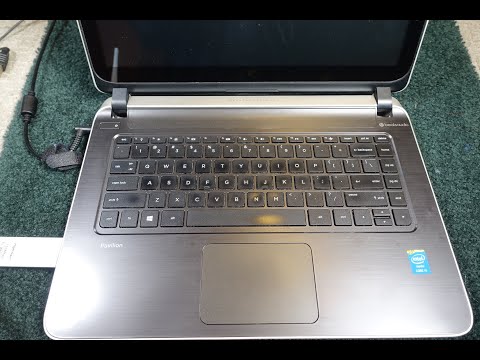
You should now have access to the internal components. So, take a good look. The Wi-Fi card is typically a small, rectangular card. It often sits in a slot, secured by tiny screws or clips. Now, you can see the Wi-Fi card itself. It is a vital step.
Extraction and Replacement: The Delicate Dance.
Carefully disconnect the antenna wires connected to the Wi-Fi card. They are usually small and clip on. Remember their placement! Some cards are held in place with a single screw. Remove it. Gently slide the old Wi-Fi card out of its slot. Next comes the fun part: installing the new card. Align the new card with the slot and gently slide it in. Secure the card with the screw (if applicable). Now, carefully reattach the antenna wires. Double-check that they are securely connected.
Reassembly and Rebirth: Putting it All Back Together.
Now that the new Wi-Fi card is in place, it’s time to reassemble your laptop. Replace the access panel. Next, tighten the screws. Ensure everything is snug but not overtightened. Furthermore, plug your laptop back into the power source. Now, power it on.
Driver Installs: A Necessary Ritual.
Once your laptop boots, it should automatically detect the new Wi-Fi card. However, sometimes, you may need to install drivers. Head to the manufacturer's website. Search for drivers specific to your new Wi-Fi card model. Then, download and install them. Once installed, restart your laptop.
Testing the Waters: Verifying Your Success.
Now for the moment of truth: testing your new Wi-Fi card! Connect to your usual Wi-Fi network. Test your internet speed. Is it significantly improved? Browse the web, stream some videos. If everything works smoothly and your speeds are looking great, congratulations! You've successfully replaced your laptop's Wi-Fi card.
Beyond the Wi-Fi Card: Additional Considerations.
Keep in mind that other factors can affect your Wi-Fi performance. Consider your router’s placement. The distance from your router can greatly impact your connection. Also, outdated router firmware can lead to issues. Furthermore, other electronic devices in your home could cause interference. So, try to minimize this.
Troubleshooting Troubles: What if It's Not Working?
What if it doesn’t work? Don't fret! First, double-check all the connections. Ensure the antenna wires are firmly in place. Make sure the Wi-Fi card is seated correctly in its slot. Double-check that you installed the correct drivers. If you're still having problems, consult your laptop’s manual. You can also seek assistance from online forums. These forums often offer helpful tips. Also, consider contacting a professional if you feel unsure.
The Rewards of DIY: Empowering Yourself.
Replacing your laptop’s Wi-Fi card is a rewarding project. It saves you money compared to paying for professional repairs. More importantly, you gain valuable tech skills. You also get a sense of accomplishment! So, go on, give it a try. You might be surprised at how easy it is. Now, enjoy your fast and reliable Wi-Fi!
Laptop WiFi Card Replacement: The SHOCKINGLY Easy DIY Guide!
Hey tech enthusiasts! Ever stared at your laptop screen, the Wi-Fi icon stubbornly displaying that dreaded “no connection” message? We've all been there. The frantic clicking, the router resets, the desperate pleas to the internet gods, all to no avail. Before you resign yourself to tech support hell or even consider a new laptop, let me let you in on a little secret: replacing your laptop's Wi-Fi card is shockingly easy. Seriously, it’s like swapping out batteries in a remote control, but with more… umph. Let’s dive in!
Why Bother Replacing Your Laptop's WiFi Card?
Before we get our hands dirty (figuratively, of course – unless you're particularly messy!), let’s explore why you might need to replace your Wi-Fi card in the first place. Think of it like this: your Wi-Fi card is the messenger. If the message isn't getting through, it can be the messenger's fault, or the sender’s, but if the messenger is failing, then the sending and receiving are a waste of time and effort. Now, here are some common culprits:
- Slow Speeds: Are you constantly stuck buffering? Is your download speed slower than molasses in January? A faulty Wi-Fi card could be the culprit.
- Inconsistent Connectivity: Dropping connections? Losing signal in spots where you used to roam freely? Your card might be the weak link.
- Hardware Failure: Sometimes, components simply give up the ghost. Years of relentless use, overheating, or even a power surge can take their toll.
- Upgrading to Future-Proof: Modern Wi-Fi standards constantly evolve. Replacing your card can bring you to the latest, greatest speeds and protocols (like Wi-Fi 6/6E/7 – the alphabet soup of wireless).
- Compromised Security: An outdated card might not support the latest security protocols, leaving your connection vulnerable.
What You'll Need: The Arsenal of the DIY Hero
Alright, gear up! We're not going to war, but we are assembling our tools. Fortunately, this isn’t a complicated process, and the required items are pretty standard.
- Your Replacement Wi-Fi Card: This is the star of the show! Make sure it’s compatible with your laptop (more on that in a bit).
- A Small Phillips Head Screwdriver: You’ll need this to open your laptop. A magnetic one is a lifesaver for catching those tiny screws.
- An Anti-Static Wrist Strap (Optional but Recommended): This prevents static electricity from frying your components. Think of it as a superhero's grounding wire.
- A Soft Surface (Like a Clean Table or Mat): Prevents scratches on your precious laptop and loss of screws.
- A Small Container or Tray: To keep track of those tiny screws. Lost screws are the bane of every DIYer’s existence!
- Your Laptop's Manual (Highly Recommended): While not essential, it can provide specific instructions for your model and help you identify the Wi-Fi card location. Also, search for your laptop’s model on YouTube! There are likely videos!
Finding the Right Wi-Fi Card – A Match Made in Tech Heaven
This is where a little research comes in. Imagine you’re buying a new pair of shoes. You wouldn't grab just any pair, right? So, similarly, you need to ascertain what will work with your machine.
- Check Your Laptop's Specifications: The easiest way is to consult your laptop's manual or the manufacturer's website. Look for the Wi-Fi standard it supports (e.g., 802.11ac, 802.11ax). Then, try searching the net!
- Identify the Card Type: Most laptops use either a "mini PCIe" or an "M.2" card form factor. M.2 cards are smaller and more modern, so this is the most likely type. Again, your manual or online resources will confirm this.
- Compatibility Matters: Double-check that the replacement card is compatible with your laptop's operating system.
- Consider Features: Do you want Bluetooth? Faster speeds? Think about what new features you'd like, and pick a card that offers them.
Prepping Your Laptop: The Surgical Scrubdown
Before we even think about cracking open your laptop, let's do some prep work. Safety first, people!
- Power Down and Unplug: This is the golden rule, especially when working with electronics. Unplug the power adapter and remove the battery if possible.
- Ground Yourself: Put on your anti-static wrist strap and clip it to a grounded metal object (like your radiator or a metal part of your computer case). If you don’t have one, discharge static by touching a metal object.
- Organize Your Workspace: Clear your table, lay down your soft surface, and get your screwdriver and screw container ready.
Opening Up Your Laptop: Entering the Forbidden Zone
Alright, here's where the magic happens! Take a deep breath; it’s not as daunting as it seems.
- Locate the Access Panel: Some laptops have a dedicated panel for accessing the Wi-Fi card. Consult your manual; this will make life much easier. If not, you'll likely need to remove the entire bottom panel.
- Unscrew and Carefully Remove the Panel: Be gentle! The screws are tiny and can easily strip. Keep track of them! Also, be careful of cables that might be glued down on the underside of the cover.
- Inspect the Interior: Marvel at the laptop's inner workings! Locate the Wi-Fi card. It's usually a small rectangular card nestled in a slot.
Removing the Old Wi-Fi Card: The Maestro's Dismount
Now, let's remove the old card.
- Disconnect the Antenna Cables: These are tiny wires that connect to the Wi-Fi card. They usually snap or clip into place. Gently detach them; they're delicate, so don't pull too hard. Take a picture of how they’re connected for future reference!
- Unscrew the Wi-Fi Card: The card is typically held in place by a single screw. Unscrew it.
- Carefully Remove the Card: The card might pop up slightly. Gently slide it out of the slot.
Installing the New Wi-Fi Card: A New Card's Dawn
Time for the upgrade!
- Align and Insert the New Card: Line up the new card with the slot, ensuring it's correctly oriented.
- Secure the Card: Screw the card in place.
- Reconnect the Antenna Cables: Attach the antenna cables to the new card. Match them up to the original configuration. If you took a picture earlier, now’s the time to use it!
Reassembly: Almost Back to the Real World
You’re in the home stretch!
- Replace the Access Panel or Bottom Cover: Carefully align the panel and replace the screws.
- Reconnect the Battery (If Removed): Slide the battery back into its slot.
- Plug It In (and Turn It On): You’re almost there! Power up your laptop and cross your fingers.
Testing Your New WiFi Card: The Moment of Truth!
Is your new card working? Let's find out!
- Check for Wi-Fi Signals: See if your laptop detects any Wi-Fi networks.
- Connect to Your Network: Enter your password and connect!
- Test Your Internet Speed: Run a speed test to ensure you're getting the speeds you expect and it is properly optimized.
Troubleshooting: When Things Go Awry
Sometimes, things don't go perfectly. Don't panic! Troubleshooting is part of the DIY journey.
- No Wi-Fi Networks Detected: Double-check that the antenna cables are securely connected. Reseat the Wi-Fi card.
- Can't Connect to Your Network: Ensure you've entered the correct password. Restart your router.
- Slow Speeds: Ensure you're getting the speeds you expect. Your driver might need to be updated. You can download and install the latest drivers from the card manufacturer's website. Search for the model, and use the manufacturer's website to ensure that they install the new drivers.
Beyond the Basics: Advanced Tips and Tricks
Want to take your WiFi card game to the next level?
- Consider Antenna Upgrades: If you're feeling adventurous, you can upgrade your laptop's antennas for even better performance.
- Explore Driver Updates: Keep your drivers updated. This can improve performance and fix bugs.
- Optimize Your Router: Ensure your router is properly configured and up to date.
The Joy of DIY: A Sense of Achievement
There’s nothing more satisfying than fixing something yourself. Knowing that you conquered a technical hurdle, saved money, and learned something new is an amazing feeling. That sense of accomplishment alone is worth the effort. Not to mention the fact that you just avoided a trip to the repair shop.
Final Thoughts and Happy Surfing!
Replacing your laptop’s Wi-Fi card is a rewarding project that, when done right
How to Upgrade Your Laptop to WiFi 6E for 30

By NASCompares How to Upgrade Your Laptop to WiFi 6E for 30 by NASCompares
WiFi Card Replacement On An Asus K550IU Laptop

By Tech-Nerdrome WiFi Card Replacement On An Asus K550IU Laptop by Tech-Nerdrome
How to UPGRADE your Laptop RAM, SSD, WiFi Card, etc. Step-by-step TUTORIAL

By Crimson Tech How to UPGRADE your Laptop RAM, SSD, WiFi Card, etc. Step-by-step TUTORIAL by Crimson Tech
Title: WiFi Card Replacement on an HP Pavilion Laptop
Channel: davidgpo
WiFi Card Replacement on an HP Pavilion Laptop by davidgpo
Laptop WiFi Card Replacement: Your Stress-Free Guide to Enhanced Connectivity!
Embark on a journey to reclaim your laptop's wireless capabilities, a process often shrouded in unnecessary mystique. We're here to demystify the laptop WiFi card replacement, equipping you with the knowledge and confidence to undertake this straightforward DIY project. Forget the frustrating lags, the dropped connections, and the weak signals. This guide offers a clear, concise, and empowering path to renewed wireless freedom.
Before You Begin: Gathering Your Arsenal and Essential Precautions
Before even considering touching your beloved machine, preparation is paramount. Think of this as a surgical procedure; meticulous preparation ensures a successful operation. Assemble the following tools and supplies:
- Screwdriver Set: A precision screwdriver set is non-negotiable. You’ll need a variety of sizes and head types, primarily Philips head (PH00, PH0, or PH1) and potentially a Torx set (T5, T6, or T8), depending on your laptop's construction. A magnetic tip is incredibly helpful in preventing dropped screws.
- New WiFi Card: Verify your laptop's compatibility. Consult your laptop's service manual (easily found online) or the existing WiFi card's specifications. Look for the correct form factor (e.g., M.2, Mini PCI-e) and supported standards (e.g., 802.11ac, 802.11ax). Purchase a reputable brand known for reliability.
- Anti-Static Wrist Strap: Absolutely essential! Static electricity is the enemy of delicate electronics. Ground yourself before and during the process to prevent damage to internal components.
- Plastic Pry Tools (or Guitar Pick): To separate the laptop's chassis without causing scratches or damage. These are indispensable for gently prying open the case.
- Small Container or Tray: To keep track of the screws. Losing a screw can halt your progress and cause frustration.
- Work Surface: A clean, well-lit, and spacious workspace is crucial. Clear the area of clutter.
- Non-Static Bag or Container: To store the old WiFi card safely.
Crucial Precautionary Measures:
- Power Down Completely: Shut down your laptop and disconnect the power adapter. Remove the battery if possible.
- Ground Yourself: Attach the anti-static wrist strap to your wrist and clip it to a grounded metal object (e.g., a radiator, a metal part of your computer case).
- Gentle Handling: Treat all components with care. Force is never required. If something doesn't budge, re-evaluate your approach.
- Photographic Documentation: Take photos of each step as you disassemble the laptop. This will be invaluable during reassembly.
Step-by-Step Disassembly: Unveiling the Wireless Heart
Now, let's delve into the process. Remember to remain composed and patient; precision is key. The specific steps might vary slightly depending on your laptop model, but the principles remain consistent.
- Locate the Access Panel: Most laptops provide a dedicated access panel for components like RAM and the WiFi card. This panel is typically secured by screws. Identify and remove these screws.
- Remove the Access Panel: Carefully pry the panel open using a plastic pry tool or, in a pinch, a guitar pick. The panel might be held in place by clips. Gently work your way around the edges until the panel releases.
- Identify the WiFi Card: With the access panel removed, the WiFi card should be readily visible. It's usually a small rectangular card secured by one or two screws and connected to two small antenna wires.
- Disconnect the Antenna Wires: These wires are typically connected to the WiFi card via small, snap-on connectors. Use your fingers or a small, non-metallic tool to gently detach them. Note the color and placement of the wires; this is vital for reassembly. Taking a picture beforehand will immensely help.
- Remove the Securing Screw(s): Unscrew the screw(s) that secure the WiFi card to the motherboard. These screws often have a small metal bracket that holds the card in place.
- Extract the Old WiFi Card: The card should now be free to be removed. Gently slide the card out of its slot. It might be held in place by some friction; do not force it.
- Preserve the Old Card: Place the old WiFi card in a non-static bag or container. This is wise in case you need to revert to the original card or for warranty purposes.
Inserting the New WiFi Card: Bringing Your Laptop Back to Life
With the old card removed, it's time to install the new WiFi card.
- Align and Insert the New Card: Carefully align the notch on the new WiFi card with the corresponding notch in the slot on the motherboard. Insert the card at a slight angle and gently push it until it clicks into place. This may require a bit of wiggling to ensure proper seating.
- Secure the New Card: Replace the screw(s) that secure the card to the motherboard.
- Reconnect the Antenna Wires: Reconnect the antenna wires to the new WiFi card. Ensure they are firmly attached and in the correct positions. Again, consult your pre-disassembly photos if needed.
- Reassemble the Access Panel: Carefully replace the access panel, aligning it correctly. Press gently around the edges until the panel clicks into place.
- Secure the Access Panel: Replace the screws that secure the access panel.
Software Configuration and Testing: Verifying Your Wireless Triumph
Hardware installation is only half the battle. Now, we need to ensure your laptop recognizes and utilizes the new WiFi card.
- Power On and Test: Power on your laptop. If you are using Windows, the operating system should ideally detect the new WiFi card automatically and begin installing the necessary drivers.
- Driver Installation (if needed): If the operating system doesn’t automatically install drivers, you may need to download them from the WiFi card manufacturer's website or your laptop manufacturer’s support page. Follow the on-screen instructions to install the drivers.
- Connect to Your WiFi Network: Open your operating system’s WiFi settings and connect to your home network. Enter your network password if prompted.
- Test the Connection: Browse the internet and verify that your new WiFi card provides a stable and fast connection. Conduct a speed test to confirm the improved performance.
- Troubleshooting: If you encounter issues, revisit your steps to double-check the hardware installation. Ensure the antenna wires are correctly attached and that the correct drivers are installed. Restarting your laptop can sometimes resolve driver conflicts. Consult the WiFi card's manual or your laptop's support documentation for specific troubleshooting steps.
Common Pitfalls and Troubleshooting Tactics
Even with meticulous instructions, some challenges might arise. Here's how to address the most common issues:
- No WiFi Detected: Double-check the WiFi card installation. Ensure it's fully seated in its slot and that the antenna wires are securely connected. Verify that the drivers are installed correctly.
- Weak Signal Strength: Ensure the antenna wires are correctly positioned and securely connected. Check your router's placement and configuration. Consider upgrading your antenna if your laptop supports it.
- Slow Connection Speeds: Run a speed test to identify the actual speed. If the speed is significantly lower than your internet plan, check your router's settings and ensure it’s configured for the latest WiFi standards. Potential interference from other electronic devices can also be a source of slow speeds.
- Driver Issues: Uninstall and reinstall the WiFi card drivers. Download the latest drivers from the manufacturer’s website. Restart your laptop after installing the drivers.
Conclusion: Embracing Wireless Mastery
You’ve done it! You’ve successfully replaced your laptop’s WiFi card, enhanced your connectivity, and gained confidence in your technical abilities. This seemingly complex task is readily handled with the right tools, a methodical approach, and a bit of patience. Embrace this newfound wireless freedom and the satisfaction of a successful DIY project.
