dell laptop windows 7 wifi not working

Title: Not connected no connections are available windows 7 laptop
Channel: IT Magics
Not connected no connections are available windows 7 laptop by IT Magics
dell laptop windows 7 wifi not working, dell laptop wifi not working, dell laptop not detecting wifi windows 7, wifi not working on laptop windows 7
Dell Laptop Wifi Nightmare? FIX Your Windows 7 Connection NOW!
Dell Laptop Wi-Fi Woes? Conquer Your Windows 7 Connection Chaos!
Is your Dell laptop’s Wi-Fi connection a source of constant frustration? Are you tired of intermittent drops and infuriating disconnections? Well, breathe easy, because you’re not alone. Furthermore, there's a high probability that a solution awaits. Therefore, let's delve into some fixes designed to banish those Wi-Fi woes.
Initial Troubleshooting: Pinpointing the Problem
Before we dive into specific solutions, let’s implement a quick diagnostic check. Initially, confirm that your Wi-Fi switch is on. Sometimes it’s the simplest things that get missed! Afterwards, check the physical switch on your laptop (often on the side or the front). Furthermore, verify that your wireless network adapter is enabled. You can access this through your Network and Sharing Center in Windows 7. Navigate to "Change adapter settings," then ensure your wireless adapter is showing as "Enabled". In addition, check the small Wi-Fi icon in your system tray. Is there an exclamation point? Are there any red crosses? These are common indicators of connection problems.
Driver Dilemmas: The Root of the Issue
A very common culprit behind Wi-Fi issues is outdated or corrupted drivers. Firstly, outdated drivers can severely impede your connection. Secondly, corrupted drivers are just plain troublesome. Consequently, updating your wireless network adapter driver is often the first crucial step. Here is how you can achieve that; you must visit Device Manager (search for it in the Start Menu). Then, expand the "Network Adapters" section. Right-click on your wireless adapter (e.g., "Dell Wireless WLAN Card") and select "Update Driver Software…". You can then either choose to search automatically online for updates or manually install a driver you’ve downloaded. Hence, a proper driver update can fix a multitude of connection issues.
Power Management Problems: Optimizing Performance
Windows 7’s default power settings can sometimes restrict your Wi-Fi adapter. Essentially, this can lead to intermittent disconnections. So, let's explore how to rectify it. Again, go to Device Manager and find your wireless adapter. Therefore, right-click on the adapter and select "Properties". Click the "Power Management" tab. Uncheck the box that says "Allow the computer to turn off this device to save power." Next, apply the changes. Consequently, this will prevent Windows 7 from powering down your Wi-Fi adapter.
Wireless Router Refresh: Restoring the Connection
Sometimes, the problem isn't your laptop at all. Sometimes It resides within your router. First, try the simplest fix: Restart your router. Unplug the router from the power outlet. Wait for at least 30 seconds. Then, plug it back in. Let it fully boot up. Furthermore, ensure your router's firmware is up-to-date. Most routers have a web-based interface for configuration. Consequently, check the manufacturer's website for firmware updates.
Network Configuration: Ensuring Proper Settings
Incorrect network settings can also hinder your wireless connection. First, verify your WPA/WPA2 security key is correct. Re-enter the password for your Wi-Fi network. Navigate to your Network and Sharing Center, then to "Manage wireless networks." Delete your existing wireless profile. Re-enter the Wi-Fi password when your machine scans again. In addition, try manually configuring your DNS settings. You can adjust the DNS servers in your adapter’s properties. Consider using public services like Google's DNS: 8.8.8.8 and 8.8.4.4.
Windows 7 Updates: The Unsung Heroes
Make sure your Windows 7 operating system is completely up to date. Regularly update your operating system. Install all available Windows updates, including optional updates. These updates can often include fixes for network-related issues. Therefore, check for updates frequently. Go to Windows Update in your Control Panel and check for updates.
Firewall Interference: Unblocking the Path
Sometimes, your Windows Firewall (or any third-party firewall) might be blocking your Wi-Fi connection. Consequently, check your firewall settings. Ensure your wireless network adapter is allowed to communicate through the firewall. Furthermore, temporarily disable your firewall (for testing purposes). If the connection works, readjust your firewall settings accordingly.
Hardware Considerations: Examining the Internal Components
If all else fails, it’s time to consider the hardware. If you're comfortable doing so, you can open your Dell laptop to inspect the wireless card. Keep in mind, however, that opening your laptop can void its warranty. After examining the card, reseat the card firmly. Ensure it is fully connected to the motherboard. In addition, it might be worth it to seek professional repair services.
The Final Word: Reclaiming Your Connectivity
Troubleshooting Wi-Fi issues can feel draining. However, using these steps, you can triumph over those common Dell Wi-Fi problems. By systematically addressing each potential issue, you're one step closer to a seamless, reliable wireless connection. Remember; if you've tried everything, seek professional assistance. Ultimately, with patience and persistence, you can resolve your Dell laptop’s Wi-Fi nightmare. So, take a deep breath, follow these steps, and reclaim your online freedom!
Laptop Hotspot Hack: Instant WiFi Anywhere!Dell Laptop Wifi Nightmare? FIX Your Windows 7 Connection NOW!
Alright folks, let's be honest. We've all been there. That moment of utter frustration when your trusty Dell laptop refuses to connect to Wi-Fi. You're staring at the screen, your fingers twitching, your patience wearing thin. This isn't just a minor inconvenience; it's a full-blown tech tantrum waiting to happen, especially when you're using Windows 7. But fear not! We're going to dive deep into this digital drama and help you reclaim your internet sanity.
1. The Dreaded Disconnect: Why Is My Dell Laptop Rejecting Wi-Fi?
First things first: let's figure out why your Dell laptop is throwing a digital hissy fit. Pinpointing the culprit is like solving a detective novel – we need to examine the clues. Is it a hardware hiccup? Software shenanigans? Or perhaps just a case of the "blame the router" blues? This initial assessment is critical for a smooth repair. I remember once, my own Dell, a trusty old Inspiron, decided to go rogue right before a major deadline. Panic? You bet! But after a bit of troubleshooting (and copious amounts of coffee), I got it back up and running. So, take a deep breath. We can do this.
2. Check the Basics: Is Your Wi-Fi Even On?
This might seem obvious, but trust me, we often overlook the simplest solutions when our tech is behaving badly. Double-check the physical switch on your laptop. Many Dell laptops, especially older models, have a dedicated Wi-Fi on/off switch, often located on the front or side of the laptop. Is it flipped to the "on" position? Sounds silly, but it happens. Think of it as checking the power button on your TV – a crucial first step.
3. The Airplane Mode Trap: Don't Get Grounded!
Airplane mode: It's a wonderful feature when you're, you know, on an airplane. But it's a sneaky culprit when you're trying to connect to Wi-Fi at home. Make sure Airplane Mode is disabled. You can usually find it in the system tray (the area with the clock and system icons) or in your Windows 7 settings. A little airplane icon in your system tray is a dead giveaway. Like, "Hey, you're not supposed to be connected to the internet right now!"
4. The Wireless Network Adapter: The Unsung Hero (and Sometimes Villain)
Your wireless network adapter is the hardware that makes the magic happen. But like any piece of tech, it can sometimes throw a spanner in the works. Click the Windows Start button, type "Device Manager" in the search bar, and open it. Look for "Network adapters". Expand that, and you should see your Wi-Fi adapter listed. Is there a yellow exclamation mark next to it? That's a red flag, indicating a problem.
5. Driver Drama: The Silent Saboteurs
Drivers are the software that allows your computer to communicate with hardware. Outdated, corrupted, or missing drivers can definitely cause Wi-Fi woes. In the Device Manager, right-click your Wi-Fi adapter and select "Update driver software". Windows will try to find and install an updated driver. If that doesn't work, you might need to download the drivers from Dell's website, using your laptop's service tag to find the right ones.
6. Troubleshooting the Router: Giving the Gateway a Good Look
Sometimes, the problem isn't your Dell; it's the router. Try these simple steps:
- Restart your router: Unplug it, wait 30 seconds, and plug it back in. It's the universal tech fix for a reason.
- Check the router's lights: Are they all flashing normally? A solid red light might indicate a problem.
- Test other devices: Do other devices (phones, tablets, other laptops) connect to the Wi-Fi? If not, the issue is likely with your router.
7. Network Reset: A Fresh Start for Your Connection
Sometimes, a network reset is the equivalent of hitting the "reset" button on life. It clears out cached settings and forces a fresh start.
- Go to the Control Panel.
- Click on "Network and Sharing Center".
- Choose "Manage wireless networks" on the left pane.
- Right-click your Wi-Fi network and select "Remove network".
- Restart your laptop, and then reconnect to your Wi-Fi network, entering the password again.
8. The Diagnostic Tool: Windows 7's Helpful Sidekick
Windows 7 has a built-in troubleshooter that can often diagnose and fix Wi-Fi problems.
- Right-click the Wi-Fi icon in your system tray (near the clock).
- Select "Troubleshoot problems".
- Let the troubleshooter run and see if it identifies and fixes any issues.
9. IP Address Conflicts: Playing Nicely on the Network
Sometimes, two devices on your network can end up with the same IP address, causing a conflict. This can disrupt your internet connection.
- Try renewing your IP address. Open Command Prompt (search for "cmd" in the Start menu), and type
ipconfig /releasefollowed byipconfig /renew. Then, restart your laptop.
10. Security Software Interference: Keeping the Programs in Check
Your antivirus or firewall can sometimes interfere with your Wi-Fi connection. Temporarily disable your security software (remember to enable it again afterward!) and see if it resolves the issue. If it does, you might need to adjust your security settings to allow your laptop to connect to the network.
11. Check for Physical Obstructions: The Invisible Barriers
Is your laptop sitting next to a microwave, a cordless phone, or a metal object? These can interfere with the Wi-Fi signal. Try moving your laptop to a different location, away from potential sources of interference. Like when I used to work from my kitchen, close to the microwave; constantly interrupting a zoom meeting because I was near the microwave was a reality!
12. Hidden Networks: Seeking Your Known Connection
Sometimes, your laptop might be trying to connect to a different Wi-Fi network than you intend. Make sure you are selecting the correct network from the available networks list. Also, double-check the network name (SSID) and your password.
13. Power Saving Settings: Saving Power, Sacrificing Performance?
Windows 7 has power-saving settings that may be turning off your Wi-Fi adapter to conserve battery life. This can affect your laptop's connection.
- Go to Control Panel and click "Power Options."
- Find your current power plan (e.g., "Balanced").
- Click "Change plan settings" next to your active power plan.
- Click "Change advanced power settings".
- In the "Wireless Adapter Settings" section, set "On battery" and "Plugged in" to "Maximum Performance".
14. Consider a Hardware Upgrade: The Last Resort
If all else fails, the problem might be with your Wi-Fi adapter itself. This could mean replacing the internal Wi-Fi card, which is more complex. It's best to take your laptop to a technology repair shop if you're not comfortable with this.
15. Seeking Professional Help: When To Call in the Cavalry
If you've tried all of the above and are still having trouble, it's time to call in the experts. A local computer repair shop can diagnose the problem and fix it. Don't be afraid to admit defeat! Sometimes, it's better to let the professionals handle it.
So, there you have it. A comprehensive guide to fixing your Dell laptop's Wi-Fi woes on Windows 7. Remember, fixing tech problems is often a process of elimination. Be patient, try these troubleshooting steps one by one, and you'll be back online in no time. Now go forth, and surf the web with confidence!
FAQs: Your Wi-Fi Worries Answered
Q1: My Dell laptop connects to Wi-Fi, but the internet doesn't work. What's the problem?
A: This is a common issue. The first things to check are your router (restart it!), and your internet service provider (ISP). Make sure your internet service hasn't run out, your modem is working. Also, try visiting the website and checking the web. Or try an alternative browser to see if the problem is isolated/
Q2: The Wi-Fi icon on my Dell laptop is missing. What do I do?
A: First, check if the Wi-Fi adapter is enabled in Device Manager (see Step 4). If it's disabled, enable it. If the adapter is missing from Device Manager, you might need to reinstall the drivers.
Q3: Why is my Dell laptop's Wi-Fi connection so slow?
A: Several factors can affect Wi-Fi speed: the distance from your router, the number of devices using the Wi-Fi, interference (see Step 11), and your internet plan.
Q4: I keep getting disconnected from Wi-Fi. What's happening?
A: This could be due to a weak signal, interference, outdated drivers, or router issues. Try moving closer to the router, updating your
Laptop WiFi Hack: Instant Mobile Hotspot Connection!Fix Dell Laptop Wi-Fi is Not Working Problem in Windows 1087 2025

By FIXsage Fix Dell Laptop Wi-Fi is Not Working Problem in Windows 1087 2025 by FIXsage
Cara mengatasi Wifi adapter hilang windows 7,8,10
By Ani Saja Cara mengatasi Wifi adapter hilang windows 7,8,10 by Ani Saja
Wireless Network Connection Enabled but Not connected Fix Windows 7
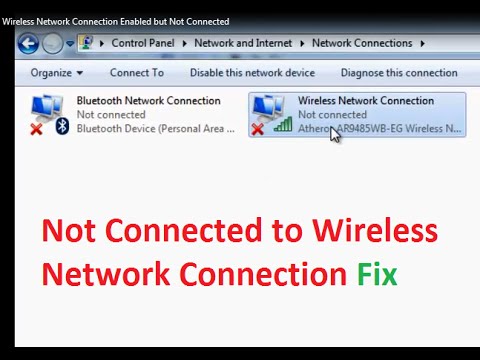
By troubleshooterrors Wireless Network Connection Enabled but Not connected Fix Windows 7 by troubleshooterrors

Title: How to enable your network connection in Windows 7
Channel: MHELP2U
How to enable your network connection in Windows 7 by MHELP2U
Wifi On Laptop
The article title is: Best Coffee Beans for French Press: A Comprehensive Guide
Best Coffee Beans for French Press: A Comprehensive Guide
The ritual of brewing coffee with a French press is a deeply satisfying experience. The gentle immersion, the release of rich aromas, and the full-bodied cup that results are hallmarks of a truly elevated coffee moment. But the magic doesn't happen by chance. The selection of the right coffee beans is paramount. We're embarking on a journey to uncover the very best coffee beans for French press brewing, ensuring every press delivers a symphony of flavor. Forget bland, forget disappointing – we're aiming for coffee Nirvana.
Understanding the French Press Brewing Process: Why Bean Choice Matters
The French press offers a unique brewing method. Unlike drip coffee makers, the French press immerses the coffee grounds directly in hot water. This extended contact extracts more of the coffee bean's oils and flavor compounds. This process, while yielding a luscious, full-bodied brew, also means the resulting coffee can be more susceptible to harsh or bitter notes if the wrong beans are chosen. Coarsely ground beans combine with the hot water for several minutes. The method underscores the need to use beans specifically optimized for French press brewing.
Key Characteristics to Look for in French Press Coffee Beans
The ideal coffee beans for French press exhibit specific characteristics that contribute to a superior cup. Consider these vital elements when making your selection:
Roast Level: Medium to dark roasts are often preferred. These roasts have developed body and depth that hold up well to the French press immersion method. Dark roasts can provide bolder, more intense flavor profiles, while medium roasts offer a balance of acidity and sweetness. Light roasts, while showcasing unique origin characteristics, may lack the body and depth needed to achieve a substantial cup. Experiment to find your personal preference.
Origin and Processing Method: Single-origin beans are an excellent choice for exploring diverse flavors and origins. Consider coffees from regions like Ethiopia, known for their bright acidity and floral notes, or Sumatran beans, celebrated for their earthy body and low acidity. The processing method, such as washed or natural, significantly influences the flavor profile. Washed coffees typically offer a cleaner taste, while natural-processed beans present a fruitier, more complex profile.
Freshness: Coffee beans begin to stale the moment they're roasted. Buy whole beans and grind them immediately before brewing for the freshest, most flavorful coffee. Look for the roast date on the bag and aim for beans roasted within the past two to four weeks for optimal flavor.
Grind Size: Coarse grind is mandatory. The French press uses a metal filter that allows fine particles to pass through, resulting in a gritty cup. A coarse grind prevents over-extraction and bitterness, delivering the clean, full-bodied experience we seek.
Top Bean Recommendations: A Curated Selection
We present a curated selection of beans, each chosen for its distinct qualities and prowess in the French press. Each option offers a delightful taste profile.
Ethiopian Yirgacheffe (Washed): This is classic. This washed Ethiopian Yirgacheffe offers a bright acidity, delicate floral notes, and a subtle sweetness. Its clean finish and nuanced flavors truly shine through the French press. The washed process ensures a crisp, clear cup, with hints of lemon and bergamot. A truly exceptional choice for those who appreciate a complex, refined coffee experience.
Sumatran Mandheling (Dark Roast): For those craving a bolder, more robust experience, Sumatran Mandheling is the answer. Its full-bodied, earthy character and low acidity make it ideal for French press brewing. This dark roast offers notes of dark chocolate, cedar, and a lingering finish. It's a perfect choice for those who enjoy a full-bodied cup with a hint of spice and a satisfying, lingering aftertaste.
Guatemalan Antigua (Medium Roast): A well-balanced option, this medium roast from Guatemala offers a combination of acidity, body, and sweetness. Expect a smooth, clean cup with notes of chocolate, caramel, and a hint of citrus. It's a versatile choice that caters to a broad palate and provides a consistently satisfying experience. This bean’s harmonious balance makes it ideal for various coffee drinkers.
Kenyan AA (Medium Roast): Renowned for its bright acidity and complex flavor profiles, Kenyan AA beans are another excellent choice. The French press allows the vibrant fruit notes and acidity to translate, providing a lively and invigorating cup. Look for hints of black currant, grapefruit, and a clean, fruity finish. It's suited to people who enjoy a bit of liveliness in their coffee.
Brazilian Santos (Medium Roast): Easy drinking, Brazilian Santos is a very standard coffee. Brazilian Santos is a medium roast coffee. It is often a go-to option for its balanced flavor and smooth body. It tends to have notes of chocolate, nuts, and a slightly sweet finish. Its forgiving nature also makes it an ideal choice for beginners.
Grinding Techniques: Mastering the Coarse Grind
Grinding is critical. A consistent, coarse grind is fundamental to success.
Burr Grinder: Invest in a burr grinder, ideally a conical burr grinder, for optimal consistency. Burr grinders grind beans by crushing them between two rotating burrs, resulting in a more uniform particle size compared to blade grinders. A consistent grind prevents over-extraction and bitterness.
Grind Setting: Experiment to find the ideal grind setting for your French press. Start with a setting slightly coarser than the coarsest available setting and adjust as needed. A grind that’s too fine will result in a muddy cup.
Pre-Grinding: Grind your beans immediately before brewing. Pre-ground coffee loses its freshness and flavor quickly.
Brewing Instructions: Step-by-Step Guide
With the perfect beans and a proper grind, it's time to brew.
Heat Water: Heat fresh, filtered water to approximately 200°F (93°C). Avoid boiling water, as it can scorch the coffee grounds and result in a bitter taste.
Preheat the French Press: Rinse the French press with hot water to warm the glass and filter. Discard the water.
Add Coffee Grounds: Add the coarsely ground coffee to the French press. A general guideline: use 2 tablespoons of ground coffee per 6 ounces of water. Adjust the amount of coffee to your personal liking.
Bloom the Coffee: Pour a small amount of hot water over the grounds, just enough to saturate them. Let it sit for 30 seconds. This process, known as the bloom, allows the trapped carbon dioxide to escape, which improves the flavor extraction.
Add Remaining Water: Slowly pour the remaining hot water over the coffee grounds, ensuring all the grounds are saturated.
Steep: Allow the coffee to steep for 4 minutes. Do not disturb the French press during this time.
Plunge Slowly: Slowly and steadily press the plunger down. Do not force it.
Serve Immediately: Serve the coffee immediately after plunging. Avoid leaving the coffee in the French press, as it can become over-extracted and bitter overtime.
Troubleshooting: Common French Press Issues
Even with the best beans, issues can arise.
Bitter Taste: The most common cause is over-extraction, often due to a grind that is too fine or a steep time that is too long. Adjust the grind size and reduce the steep time. Over-extracted coffee happens when the coffee grounds are in contact with the hot water for too long.
Sour Taste: Underextraction is often the cause of sour, acidic coffee. This can be fixed by grinding the beans finer, using hotter water, or increasing the steeping time.
Muddy Cup: This usually indicates the grind is too fine or the beans are not fresh. Ensure you are using a coarse grind and freshly roasted beans.
Weak Flavor: Use more coffee grounds or ensure the water temperature is hot enough.
Storage: Preserving Coffee Bean Freshness
Proper storage is crucial for maintaining freshness.
Airtight Container: Store whole beans in an airtight container away from light, heat, and moisture.
Dark, Cool Place: Store the container in a dark, cool place, such as a pantry or a cupboard.
Avoid the Fridge: Never store coffee beans in the refrigerator, as they can absorb moisture and odors.
Beyond the Bean: Elevating Your French Press Ritual
Beyond bean selection, consider these elements to elevate the experience.
Water Quality: The water constitutes the majority of your brew. Use filtered water for optimal flavor.
Temperature Control: Measure the water temperature with a thermometer for consistent results.
Cleanliness: Regularly clean your French press to prevent residue from affecting the flavor.
Experimentation: Don't be afraid to experiment with different bean varieties, roast levels, and brewing parameters to discover what you prefer.
Conclusion: Your Journey to French Press Excellence Begins Now
Choosing the best coffee beans for French press brewing is a journey of discovery. With the right bean selection, proper grinding techniques, and careful brewing, you can unlock the full potential of this simple yet elegant brewing method. Armed with this knowledge, we hope you embark on your own adventure into the world of French press coffee, one cup at a time. Cheers to
