how to connect wifi hotspot laptop to mobile
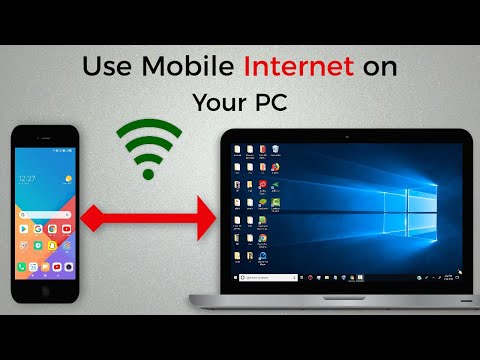
Title: How To Connect Internet from Mobile to PC or Laptop via hotspot
Channel: WebbyFan
How To Connect Internet from Mobile to PC or Laptop via hotspot by WebbyFan
how to connect mobile wifi hotspot to laptop windows 7, how to connect laptop hotspot to mobile wifi, how to connect mobile hotspot to laptop wi fi, how to connect laptop to mobile hotspot without wifi, how to connect internet from mobile to laptop through wifi hotspot, how do you connect laptop to mobile hotspot
Unlock Your Phone's WiFi: Laptop Hotspot Hack!
Taming the Digital Wild: Unleash Your Phone's WiFi with a Laptop Hotspot
Imagine this: You're stranded. Your internet has vanished. All you have is your trusty laptop and your ever-present phone. You're not alone. Fortunately, a hidden key unlocks the digital world for you. You can connect your laptop to the internet using your phone. It's all thanks to a laptop hotspot.
Understanding the Hidden Power: Mobile Hotspot Fundamentals
Mobile hotspots are awesome. They transform your phone into a Wi-Fi router. This allows other devices to connect using your data plan. That’s a significant amount of utility, right? Now, let's consider a laptop. It can act as a conduit. It's a gateway to internet freedom. This is the beauty of a laptop hotspot. So, how does it work? The process is quite straightforward. Your laptop receives the signal from your phone. Then, it relays it to other devices. It's a digital relay race. This provides access to the world. Essentially, you're building a personal, portable network.
Step-by-Step: Creating Your Laptop Hotspot Magic
Firstly, ensure you have the right tools. You will need a laptop and a smartphone. Also, confirm you have a data plan. This should be active on the phone. Then, prepare for setup. The steps are mostly simple. However, each device is slightly unique.
For Android Users:
- Navigate to your settings. Look for "Network & Internet." Otherwise, it might be "Connections."
- Then, find "Hotspot & tethering". Choose "Wi-Fi hotspot". Turn it on.
- Your laptop should detect the new Wi-Fi network. Connect to it.
For iPhone Users:
- Head to "Settings". Then, select "Personal Hotspot."
- Toggle the switch to enable it. This will make it visible.
- Find the hotspot on your laptop. Then, connect using the password.
That’s it! You are connected to the internet.
Troubleshooting the Connection: Navigating Potential Hiccups
Sometimes, things go sideways. Don't panic. Several common issues can pop up. Firstly, check your phone's data connection. Ensure it is active and strong. Then, confirm the hotspot is switched on. Restarting both devices can also work wonders. Moreover, check your laptop’s Wi-Fi settings. Make sure it is configured to automatically connect. Also, ensure you have the correct password. Finally, consider your data plan. Have you exceeded your data limits? If yes, then you might be facing slower speeds. Troubleshooting is key.
Beyond the Basics: Enhancing Your Hotspot Experience
Once you've mastered the setup, consider these extras. Firstly, personalize your hotspot's name. This makes it easy to identify. Secondly, change the password. This adds a layer of security. Thirdly, optimize your data usage. Monitor your data consumption. Close unnecessary apps on connected devices. You can save data. You should also consider turning off automatic updates. This will prevent unwanted data consumption.
The Advantages: Why Use a Laptop Hotspot?
So, what are the actual benefits? Well, it's about having options. A laptop hotspot gives you internet access. It is available when you need it most. It’s ideal in situations such as travel. Imagine being in a remote location. You can stay connected on the go. Moreover, it is a good backup plan. If your home internet fails, you still have resources. It can connect multiple devices. This will allow others to connect as well. Therefore, it is a convenient solution. This also offers a degree of freedom.
Security Matters: Keeping Your Hotspot Secure
Security is key. Protect your data when using a hotspot. Always use a strong password. Avoid public Wi-Fi networks if possible. Enable WPA2 or WPA3 encryption. This enhances your security. Consider using a VPN. This creates a secure and encrypted connection. Keep your device software updated. This helps against potential vulnerabilities. Also, be mindful of the devices you allow to connect. Regularly monitor your data usage. Watch for any unexpected activity.
Conclusion: Embrace the Mobility of Internet Access
Now you know how to create a laptop hotspot. You can stay connected. You have the power. It allows you to keep working, exploring, or staying in touch. This mobile access is a valuable skill. Remember, you can adapt. You can thrive. Thus, embrace the freedom. Enjoy your connection.
Unlock Your Laptop's WiFi: The Secret Sharing Trick!Let's dive right in!
Unlock Your Phone's WiFi: Laptop Hotspot Hack!
Ever been stranded with a dead phone, a dying laptop, and a desperate need for Wi-Fi? We’ve all been there. Picture this: you're in a remote coffee shop, desperately trying to finish that crucial work presentation, and the cafe’s Wi-Fi is slower than a snail in quicksand. Or maybe, you're on a road trip, your passengers are clamoring for internet access, and you're staring at a blank screen of despair. Fear not, fellow tech adventurers! Today, we're not just talking about a solution; we're unveiling a secret weapon: the laptop hotspot hack. It's like having a portable Wi-Fi router in your backpack, ready to save the day.
1. The Wi-Fi Wilderness: Why You Need This Hack
Let's face it; Wi-Fi is the oxygen of the digital age. Without it, we're gasping for information, cut off from the world, and staring blankly at our screens. Think of your phone as a powerful tool, a digital Swiss Army knife. But that knife is dull without a sharp internet connection. This hack is about regaining control, about being prepared for anything. It's about reclaiming your digital freedom!
2. Ditching the Data Drain: The Cost-Effective Advantage
One of the biggest perks of this laptop hotspot hack is the potential to conserve your precious mobile data. Think of those gigabytes as liquid gold. Why let them drain away streaming videos when you can leverage your laptop’s Wi-Fi connection? It's like finding a hidden gold mine! By creating a hotspot, you can connect multiple devices, splitting the Wi-Fi bandwidth instead of burning through your data allowance. This trick is particularly useful if you have a limited data plan or if you're traveling internationally and want to avoid expensive roaming charges.
3. The Laptop's Superpower: Turning It Into a Wireless Beacon
Your trusty laptop isn't just for spreadsheets and writing emails. It's a powerhouse capable of much more, especially when you need to share your internet connection. Think of your laptop as a Wi-Fi antenna, reaching out and pulling in the internet signal, then rebroadcasting it to your other devices. It's like having a miniature broadcasting station, ready to connect your phone, tablet, and other gadgets to the digital world.
4. Windows Wonders: Creating a Hotspot in a Few Clicks
Let's get down to the nitty-gritty. For Windows users, setting up a hotspot is surprisingly straightforward. We'll walk through it step by step.
- Step 1: Access Your Settings: Click the Windows Start button, then choose "Settings" (the gear icon).
- Step 2: Navigate to Network & Internet: Select "Network & Internet."
- Step 3: Mobile Hotspot Magic: Click "Mobile Hotspot" in the left-hand menu.
- Step 4: Turn it On: Toggle the "Share my Internet connection with other devices" switch to "On."
- Step 5: Choose Your Internet Source: Under "Share my Internet connection from" select your preferred connection (Wi-Fi or Ethernet).
- Step 6: Edit Your Hotspot (Optional): Click "Edit" to change your network name (SSID) and password. Keep it secure!
And there you have it! Your laptop is now broadcasting Wi-Fi.
5. Mac Mavericks: The Simple Hotspot Setup on Your Apple Device
Apple users, we haven't forgotten you! The good news is that creating a hotspot on a Mac is just as simple, maybe even easier.
- Step 1: Open System Preferences: Click the Apple logo in the top-left corner of your screen, then select "System Preferences."
- Step 2: Navigate to Sharing: Click on the "Sharing" icon.
- Step 3: Internet Sharing: In the left-hand column, click "Internet Sharing."
- Step 4: Choose Your Connection Source: In the "Share your connection from" dropdown menu, select your internet source (Wi-Fi or Ethernet).
- Step 5: Select Where to Share: Check the box next to "Wi-Fi."
- Step 6: Wi-Fi Options: Click "Wi-Fi Options…" to create a network name and password. This is important for security.
- Step 7: Activate Sharing: Check the box next to "Internet Sharing" to start your hotspot.
Voilà! Your Mac is sharing its internet, ready to keep your devices connected.
6. Security First: Protecting Your Hotspot
Just like with a regular Wi-Fi network, security is paramount. Remember, a public hotspot is an open door to your devices.
- Strong Passwords: Always use a strong, unique password for your hotspot. Avoid obvious choices like your birthday or pet's name.
- Encryption: Your hotspot uses a secure encryption protocol (like WPA2 or WPA3) by default.
- Disable Sharing When Not in Use: When you're done sharing, be sure to switch off the hotspot. It's like locking the door when you leave the house.
7. Troubleshooting Troubles: Common Problems and Solutions
Not everything runs smoothly all the time. Here are some common issues you might encounter and how to fix them.
- Device Not Connecting: Ensure that the device you're trying to connect is within range of your laptop's Wi-Fi signal. Also, double-check the password and make sure you've entered it correctly.
- Slow Internet Speed: The speed of your hotspot depends on the speed of your laptop's connection. If the internet is slow, you may be experiencing congestion on your network. Try disconnecting some devices or closing unnecessary applications.
- Hotspot Not Visible: Make sure the hotspot is turned on and that your laptop's Wi-Fi adapter is enabled. Also, double-check the network name you set.
8. Beyond Basic: Advanced Hotspot Customization
For the tech-savvy among us, you can customize your hotspot experience even further.
- Bandwidth Control: Some operating systems and third-party software allow you to set limits on the bandwidth allocated to different connected devices. This is useful to prioritize certain traffic.
- MAC Address Filtering: Filter the MAC addresses of devices allowed to connect to your hotspot. MAC address filtering adds another layer of security.
- Third-Party Software: Consider using third-party hotspot software for more advanced features. Some of these tools offer more customization and control than the built-in features.
9. The Perfect Scenario: When This Hack Shines
Think of the ultimate travel scenario: You're in a hotel room with terrible Wi-Fi, and your phone needs to download a crucial document. Or you're with friends, and you're all trying to stream a movie on the go. Or you are simply working remotely while traveling, and you're stuck with a slow connection. The laptop hotspot hack shines in these scenarios.
10. Avoiding the Pitfalls: Things to Watch Out For
While the laptop hotspot hack is a lifesaver, there are a few things to keep in mind.
- Battery Life: Creating a hotspot drains your laptop's battery faster. Keep your laptop plugged in whenever possible.
- Data Usage Monitoring: Always be mindful of your data usage, especially if you're using your mobile data as the internet source.
- Security Risks: Public Wi-Fi can be risky; the use of a VPN is always a good idea.
11. Software Solutions: Apps and Programs That Help
There are several software solutions that can enhance your hotspot experience. Some of the Best include:
- Connectify Hotspo: Connectify Hotspot. This application offers a user-friendly interface and advanced features.
- Virtual Router Manager: Virtual Router Manager is a free and open-source software for creating a Wi-Fi hotspot.
12. The Power of Accessibility: Connecting Multiple Devices
One of the most significant advantages of this hack is the ability to connect multiple devices simultaneously. Whether it's your phone, tablet, or another laptop, your laptop hotspot can handle it. This is perfect for family trips, group projects, or simply allowing your friends to connect their devices.
13. Think Green: Hotspot for Sustainability
The laptop hotspot hack has ecological advantages.
- Reduced Data Consumption: By sharing a single Wi-Fi connection between multiple devices, we reduce the data consumption.
- Energy Efficiency: When we avoid using cellular data, we contribute to the extension of our battery life.
14. The Future of Connectivity: What's Next?
As technology progresses, the laptop hotspot hack will evolve. We can expect to see improved speed, security features, and easier-to-use interfaces. The future of connectivity is all about convenience, security, and speed.
15. Final Thoughts: Your Digital Superhero
So, there you have it! The laptop hotspot hack: your digital superhero! It’s a simple, yet powerful tool that can transform your laptop into a Wi-Fi haven, saving you from internet emergencies and potential data overages.
Closing Section
We’ve gone from Wi-Fi woes to hotspot heroes. You are now equipped with the knowledge to
Cell Phone No WiFi? Laptop's Your Lifeline! (But Is It?)How To Share Internet From Laptop To Mobile Via WiFi in Windows 11

By EasyTechGeek How To Share Internet From Laptop To Mobile Via WiFi in Windows 11 by EasyTechGeek
How to Use PC Internet in Mobile Using Hotspot Wireless-2020

By MJ Tube How to Use PC Internet in Mobile Using Hotspot Wireless-2020 by MJ Tube
How to Connect Mobile Hotspot to Laptop or PC

By Techie Leopard How to Connect Mobile Hotspot to Laptop or PC by Techie Leopard

Title: We Can't setup Mobile Hotspot Windows 10 SOLVED
Channel: Nam Anh Cap
We Can't setup Mobile Hotspot Windows 10 SOLVED by Nam Anh Cap
Change Wifi Settings
Title: The Definitive Guide to Crafting the Perfect Homemade Sourdough Bread
Have you ever savored the aroma of freshly baked sourdough, its crust crackling as you tear into the airy interior? The tangy bite, the complex flavors – it's a culinary experience unparalleled by mass-produced loaves. Crafting this artisan bread at home might seem daunting, but with the right knowledge and a bit of patience, you can produce a sourdough masterpiece that will impress even the most discerning palates. We have crafted this definitive guide to empower you. It will provide you with the knowledge and techniques to achieve sourdough success every time.
Understanding the Magic: The Science Behind Sourdough
Sourdough's unique character stems from its natural leavening process, a symbiotic dance between wild yeasts and beneficial bacteria, primarily Lactobacilli. Unlike commercial bread, which relies on cultivated yeast, sourdough utilizes a "starter," a bubbly culture of these microorganisms. The Lactobacilli produce lactic acid, contributing to the bread's characteristic tang and acting as a natural preservative, extending its shelf life. The wild yeasts generate carbon dioxide, responsible for the airy crumb and the loaf's rise.
The Heart of the Home: Creating and Maintaining Your Sourdough Starter
Your sourdough journey begins with the starter, often called the "mother dough." It's a living organism, a vibrant community demanding consistent care.
- Cultivating Your Starter: Combine equal parts (e.g., 50 grams each) of unbleached all-purpose flour and lukewarm, non-chlorinated water in a clean glass jar. Stir thoroughly to combine. Cover loosely with a lid or plastic wrap, allowing air circulation. Leave it at room temperature (ideally between 70-75°F/21-24°C).
- The Feeding Ritual: For the first week, discard half of the starter daily and feed it with fresh flour and water in equal proportions, maintaining the same ratio as before. This process "feeds" the yeast and bacteria, providing them with the resources they need to thrive.
- Identifying Activity: Initially, the starter will show little to no activity. However, after a few days, you may observe small bubbles forming. As the days progress, the starter should double in size, developing a sour, slightly fermented aroma. This indicates the yeast and bacteria are flourishing.
- Maintaining Maturity: Once your starter consistently doubles in size within 4-8 hours after feeding, and displays a noticeable sour smell, It is ready for use. You can transfer the starter to the refrigerator. The cold temperature will slow down its activity, allowing you to feed it less frequently. Feed your refrigerated starter once a week, following the discard and feed cycle.
Selecting the Right Ingredients: The Foundation of Flavor
The quality of your ingredients significantly impacts the final product.
- Flour Power: Unbleached, organic all-purpose flour is a versatile choice, offering a good balance of gluten development and flavor. Experiment with bread flour for a chewier crumb, or incorporate whole wheat flour for added nutrients and a nuttier taste. The protein content of your flour will affect the gluten development.
- Water Wisdom: Use filtered or non-chlorinated water. Chlorine can inhibit the growth of the yeast and bacteria. The temperature should be lukewarm, around 75-80°F (24-27°C), to activate the starter and aid dough development.
- Salt's Role: Sea salt or kosher salt is best. Salt not only enhances the flavor but also controls the yeast activity and strengthens the gluten structure. The ideal salt-to-flour ratio is generally 2-2.5% by weight.
The Art of the Bake: Step-by-Step Sourdough Creation
Now for the most exciting part of the process: baking!
- Mixing the Dough (Autolyse): Combine the flour and water in a large mixing bowl. Mix until there are no dry patches of flour. Cover and let the mixture rest (autolyse) for 30-60 minutes. This allows the flour to fully hydrate, promoting gluten development and improving the final texture.
- Adding the Starter and Salt: Add the active starter and the salt to the autolysed dough. Use your hands or a dough whisk to incorporate them fully. The dough will initially be shaggy and sticky.
- Bulk Fermentation: Bulk fermentation is where the magic truly happens. This is the process where the dough ferments, developing flavor and structure. Place the dough in a lightly oiled bowl, cover it, and let it rise at room temperature (70-75°F/21-24°C). Perform a series of stretch and folds every 30-60 minutes for the first 2-3 hours. To do this, gently stretch a portion of the dough upwards and fold it over onto itself. Rotate the bowl and repeat until you've worked your way around the entire dough. This strengthens the gluten network and distributes the yeast and bacteria evenly. The total bulk fermentation time will vary depending on the temperature and the activity of your starter, usually 6-12 hours or so. The dough is ready when it has increased in volume by about 50% and has developed some bubbles.
- Shaping the Loaf: Gently deflate the dough. Form it into your desired shape, a round boule or an oblong batard. Ensure the dough surface is taut. The surface tension that gives the bread it's form comes from the friction between the dough the surface of the countertop.
- Proofing (Retarding): Place the shaped dough in a well-floured banneton basket or a bowl lined with a floured kitchen towel, seam-side up. Cover it tightly and refrigerate overnight (or for up to 24 hours). This slow, cold fermentation enhances the flavor and develops a more complex crumb structure.
- Baking with Steam: Preheat your oven to 450-500°F (232-260°C) with a Dutch oven inside. Carefully remove the hot Dutch oven and gently place the proofed dough inside. Score the top of the loaf with a sharp knife or lame; this controls the expansion of the loaf during baking and allows steam to escape. Cover the Dutch oven and bake for 20 minutes.
- Uncover and Finish: Remove the lid and continue baking for another 25-35 minutes, or until the crust is deeply golden brown and the internal temperature reaches 200-210°F (93-99°C). Internal temperature is the best measure of doneness.
- Cooling and Savoring: Transfer the baked loaf to a wire rack and let it cool completely before slicing. This is crucial; cutting into a warm loaf can result in a gummy texture. Allow the bread at least 1-2 hours to cool. The flavors will continue to develop as it cools, and the crust will crisp further.
Troubleshooting: Mastering the Challenges
Even with the best efforts, problems may arise. Here's how to address common sourdough challenges:
- Flat Bread: This is often due to a weak starter, under-proofing, or over-proofing. Ensure your starter is active, proof for the appropriate time, and avoid excessively warm temperatures during the bulk fermentation. Over-proofing means the dough loses its structure.
- Dense Crumb: This can be a result of using too much flour, not enough water, under-fermentation, or not enough gluten development. Ensure you are measuring ingredients accurately, and allow sufficient time for fermentation and proofing.
- Sourness Variations: The sourness depends on several factors, including the hydration of the starter and the ambient temperature. If the starter is too cold, the fermentation will be slower, and the bread less sour. A higher hydration dough usually results in a more sour flavor. Increasing the bulk fermentation and the proofing time can increase the bread's sour flavor.
- Uneven Baking: This is often caused by oven temperature fluctuations. Use an oven thermometer to monitor the temperature and adjust as necessary.
Beyond the Basics: Exploring Bread Variations
Once you've mastered the basic sourdough, the possibilities are endless.
- Whole Wheat Sourdough: Substitute some of the all-purpose flour with whole wheat flour for added flavor and nutrition. Be mindful of the water absorption, as whole wheat flour absorbs more water.
- Seeded Sourdough: Incorporate seeds like sesame, sunflower, or poppy seeds into the dough or sprinkle them on the crust for added texture and flavor.
- Flavorful Additions: Experiment with adding ingredients like dried fruits, nuts, or herbs to the dough.
- Sourdough Pancakes and Waffles: Use the sourdough discard to make delicious breakfast treats.
The Journey Continues: Embracing the Sourdough Lifestyle
Baking sourdough is more than a culinary pursuit; it's a journey of discovery, patience, and a deep appreciation for the natural processes that transform simple ingredients into something truly extraordinary. Every loaf offers an opportunity to refine your technique, learn from your mistakes, and celebrate the joy of creating something delicious and nourishing from scratch. With practice and passion, you’ll soon be sharing your own sourdough creations, spreading the love of this remarkable artisan bread.
