laptop not showing all wifi networks

Title: Fix WiFi Not Showing in Settings On Windows 10 Fix Missing WiFi 2025
Channel: Sandeep Singh
Fix WiFi Not Showing in Settings On Windows 10 Fix Missing WiFi 2025 by Sandeep Singh
laptop not showing all wifi networks, laptop not showing any wifi networks, laptop not seeing all wifi networks, laptop not finding any wifi networks, laptop not seeing any wifi networks, laptop not showing all available wifi networks, laptop not detecting any wifi networks, dell laptop not showing all wifi networks, laptop not finding any wifi networks windows 11, hp laptop not showing all wifi networks
Laptop WiFi Mystery Solved: Why You're Missing Networks!
Cracking the Code: Unveiling Your Laptop's Missing WiFi Networks
Have you ever found yourself staring blankly at your laptop screen? You might see a limited list of WiFi networks. You might even see none at all. This frustrating experience plagues many laptop users. Prepare to bid farewell to WiFi woes. We're about to embark on a journey to solve this common tech puzzle.
The Ghost in the Machine: Identifying the Culprit
Firstly, let's acknowledge the problem. Your laptop isn't detecting your WiFi. This can be a temporary glitch. It can also be a more persistent issue. Therefore, we need to investigate. Think of it like a detective searching for clues. Begin by checking the obvious. Ensure WiFi is enabled on your laptop. Look for the WiFi icon in your system tray. Is it showing a connection? If not, proceed to the next step.
Drivers Unleashed: The Silent Heroes of Your WiFi
Now, consider your network adapter drivers. These are essential software components. They act as the bridge between your laptop and your WiFi. Outdated or corrupted drivers can cause connectivity issues. To address this, you must update your drivers. Typically, you can update them through Device Manager. Locate your network adapter. Right-click and select "Update driver." This is often the first step to resolve many issues. Also, consider a complete driver reinstallation. This can often resolve more persistent problems.
The Router's Realm: Examining the Gateway
Next, we'll delve into your router. After all, it controls your wireless signals. Sometimes, the router itself is the problem. Is it functioning correctly? Are other devices connected? If not, reboot the router. This is often a surprisingly effective solution. Unplug it, wait a minute, and plug it back in. This often resolves minor glitches. After the reboot, check your laptop again.
Signal Strength Shenanigans: Navigating the Wireless Landscape
Location, location, location! Your physical proximity to your router impacts WiFi reception. Think about the environment. Thick walls and metal objects can obstruct the signal. Therefore, move closer to the router, if possible. See if the signal strength improves. If you're far away, consider a WiFi extender.
Channel Surfing: Finding the Right Frequency
Routers transmit on different channels. These channels can sometimes experience interference. Think of it as a traffic jam on the wireless highway. Therefore, log into your router's settings. Look for the wireless channel settings. Experiment with different channels. You may find a less congested one.
The Hidden Network: Unmasking the SSID
Some networks are hidden. What does this mean? The network name (SSID) isn't broadcast. You'll need to manually enter the SSID. Also, you will need the password. Consult your router's documentation. This will guide you through the process. Once you are able to enter the information, then connect by providing the password.
Troubleshooting Toolkit: Your Arsenal of Solutions
If the above steps fail, don't despair. Consider these additional troubleshooting tips. Firstly, disable and re-enable your network adapter. Secondly, flush your DNS cache. This can resolve some network conflicts. Thirdly, run the Windows Network Troubleshooter. This can often provide automatic solutions.
Hardware Hurdles: When the Problem is Physical
Sometimes, the issue is hardware-related. Your network adapter could be faulty. Similarly, your router may be damaged. Thus, it could be time to consider replacing the component. Consider the age of the device. Replacing older devices can often modernize your network.
Protecting Your Wireless Fortress: Security Considerations
Always ensure your WiFi network is secure. Use a strong password. Employ WPA2 or WPA3 encryption. Regularly update your router's firmware. This will protect against potential vulnerabilities. Consider that security is a fundamental part of any network.
The Final Verdict: Reclaiming Your WiFi Connection
In conclusion, resolving WiFi connection problems can be tricky. However, with patience and the right troubleshooting steps, success is achievable. By methodically working through these steps, you can regain your internet access. Now you can finally enjoy uninterrupted browsing and streaming. Enjoy your newly restored WiFi! Furthermore, if all else fails, seek professional help. Sometimes, an expert can swiftly resolve complex issues.
Laptop WiFi WPS: The Secret Button Trick You NEED to Know!Laptop WiFi Mystery Solved: Why You're Missing Networks!
Ever felt like your laptop's WiFi is playing hide-and-seek? One minute you're streaming your favorite show, the next, you're staring at a network list drier than the Sahara. We've all been there, haven't we? That frustrating moment when the little WiFi icon screams "No connection" and you're left wondering, "Where did all the networks go?" Fear not, fellow digital wanderers! We're about to embark on a troubleshooting journey, cracking the code to the laptop WiFi mystery and making sure you're connected, content, and catching those cat videos in no time. This isn't your average tech jargon-filled guide; we're going to decode the problem like seasoned detectives solving a delicious, digital puzzle.
1. The Phantom Networks: Unveiling the Initial Suspects
Let's start with the basics. Before you launch into a full-blown tech tantrum, we need to understand the usual culprits. Think of it like a detective gathering evidence at the scene. Is the router even on? Sounds silly, I know, but hey, we've all forgotten to plug in the power cable at some point. Check the simple things first: is the router turned on, and are the lights blinking? Is your laptop's WiFi switch (the physical button or function key combo) flipped to the “on” position? Sometimes, it's the most obvious things we miss.
2. Router Roulette: Could Your Router Be the Problem?
Often, the issue isn't your laptop at all — it’s akin to blaming the painting instead of the painter. The router, that little box of magic, is the bridge between your laptop and the internet. Resetting your router is the digital equivalent of a good night's sleep. Unplug it for 30 seconds, plug it back in, and let it reboot. While it’s rebooting, go grab a coffee, stretch, or maybe even do a quick jig (it works, trust me!). If, after the reboot, your networks still aren't showing up, then we move along, but often, this is the quick fix we all crave.
3. Driver Drama: Are Your WiFi Drivers Up-to-Date?
Imagine your laptop's WiFi card as a translator. Drivers are the dictionary that lets it speak the language of the internet. Outdated or corrupted drivers can be the bane of your network’s existence. To check, search for "Device Manager" in your Windows search bar (it varies slightly on Mac, but the principles remain the same). Expand “Network Adapters.” Right-click on your WiFi adapter (it'll have a name like “Intel Wireless-AC 9260” or similar) and select "Update driver." Follow the prompts, and let the system do its thing. This is often easier than it seems and might just solve the whole problem.
4. Channel Chaos: WiFi Channels and Interference
Think of WiFi channels like radio frequencies. If your router and your neighbor's are using the same one, it can create interference, much like two people talking at the same time. Many modern routers automatically choose the best channel, but sometimes, a manual adjustment is necessary. Access your router's settings (usually through a web browser by typing in its IP address, often found on the router itself or in your computer's network settings). Look for a "WiFi channel" setting and experiment with different options.
5. Hidden SSID Hocus Pocus: Is Your Network Keeping Secrets?
Some networks hide their names (SSIDs) for security reasons. If your network is hidden, your laptop won’t automatically find it. You’ll need to manually add the network. In your WiFi settings, look for an option to "manually add a network." You'll need the network name (SSID) and password. This is like being given a secret handshake – suddenly you're in!
6. Range Anxiety: Are You Too Far Away?
WiFi signals, like light, can be affected by distance and obstructions. Thick walls, metal objects, and distance can block or weaken the signal. Try moving closer to your router. If your connection improves, you know you've found your limit and that you need more power. Consider adding a WiFi extender or mesh network for better coverage if that's an ongoing issue.
7. Power Saving Shenanigans: Laptop Power Settings
Your laptop’s power settings might be putting your WiFi to sleep to save battery. Go to "Power Options" in your system settings. Check the relevant settings for your WiFi adapter. Make sure that the setting allowing the computer to turn off the device to save power is disabled. We don’t want our laptop to be a sleepyhead, do we?
8. Firewall Flummoxery: Is the Firewall Blocking Access?
Your firewall, like a digital security guard, can sometimes block legitimate network connections. Check your firewall settings (usually controlled by your operating system or an installed security program) to ensure they aren't unintentionally blocking your WiFi.
9. Network Sharing Conflicts: Troubleshooting Shared Connections
If you're trying to connect via a shared network (like a hotspot), make sure the host device is properly configured and that the connection settings are correct. Compatibility issues between devices can create interference, much like a clashing band.
10. DHCP Dilemma: The Mystery of IP Addresses
Your computer gets assigned to an IP address by the router, which can lead to some problems. Sometimes your computer fails to obtain an IP address. Go into the Network settings of your computer and look for the IP address setting. It should be on "Obtain IP address automatically". If it is not, change it to automatic, and restart your device.
11. Hardware Hurdles: When the WiFi Card is the Problem
In rare cases, the WiFi card itself might be faulty. This is more likely if other devices connect to the same WiFi network with no issues. If you suspect this, it's time to seek professional help or consider replacing the card (if possible).
12. The Guest Network Gambit: Connecting to Guest Networks
If you’re attempting to connect to a guest network, ensure you have the correct password and understand any limitations the network may impose. Guest networks are often designed to limit access, so this could be the problem.
13. Security Protocol Struggles: Compatibility Concerns
Older devices may have a hard time connecting to newer WiFi networks with advanced security protocols. Verify that your device supports the security protocol used by your router. You may need to adjust your router's security settings.
14. Resetting Network Settings: The Ultimate Reboot
Sometimes, a complete reset is needed. In Windows, you can reset your network settings in the Network settings. This will remove all your network configurations and often fixes many problems, but be careful, as you will need to re-enter your WiFi password afterward.
15. Seek Professional Help: When All Else Fails
If you've tried all the above, it might be time to call in the experts. Contact your internet service provider (ISP) or a qualified tech specialist. They can often diagnose and fix more complex problems that you can't.
Closing Comments: From Frustration to Freedom!
There you have it! We've navigated the twists and turns of the laptop WiFi mystery, and, hopefully, you are now back online and ready to explore the digital world. Remember, troubleshooting WiFi issues is like detective work – it can be frustrating, but the satisfaction of solving the puzzle is well worth the effort. Just like any good detective, be patient, and methodical, and don’t be afraid to consult the experts if needed. Now go forth and enjoy your internet freedom!
FAQs: Laptop WiFi Woes Demystified
1. Why does my laptop connect to some WiFi networks and not others?
This could be due to a variety of factors. Sometimes, older laptops don't work with newer WiFi security protocols. It could also be related to the network's range, hidden names, or compatibility issues.
2. Why is my WiFi connection slow?
Slow WiFi can be caused by many things. Distance from the router, interference, too many connected devices, or your internet plan's speed limitations are all potential culprits.
3. What should I do if my laptop shows "No networks found"?
Double-check the simple stuff: is WiFi enabled, is the router on, and is the physical switch correct? Then work through the steps we outlined: reboot the router, update drivers, and verify settings.
4. How often should I reboot my router?
It's good practice to reboot your router at least once a month, or whenever you experience connectivity issues. It's like giving your brain a break.
5. Is my WiFi secure?
Your WiFi security depends on the settings of your router. Make sure your network has a strong password and uses up-to-date security protocols, like WPA2 or WPA3.
- Principal Keywords: Laptop WiFi Missing Networks
- SEO Headline: Laptop WiFi Missing Networks? Solve It Now!
- Pathway: WiFi Troubleshooting
- Meta Summary: Laptop WiFi acting up? Learn why you're missing networks and get connected! Troubleshooting guide to fix WiFi issues & reconnect!
- Image Alt Text: A laptop displaying the missing WiFi network icon, with the image portraying frustration coupled with the joy of re-connection.
- Image Caption: Missing Networks: Find Wifi, Get
FIXED No WiFi Networks Found Windows 10

By Techworm FIXED No WiFi Networks Found Windows 10 by Techworm
Memperbaiki WiFi yang Tidak Muncul di Pengaturan Windows 11 Memperbaiki WiFi yang Hilang

By Sandeep Singh Memperbaiki WiFi yang Tidak Muncul di Pengaturan Windows 11 Memperbaiki WiFi yang Hilang by Sandeep Singh
How to solve Wi-Fi Not showing Problem in Windows 10 200 Fixed

By Rounak Verma How to solve Wi-Fi Not showing Problem in Windows 10 200 Fixed by Rounak Verma
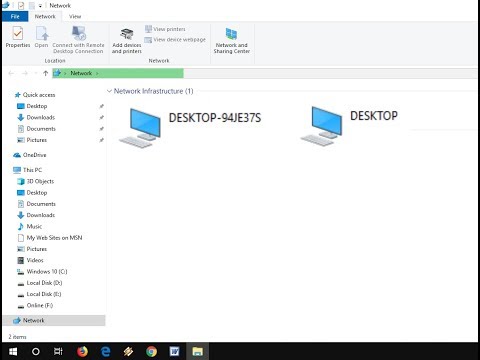
Title: How to Fix All Network Sharing Issues-Computer not showing in Network
Channel: MJ Tube
How to Fix All Network Sharing Issues-Computer not showing in Network by MJ Tube
Laptop Working
Here is the title: The Ultimate Guide to Mastering the Art of Sourdough Baking at Home
The Ultimate Guide to Mastering the Art of Sourdough Baking at Home
Embarking on the journey of sourdough baking is akin to unlocking an ancient secret, a culinary rite of passage that rewards patience and dedication with the most delectable loaves imaginable. This comprehensive guide is designed not merely to inform but to empower you, providing the knowledge and practical skills needed to transform your kitchen into a sourdough sanctuary. Prepare to bid farewell to commercially produced bread and say hello to the intoxicating aroma and unparalleled flavor of homemade sourdough.
Cultivating Your Sourdough Starter: The Heart of the Operation
The cornerstone of any successful sourdough endeavor is the sourdough starter, often affectionately called "levain" or "mother." This living culture of wild yeasts and beneficial bacteria, the very essence of sourdough's magic, demands meticulous care and attention. We will delve deep into the process of creating and nurturing a robust and vibrant starter.
The Initial Flour & Water Ritual: Begin with equal parts of unbleached, all-purpose flour (though whole wheat or rye can add complexity) and lukewarm, chlorine-free water. The absence of chlorine is critical, as it can inhibit the growth of the beneficial bacteria. Combine these ingredients in a clean glass jar and mix thoroughly until you achieve a thick, pancake batter-like consistency. The lid should be loosely placed to allow for eventual gas release. This initial mixture will be fed daily, typically at the same time each day, for the first week.
Observing the Transformation: Over the next few days, observe the gradual transformation. Tiny bubbles will begin to surface, a testament to the yeast's activity. You might also notice a subtle, sour aroma developing. These are positive signs, indicating that the wild yeasts are taking hold. As the starter matures, discard about half of the mixture each day (this is commonly referred to as "discard"). This process ensures that the starter remains manageable and reduces the accumulation of excess acidic byproducts.
Feeding and Maintaining Your Starter: The feeding process is straightforward: discard the discarded starter and replenish with equal parts of flour and water, stirring well after. The amount of flour and water added depends on the size of your final starter or the amount needed for baking. The ideal feeding frequency depends on your environment and the activity of your starter. A vigorous starter, one that doubles in size within 4-8 hours after feeding, is ready for baking. Refrigeration slows down the starter.
Troubleshooting Common Starter Issues: A sluggish starter might be the result of several factors:
- Temperature: Cold temperatures slow the yeast activity. Ensure your starter is kept in a warm environment (around 70-75°F or 21-24°C).
- Flour Quality: Use high-quality, unbleached flour.
- Water Quality: Chlorine can impede growth.
- Incorrect Feeding Ratio: Ensure you're using equal parts flour and water.
- Improper Discarding: Discarding is essential to maintain the healthy balance of the starter.
Crafting Your First Sourdough Loaf: A Step-by-Step Approach
With your starter thriving, the moment to bake your first loaf has arrived! This section will guide you through the complete bread-making process, from mixing the dough to enjoying the fruits of your labor.
Preparing the Levain: In preparation for baking, typically 4-12 hours before you intend to bake, take a portion of your active starter (usually a few tablespoons) and feed it with flour and water in a separate jar. This mixture, known as the levain, serves as the leavening agent for your bread. The levain is ready when it has doubled in size, and is puffy and airy.
Autolyse: Hydrating the Flour: Autolyse is an optional but highly beneficial step. In a large bowl, combine the flour and water for your dough. Mix gently until just combined, incorporating all of the flour. Cover the bowl and let it rest for 30-60 minutes. This process allows the flour to fully hydrate, improving gluten development.
Mixing the Dough: Add the active levain and salt to the autolysed dough. Mix gently until incorporated. This will improve gluten development.
Bulk Fermentation: Developing Flavor and Structure: Place the dough in a lightly oiled bowl. Cover and let it rise in a warm place. This is where the real flavor magic happens. The bulk fermentation stage involves a series of "stretch and folds" every 30-60 minutes for the first 2-3 hours. Gently stretch a portion of the dough upwards and fold it over itself. Repeat this process around the bowl, 4-6 times. This technique develops strength and structure in the dough. The bulk fermentation can last a total of 4-6 hours.
Shaping the Dough: Gently transfer the dough to a lightly floured work surface. Shape the dough into a round or oblong shape. This process, known as "shaping," gives the loaf its final form.
Proofing the Dough: Place the shaped dough in a proofing basket or a bowl lined with a floured kitchen towel. Cover and refrigerate for 12-24 hours. This extended cold proofing significantly enhances the flavor and texture of the bread.
Baking the Sourdough: Preheat your oven to 450-500°F (232-260°C), with a Dutch oven or a heavy baking stone or steel inside. Carefully place the dough in the hot Dutch oven and score the top of the loaf with a sharp knife or a lame. This allows the loaf to expand in a controlled manner during baking and creates beautiful designs. The scoring pattern is up to you! Bake, covered, for 20-25 minutes. The covered environment traps steam, which is essential for achieving oven spring. Then, remove the lid and bake for another 25-30 minutes, or until the crust is deeply golden brown.
Cooling and Enjoying: Allow the loaf to cool completely on a wire rack before slicing. This allows the internal structure to set, preventing a gummy texture. The anticipation of the moment of the first cut into the bread is crucial.
Variations and Advanced Techniques for the Discerning Baker
Beyond the basic sourdough loaf, a whole world of possibilities awaits. This section explores some variations and advanced techniques to elevate your sourdough baking skills.
Whole Wheat Sourdough: Incorporating whole wheat flour adds a nuttier flavor and a heartier texture. The hydration levels may need to be adjusted; whole wheat absorbs more water than white flour.
Adding Seeds and Grains: Experiment with incorporating seeds (sesame, sunflower, poppy), grains (oats, barley), or dried fruits (cranberries, raisins) to enhance the flavor and texture of your loaves. Add these ingredients during the final stretch and fold of the bulk fermentation.
The Art of Scoring: Scoring is both functional and aesthetic. Experiment with different scoring patterns to create unique designs on your loaves. A sharp lame or a razor blade is essential for achieving clean, precise scores.
Understanding and Adjusting Hydration: Hydration refers to the percentage of water in the dough. Higher hydration doughs (75% or more) produce loaves with a more open crumb. Adjust the water content based on the flour type and your preferred texture.
Expanding the Bread Horizons: Consider adding different types of flours such as rye, spelt, or kamut to the dough. This will change the texture and taste of the loaf.
Troubleshooting Common Sourdough Challenges
Even with the best intentions, sourdough baking can present challenges. This section addresses common issues and provides solutions.
Dense Loaves: A dense loaf can be the result of several factors:
- Under-proofed dough: Longer proofing times are needed in cold temperatures to ensure fermentation.
- Weak gluten development: Ensure proper mixing, autolyse, and stretch-and-fold techniques.
- Inactive starter: Make sure your starter is active and has doubled in size after feeding.
- Too much starter: The dough may not be over-proofed.
Flat Loaves: Flat loaves often indicate under-proofing or a weak dough structure. Ensure you have allowed enough cold proofing time and that the dough has sufficient gluten development.
Sourness Issues: Sourdough flavor is characterized by having acidity. Adjust the flour and water ratios. Some bakers may prefer the sourdough to be less sour by changing the amounts of the ingredients.
Uneven Crumb: Uneven crumb structure can be a result of inconsistent shaping, improper scoring, or variations in fermentation.
The Rewards of Sourdough: Beyond the Loaf
The joy of sourdough extends far beyond the delicious bread itself. It's a connection to the past, a mindful practice, and a pursuit that offers constant learning and satisfaction. The satisfaction of creating your bread is like no other.
The Health Benefits: Sourdough bread is often more digestible than commercially produced bread due to the fermentation process, which breaks down gluten and makes nutrients more available.
Embracing the Slow Food Movement: Sourdough baking aligns beautifully with the slow food movement, emphasizing quality ingredients, traditional techniques, and a mindful appreciation of the process.
A Lifelong Journey: Sourdough
