laptop wifi invalid ip configuration
Title: Fix ethernet doesn't have a valid ip configuration issue in windows 10 Windows 11
Channel: IT Magics
Fix ethernet doesn't have a valid ip configuration issue in windows 10 Windows 11 by IT Magics
Laptop WiFi Nightmare? FIX Invalid IP Configuration NOW!
Laptop WiFi Woes? Conquer the Invalid IP Configuration
Have you ever stared longingly at your laptop screen, only to be met with the dreaded "No Internet Access" message? It’s a scenario many of us know all too well. And the culprit? Often, an invalid IP configuration. It can feel like your digital lifeline has been severed. But fear not! You can fix this frustrating problem, and fast. We'll guide you through the steps.
Decoding the Digital Dilemma
First, what exactly is an IP address? It's your laptop's unique digital identity on the network. Think of it as your home address for the internet. The network gives you an IP address. It allows data to be sent to and from your device. An invalid IP configuration means your laptop can't properly communicate with the network. That is why you can't access the internet! This problem can stem from various sources. These include incorrect settings, a conflicting IP address, or even issues with your router. Understanding the root cause is crucial. Then you can troubleshoot effectively.
Troubleshooting Triumph: Your Step-by-Step Guide
Let’s dive into some solutions. These should get you back online.
1. Release and Renew: The Magic Command
This is often the simplest and most effective fix. We'll use the command prompt. It clears and renews your IP address.
- Press the Windows key and the "R" key simultaneously. This opens the Run dialog box.
- Type "cmd" and press Enter. This will open the command prompt.
- Type "ipconfig /release" and press Enter. This releases your current IP address.
- Then, type "ipconfig /renew" and press Enter. This gets a new IP address.
- Finally, type "ipconfig /flushdns" and press Enter. This clears the DNS cache.
Restart your computer. More often than not, this works wonders.
2. Router Reboot: A Network Refresh
Sometimes, the problem lies with your router. It needs a reboot.
- Unplug your router from the power outlet.
- Wait for at least thirty seconds. This gives it time to fully reset.
- Plug the router back in.
- Allow a few minutes for it to power up and reconnect to the internet.
- Reconnect your laptop to the Wi-Fi network.
This simple step can often clear up any network glitches.
3. Static IP vs. Dynamic IP: Understanding the Difference
Your router can assign IP addresses dynamically. It can also assign them statically. Dynamic IP addresses change. Static IP addresses remain the same. Confirm your settings. Your laptop might be attempting to use a static IP address. This is when the network uses dynamic IP addresses.
- Go to your network settings.
- Find "Change adapter options."
- Right-click on your Wi-Fi network.
- Select "Properties."
- Look for "Internet Protocol Version 4 (TCP/IPv4)." Select it.
- Click "Properties."
- Check the "Obtain an IP address automatically" box.
- Ensure "Obtain DNS server address automatically" is also checked.
4. Driver Detective: Updating Your Network Adapter
Outdated network drivers can cause connectivity issues. Updating them is a smart move.
- Press the Windows key and "X."
- Select "Device Manager."
- Expand "Network adapters."
- Right-click on your Wi-Fi adapter.
- Select "Update driver."
- Choose "Search automatically for drivers."
- Follow the prompts to install any updates.
Sometimes, outdated drivers cause problems. Updating can be the solution.
5. Check Your Security Software
Security software, like firewalls, can sometimes block network access. This can lead to an invalid IP configuration.
- Temporarily disable your firewall.
- Try connecting to the internet.
- If this resolves the issue, adjust your firewall settings.
- Allow your laptop to connect to your network.
- Re-enable your firewall.
Beyond the Basics: Advanced Troubleshooting Tips
If you've tried the above steps and still face issues, there are a few more things to consider.
1. Reset Network Settings
Windows gives you a network reset option. This brings your network settings back to default.
- Go to Settings > Network & Internet > Status.
- Scroll down and select "Network reset.”
- Follow the on-screen instructions.
2. Consider Hardware Issues
Sometimes, the problem isn't software. The Wi-Fi adapter might be faulty. If every other device works, this may be the cause. Consider getting a professional to examine your laptop.
3. Check for Conflicting Devices
Do other devices on your network have the same IP address? This can cause conflict. Check the IP address of each device. Ensure that they are unique.
Conclusion: Back to Browsing Bliss
Dealing with an invalid IP configuration can be frustrating. But, armed with these troubleshooting steps, you can take charge. More often than not, you can quickly resolve the issue. You'll be back online and browsing in no time! Remember to be patient and persistent. Good luck. Your internet awaits!
Unlock ANY WiFi Password Instantly: Laptop Trick Revealed!Laptop WiFi Nightmare? FIX Invalid IP Configuration NOW!
Oh, the sweet agony of the Wi-Fi. One minute you’re streaming cat videos in glorious HD, the next… nothing. That dreaded yellow triangle with the exclamation point. The gateway timeout errors that haunt your dreams. If you’re staring at your laptop screen, feeling like you’re marooned on a digital desert island, chances are you're wrestling with an invalid IP configuration. Don’t worry, friend, we've all been there. This isn’t a death sentence for your internet connection. We’re going to arm you with the knowledge (and the firepower!) to slay this particular digital dragon. Let's get you back online.
1. The Silent Scream of Your System: Understanding Invalid IP Configurations
Imagine trying to mail a letter, but the post office doesn’t recognize your address. That’s essentially what an invalid IP configuration feels like for your laptop. Your IP address is your digital address, and without a valid one, your device can’t communicate with the internet. It’s like shouting into a void. You're there, but no one can hear you. This usually shows up as "No internet access," limited connectivity, or the dreaded "Invalid IP Configuration" error message. It's a frustrating roadblock, but a solvable one. Sometimes, it's a simple glitch; other times, a bit more involved. But trust us, you can fix it.
2. Decoder Ring Time: Why Did This Happen?! Potential Culprits
Now, before we grab our digital wrench and start tinkering, let's figure out why this happened. Knowledge is power, and understanding the cause gets us closer to the solution. Here are some of the most common reasons behind an invalid IP configuration:
- Router Misbehaving: Your router, the gatekeeper of your internet, might be experiencing a hiccup. It’s like a grumpy bouncer at a digital club, denying entry for no good reason.
- IP Address Conflicts: Imagine two houses on the same street having the same address. Madness! Your laptop might be trying to use an IP address that’s already in use by another device on your network.
- Static IP Settings Gone Rogue: You or, more likely, someone like your tech-savvy neighbor, could've accidentally (or intentionally) set up a static IP address that’s causing trouble.
- Driver Drama: Outdated or corrupted network adapter drivers – imagine wearing shoes that don't fit. They can create all sorts of problems.
- Interference from Security Software: Firewalls or antivirus programs can sometimes overreact and block your internet connection. It’s like a overzealous security guard.
- DNS Disputes: The Domain Name System (DNS) translates website addresses into IP addresses. If these settings are incorrect, your laptop can’t find its way around the internet.
3. Restarting the Engine: The Simple First Steps (Don't Skip These!)
Before we delve into the advanced stuff, let's try the equivalent of kicking the tires and checking the gas. These are your basic troubleshooting steps:
- Restart, Restart, Restart! Yes, we sound like your grandma saying, "Have you tried turning it off and on again?". Seriously, a simple restart of your laptop and your router can often fix the problem. It's the digital equivalent of a good night's sleep.
- Check the Physical Connections: Are your cables plugged in securely? Is the Wi-Fi switched on? Sometimes the simplest solutions are the ones we overlook.
- Verify the WiFi Password: Double-check that you're entering the correct Wi-Fi password. It's incredibly embarrassing, and we've all done it.
4. Diving Deeper: Releasing and Renewing Your IP Address
Now that we have the basics out of the way, let's get our hands dirty. One of the most common and effective solutions is to "release" and "renew" your IP address. This forces your laptop to request a new, fresh IP address from your router. Here’s how to do it on Windows:
- Open Command Prompt: Search for "cmd" in the Windows search bar and open the "Command Prompt" application.
- Type and Execute: Type the following commands exactly as they appear, pressing Enter after each one:
ipconfig /releaseand thenipconfig /renew. This is your magic spell. - Cross Your Fingers: Wait a moment, and hopefully, your internet connection will be restored. If not, it’s on to the next stage of our mission.
5. Flushing the Fluff: Clearing the DNS Cache
Think of your DNS cache as the memory of your internet browsing. It stores the IP addresses of websites you've visited, allowing you to quickly access them. Occasionally, this cache can become corrupted, causing connectivity issues. Let's clear it out:
- Open Command Prompt (Again!): Yep, same as before.
- The Magic Incantation: Type
ipconfig /flushdnsand press Enter. - Success! You should see a confirmation message saying the DNS resolver cache was successfully flushed.
6. The Art of Network Adapter Troubleshooting
Your network adapter is the hardware that connects your laptop to the internet. Sometimes, it needs a little TLC. Let's troubleshoot:
- Device Manager: Right-click the Windows start button and select "Device Manager."
- Network Adapters: Expand the "Network adapters" section. You should see your Wi-Fi adapter (e.g., "Wireless Network Adapter") listed there.
- Driver Check: Right-click your Wi-Fi adapter and select “Update driver.” Choose "Search automatically for drivers.” Windows will try to find and install the latest drivers for you.
- Reinstalling Drivers: If updating doesn’t work, try uninstalling and reinstalling your network adapter. Right-click it, select “Uninstall device,” and then restart your laptop. Windows will automatically try to reinstall the drivers.
7. Static vs. Dynamic: Untangling IP Addressing
Your computer gets an IP address in one of two ways:
Dynamic IP: Typically, you get this automatically from your router. This is the default setting and what you want in most cases.
Static IP: This is a manually assigned IP address. Unless you have a good reason (and you probably don't), you shouldn't be using this. Let's make sure your device is set to grab an IP address automatically.
Network and Internet Settings: Open ‘Settings’ in Windows and click through “Network & Internet”.
Change Adapter Options: Click on “Change adapter options.” This will list your network connections (Wi-Fi and Ethernet if you have it).
Properties: (Wi-Fi Adapter): Right-click on your Wi-Fi adapter and select “Properties.”
Internet Protocol Version 4 (TCP/IPv4): Double-click on “Internet Protocol Version 4 (TCP/IPv4).”
Obtain an IP Address Automatically: Ensure that "Obtain an IP address automatically" and "Obtain DNS server address automatically" are selected. If not, select them, click "OK," and restart your laptop.
8. Router Reboot Redemption: The Overlooked Fix
Your router is the central hub of your internet connection. Sometimes, it just needs a good kickstart.
- Unplug and Wait: Unplug your router from the power outlet.
- The Waiting Game: Wait a full minute. This gives the router a chance to completely reset.
- Plug it back in and wait another few minutes (for it to boot up properly).
9. The DNS Dilemma: Switching to Public DNS Servers
Your DNS server (the digital phonebook of the internet) might be the problem. Try using a public DNS server like Google's:
- Network and Internet Settings: Open your ‘Settings’ in Windows and click through “Network & Internet”.
- Change Adapter Options: Click on “Change adapter options.” This will list your network connections (Wi-Fi and Ethernet if you have it).
- Properties: (Wi-Fi Adapter): Right-click on your Wi-Fi adapter and select “Properties.”
- Internet Protocol Version 4 (TCP/IPv4): Double-click on “Internet Protocol Version 4 (TCP/IPv4).”
- Use the Following DNS Server Addresses: Select “Use the following DNS server addresses.”
- Input the settings: Enter 8.8.8.8 (Preferred DNS server) and 8.8.4.4 (Alternative DNS server). These are Google's public DNS servers.
- Click OK and Restart: Click "OK" and restart your laptop.
10. Security Software Showdown: Disabling Temporarily.
Your security software (firewall, antivirus) can occasionally block your internet connection. To test, disable it temporarily to see if it's the culprit. Be cautious: only do this for a short period and re-enable it afterward.
- Find your security software in the system tray.
- Select the disable option.
- Test your internet connection.
- Re-enable immediately after the test! If the connection is working, you will have to
WiFi Doesn't have a valid IP configuration on Windows 10

By FIXsage WiFi Doesn't have a valid IP configuration on Windows 10 by FIXsage
How to Fix Wi-fi Doesnt Have A Valid IP Configuration

By TechSimplify How to Fix Wi-fi Doesnt Have A Valid IP Configuration by TechSimplify
WiFi Doesn't have a valid IP configuration in Windows 11 10 87 - How To Fix WI-FI Error

By Victor Explains WiFi Doesn't have a valid IP configuration in Windows 11 10 87 - How To Fix WI-FI Error by Victor Explains

Title: 2025 Fix Ethernet doesnt have a valid IP configuration in Windows 1011
Channel: How To Fix Tech
2025 Fix Ethernet doesnt have a valid IP configuration in Windows 1011 by How To Fix Tech
Wifi On Laptop
Laptop WiFi Nightmare? FIX Invalid IP Configuration NOW!
Is your laptop's Wi-Fi connection suddenly a source of frustration? Are you staring at an error message, specifically an "Invalid IP Configuration," and feeling utterly disconnected from the digital world? You're not alone. Countless users encounter this infuriating problem, but the good news is that solutions are readily available. We're here to guide you through the troubleshooting process, providing clear, concise, and actionable steps to resurrect your laptop's internet access and banish that pesky "Invalid IP Configuration" error for good. Prepare to reclaim your online experience.
Understanding the Invalid IP Configuration Error
Before diving into the fixes, it’s crucial to grasp what this error signifies. The "Invalid IP Configuration" message typically indicates that your laptop is unable to obtain a valid IP address from your network's router. This IP address is essentially your laptop's unique identifier on the network, allowing it to communicate with other devices and access the internet. Without a valid IP, your laptop is essentially adrift, unable to send or receive data. This can manifest in several ways: a lack of internet access, extremely slow speeds, or intermittent connectivity issues. Various factors can trigger this error, ranging from minor glitches to more complex network configuration problems. However, the most common culprits revolve around issues with the DHCP (Dynamic Host Configuration Protocol) server, which is responsible for assigning IP addresses, your network adapter settings, or conflicts within your network itself.
Step-by-Step Troubleshooting: Your Path to Connectivity
Let's walk through a structured approach to resolve your "Invalid IP Configuration" dilemma. Follow these steps sequentially, and you'll likely find your solution swiftly.
1. The Simple Restart: Your First Line of Defense
This might seem overly simplistic, but frequently, a simple reboot can work wonders. Restart your laptop. Then, restart your router and modem. Wait a full minute after powering them off before turning them back on. This allows all devices to refresh their configurations and re-establish connections. This process can often clear temporary software glitches or conflicts that might be the root cause of the error. Ensure all devices are fully booted before attempting to reconnect to your Wi-Fi network.
2. IP Release and Renew: Forcing a Configuration Refresh
This is one of the most common and effective solutions. Here's how to do it:
- Open Command Prompt as Administrator: In the Windows search bar, type "cmd." Right-click on "Command Prompt" and select "Run as administrator." This step is critical, as you'll need administrative privileges to modify network settings.
- Release the Current IP: In the Command Prompt window, type
ipconfig /releaseand press Enter. This command instructs your laptop to relinquish its current IP address. - Renew the IP Address: Next, type
ipconfig /renewand press Enter. This command forces your laptop to request a new IP address from the network. - Check Your Connection: After the process completes, test your internet connectivity. You should now have a valid IP address.
3. Troubleshooting the Network Adapter: Driver Issues and Resetting
Sometimes, the issue lies with your laptop's network adapter. Here’s how to troubleshoot:
- Update Network Adapter Drivers: Outdated or corrupt drivers can cause connectivity problems. To update your drivers:
- Right-click the Start button and select "Device Manager."
- Expand "Network adapters."
- Right-click on your Wi-Fi adapter (it might be named something like "Wireless Network Adapter" or "Intel Wireless-AC").
- Select "Update driver."
- Choose the option to "Search automatically for drivers." Windows will attempt to find and install the latest drivers.
- If Windows can't find anything, visit the manufacturer's website (Intel, Realtek, etc.) and download the latest drivers for your specific adapter model.
- Reset Network Adapter: If updating doesn't work, you can reset your network adapter:
- In Device Manager, right-click your Wi-Fi adapter and choose "Uninstall device."
- Restart your computer. Windows should automatically reinstall the adapter and drivers.
4. Static IP Configuration: A Manual Approach
If the DHCP server isn't working correctly, you can manually assign a static IP address to your laptop. However, you'll need some information from your router’s configuration.
- Gather Network Information: Access your router’s configuration. This is usually done by entering your router's IP address in your web browser (e.g., 192.168.1.1 or 192.168.0.1; check your router’s documentation). Log in with your router's admin credentials. Find your router's default gateway and the subnet mask. Also, note the DNS server addresses. If you can, find the range of IP addresses your router assigns via DHCP.
- Configure the Static IP:
- Open "Network Connections" (search for it in the Windows search bar).
- Right-click on your Wi-Fi network connection and select "Properties."
- Double-click on "Internet Protocol Version 4 (TCP/IPv4)."
- Select "Use the following IP address."
- Enter a valid IP address. A valid IP typically starts from 192.168.1.X, 192.168.0.X, or 10.0.0.X. It should be outside the DHCP range and match the network IP range. Make sure the last digit of your chosen IP address is not already in use.
- Enter the subnet mask. Usually, this is 255.255.255.0.
- Enter your router's default gateway.
- Enter the DNS server addresses (often your router’s IP, or try Google's public DNS servers: 8.8.8.8 and 8.8.4.4).
- Click "OK" and test your internet connection.
5. Flush DNS: Clearing the Cache
The Domain Name System (DNS) translates website names into IP addresses. A corrupted DNS cache can sometimes cause connection problems. Here's how to clear it:
- Open Command Prompt as Administrator: (As detailed in step 2).
- Flush the DNS cache: Type
ipconfig /flushdnsand press Enter. This command clears the DNS cache stored on your computer. - Restart your computer after flushing the DNS cache.
6. Firewall Interference: Temporarily Disable Your Firewall
Sometimes, your firewall (Windows Firewall or third-party firewall software) might be blocking your laptop's access to the internet.
- Temporarily Disable Firewall: Disable your Windows Firewall or the third-party firewall. Be cautious when doing this, as it can make your computer vulnerable. Test your internet connection.
- Re-enable Firewall and Configure Exceptions: If disabling the firewall resolves the issue, you'll need to re-enable it and configure exceptions for your applications to allow them to access the internet. Consult your firewall software's documentation for instructions.
7. Network Reset: Rolling Back Network Settings
If all else fails, you can reset your network settings to their default configuration. This is a more drastic measure but is often effective.
- Network Reset:
- Go to "Settings" > "Network & internet" > "Status."
- Scroll down and click "Network reset."
- Follow the on-screen instructions. This will remove and reinstall your network adapters and revert network settings to their defaults. You will need to re-enter your Wi-Fi password after the reset.
8. Router Firmware and Configuration: Checking for Issues
Sometimes, the problem lies with the router itself.
- Update Router Firmware: Check your router manufacturer's website for firmware updates. Firmware updates can fix bugs and improve performance.
- Check Router Configuration: Ensure the router’s DHCP is enabled. If you are using a static IP, make sure DHCP is disabled on your router as it would conflict with your static configurations. Check for any MAC address filtering that might be blocking your device.
Advanced Troubleshooting and Prevention Strategies
While the above steps address the most common causes, here are some additional troubleshooting steps and preventative measures to keep in mind:
- Check for Conflicting Devices: Ensure no other devices on your network are using the same IP address as your laptop. This is a rare occurrence, but it can cause conflicts. Review the devices connected to your network through your router's admin interface.
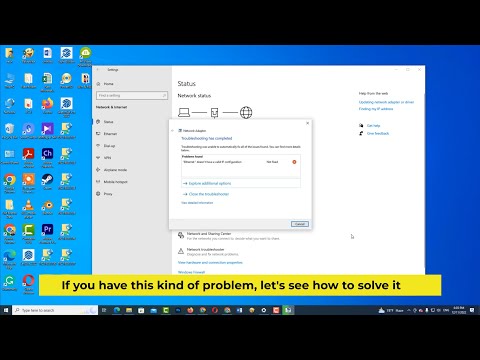
- Run a Network Diagnostics Tool: Windows has a built-in network troubleshooter. Right-click the network icon in the system tray, and select "Troubleshoot problems." This tool can automatically detect and fix some common network issues.
- Consider a Wireless Network Analyzer: Download and install a wireless network analyzer app for your laptop. This app can scan for nearby Wi-Fi networks, identify channel congestion, and suggest the best channel for your router.
- Regular Maintenance: Keep your operating system and drivers updated. Updates often include bug fixes and security patches that can prevent network issues. Run regular malware scans to rule out any infections that might be interfering with your network connection.
