broadcast wifi from laptop windows 7

Title: How to enable your network connection in Windows 7
Channel: MHELP2U
How to enable your network connection in Windows 7 by MHELP2U
Unlock Blazing-Fast WiFi From Your Windows 7 Laptop: The Secret Trick!
Supercharge Your Windows 7 Laptop's WiFi: The Hidden Boost You Need!
It's frustrating, right? That constant lag, the buffering wheel of doom, the feeling your internet connection is crawling. You yearn for speed, the effortless glide of a truly responsive online experience. Well, grab a seat, because this isn’t just another tech tip. It’s a game-changer. Today, we're diving deep, revealing a secret that'll make your Windows 7 laptop's WiFi practically sing.
The WiFi Blues: Recognizing the Symptoms
Slow internet can manifest in so many ways. Initially, webpages load sluggishly, taking an eternity to appear. Then, streaming videos stutter and freeze, disrupting your viewing pleasure. Email downloads crawl, leaving you waiting impatiently. Furthermore, online gaming becomes a lag-filled nightmare, ruining your fun. Consequently, these issues can wreak havoc on productivity and enjoyment. You are not alone in facing this. Many Windows 7 users silently suffer. However, there is light at the end of the tunnel.
Unveiling the Hidden WiFi Potential
Let's cut to the chase. The core issue often stems from outdated drivers. They're the unsung heroes (or sometimes villains) of your laptop's connectivity. They control how your laptop interacts with your WiFi adapter. They are critical. Think of them as the translators, ensuring smooth communication between your hardware and the internet. Because of this, outdated drivers are a major bottleneck. In essence, they're the key to unlocking the hidden power within your WiFi card.
Step-by-Step: Updating Your WiFi Drivers
This isn't rocket science, I promise. You can do it. We will get through this together. Follow these simple steps. First, hit the Windows key, or click the Start button. Then, type "Device Manager" into the search bar. Press Enter. This opens a window that is filled with your computer's hardware. Now, let's find your network adapter.
Within the Device Manager window, look for "Network adapters." Click the small arrow next to it. This reveals a list of your network devices. You'll typically see your WiFi adapter listed here (it might have a name like "Wireless Network Adapter" or something similar). Right-click on your WiFi adapter's name. From the context menu, select "Update driver." A new window will pop up.
Choose "Search automatically for updated driver software." Windows will now search online for the latest drivers. If updates are found, the system will download and install them automatically. This is a huge time-saver. Afterwards, you might be prompted to restart your computer. Follow the prompts carefully. This restart helps the new drivers take effect.
Beyond Drivers: Fine-Tuning Your Connection
Updating the drivers is the primary step. However, there are also other things to consider. Let's explore a few additional tweaks. First, ensure your router is positioned optimally. Avoid obstructions like walls or electronic devices. Secondly, consider the 2.4 GHz and 5 GHz bands if your router supports them. The 5 GHz band often offers faster speeds, but has less range. Conversely, the 2.4 GHz band travels further but might be slower.
Furthermore, verify your WiFi signal strength. Hold your cursor over the WiFi icon in the system tray. This displays the current signal strength. Ideally, you want a strong signal. If the signal is weak, try moving closer to your router. Alternatively, you may consider investing in a WiFi extender.
The Power of a Clean Startup
Unnecessary programs can interfere with your WiFi. A cluttered system slows everything down. To remedy this, perform a clean boot. Press the Windows key + R. This opens the "Run" dialog box. Type "msconfig" and press Enter. The System Configuration window pops up. Click on the "Services" tab. Check the box that says "Hide all Microsoft services." Then, click "Disable all". Move to the "Startup" tab. Open Task Manager. Disable all startup programs. Restart your computer.
After rebooting, test your internet speed. Use an online speed test website (like Speedtest.net). Compare the results to your internet plan's advertised speeds. You should see a noticeable improvement.
Troubleshooting Common WiFi Issues
Occasionally, you might encounter further issues. Don't panic! Because we have a few troubleshooting tips. Firstly, ensure your router firmware is up-to-date. Visit your router manufacturer's website to find the latest updates. Reboot your router. This simple action can often resolve minor glitches. Check your laptop for malware. Scan your system with a reputable antivirus program. In addition, disable any firewalls temporarily. This helps determine if your firewall is blocking your connection.
Conclusion: Unleash Your Laptop's WiFi Potential
Ultimately, faster WiFi on your Windows 7 laptop is within reach. Therefore, give the solutions a shot. Implementing these steps will seriously improve your online experience. Remember, updating your drivers is the crucial first step. Fine-tuning your settings helps to maximize performance. Soon, you will have blazing fast WiFi. Experience the freedom of a seamless internet connection. So, get started today and transform your laptop's WiFi from sluggish to sensational. You deserve it!
HP Laptop Wifi MIA? Find Your Network NOW!Unlock Blazing-Fast WiFi From Your Windows 7 Laptop: The Secret Trick!
Alright, folks, gather 'round! Ever felt like your trusty Windows 7 laptop, that old friend that's seen you through thick and thin, is suddenly a slowpoke? Especially when it comes to WiFi? You’re probably staring in disbelief at your loading web pages, feeling that digital frustration creep in. We've all been there. It's like watching paint dry or, even worse, waiting for a dial-up modem to eventually connect (shudders). But fear not! Because today, we're diving headfirst into a secret trick to unlock blazing-fast WiFi on your Windows 7 laptop. Prepare to have your mind blown (or at least your internet speed significantly improved). And trust me, this isn't some technical mumbo jumbo that requires a degree in rocket science. It's straightforward and achievable, even if you consider yourself less than tech-savvy.
1. The WiFi Woes: Why Is My Windows 7 Laptop So Slow?
Before we jump into the magic, let's understand the problem. Think of your WiFi connection like a highway. Your laptop is the car, and the internet is the destination. Now, a few things might be causing traffic jams. It might be the drivers (your laptop's WiFi settings), the road conditions (the network), or even the vehicle itself (the age of your laptop). The main culprits on a Windows 7 laptop are often outdated drivers, a crowded WiFi channel, or the interference from other electronic devices. It's like trying to race your car on a muddy road; you're going to struggle to go fast.
2. The Secret Weapon: Updating Your WiFi Adapter Driver
Here's the secret, and it's simpler than you might think. The key to unlocking speed is often tucked away in a small but powerful component: your WiFi adapter driver. This driver is like the translator between your laptop and the internet. If it's old or corrupted, it’s like trying to order pizza in a language you barely understand – things get muddled. So, updating this driver is our secret weapon.
3. Finding Your WiFi Adapter's Name (It's Easier Than You Think)
First things first, we need to know the name of your WiFi adapter. It's not as complicated as it sounds.
- Step 1: Open Device Manager. Click on the Start button, type "Device Manager" in the search box, and hit Enter. Alternatively, right-click on "Computer" (or "This PC") on your desktop and select "Properties." In the left pane, click "Device Manager".
- Step 2: Locate Network Adapters. In the Device Manager window, find the "Network adapters" category and click the little arrow to expand it.
- Step 3: Identify Your WiFi Adapter. You'll see a list of network adapters. Look for the one that mentions "Wireless," "WiFi," or "802.11." That's your WiFi adapter. Jot down the name, as you'll need it in the next step. Something like "Intel(R) Centrino(R) Wireless-N 1000" is a typical example.
4. Bringing Your Drivers Up to Speed: The Update Process
Now that you know the name, it's time to update. There are two main ways to do this:
Method 1: Through Device Manager (Automated).
- Right-click on your WiFi adapter in Device Manager.
- Select "Update driver."
- Choose "Search automatically for drivers." Windows will try to find and install the latest driver. This is the easiest option, but it doesn't always work perfectly.
Method 2: Manually from the Manufacturer’s Website (More Reliable). This one's a bit more involved but often yields better results.
- Find your Laptop’s Manufacturer’s Website: Go to Google (or your preferred search engine) and search for your laptop's manufacturer (e.g., "Dell," "HP," "Lenovo") support website.
- Navigate to Drivers & Downloads: On the support website, find the "Drivers & Downloads" section.
- Enter your Laptop’s Model Number: You'll usually need to enter your laptop's model number (found on a sticker on the bottom of your laptop or in the specifications), or select it from a list.
- Find the WiFi Driver: Search for the WiFi driver specifically. You might need to filter by your Windows 7 operating system.
- Download and Install: Download the correct driver and follow the installation instructions. This often involves running the downloaded installer and following the on-screen prompts.
5. Restart, Refresh and Reconnect: The Crucial Next Step
After updating the driver, it’s absolutely crucial to restart your laptop. This is, in effect, like hitting the reset button for your WiFi capabilities. Once your laptop is back up and running, reconnect to your WiFi network. Fingers crossed, you should already notice an improvement in your wifi speeds!
6. Tweaking Your Router Settings: The Next Frontier
Updating your drivers will often work wonders. But, sometimes, there are other things hindering your speed. Your router settings are the next area to investigate. It's not always necessary, but it certainly helps to optimize them.
- Channel Selection: Routers broadcast on different channels. Some channels can be more congested than others. Your router's manual should explain how to change this, often through your router's settings page (accessed by typing your router’s IP address into a web browser). Experimenting with different channels can sometimes clear up congestion.
- Router Placement: Ensure your router is centrally located in your home and is unobstructed. Avoid placing it near walls or metallic objects, as they can interfere with the signal.
7. Unveiling the Hidden Issue: Background Applications & Bandwidth Hogs
Your laptop may be blazing fast, but some programs may still be slowing down your internet. Some Applications constantly use your internet, reducing your speed. Let's consider some steps to solve this:
- Monitor Network Usage: Open Task Manager (Ctrl+Shift+Esc). Go to the "Performance" tab and then to "Open Resource Monitor". Under the "Network" tab, you can see which applications are currently using the most bandwidth. Close any resource-intensive applications you don't need.
- Close Unnecessary Programs: Close any applications that you are not using and can affect your internet speeds.
- Disable Unnecessary Background Processes: Prevent auto-updated, apps, services from running in the background unnecessarily, especially those that update and upload data to the internet.
8. The Great Firewall Conundrum: Antivirus and Firewall Settings
Firewalls are essential for security, but they can sometimes interfere with your internet speed.
- Check Firewall Settings: Make sure that your firewall (both Windows Firewall and any third-party antivirus firewalls) is not overly restrictive.
- Temporarily Disable Antivirus: If your internet speed is still an issue, you can temporarily disable your antivirus software to see if it is the culprit, but make sure to do this safely and not for too long.
9. The Hardware Factor: Is Your Adapter Up to the Task?
Let's be honest. Sometimes, it's not a software issue. Your WiFi adapter might be old and simply not capable of the speeds your internet plan offers.
- Check Adapter Specs: Look up the specifications of your WiFi adapter. See what wireless standards it supports (e.g., 802.11b, g, n, or ac). Newer standards offer faster speeds.
- External WiFi Adapters: If your internal adapter is outdated, consider investing in an external USB WiFi adapter. These are often more powerful and support newer standards.
10. The Power Saver Pitfall: Check Your Power Settings
Windows 7 has power-saving settings that can unintentionally throttle your WiFi performance.
- Power Options: Go to Control Panel > Power Options.
- Choose a High-Performance Plan: Select a power plan that prioritizes performance over power savings.
- Adapter Settings: Make sure that your wireless network adapter settings are set to "Maximum Performance" in the advanced power options.
11. The Data Capacity Dilemma: Clearing Cache Files
Over time, your laptop accumulates temporary files that can slow down performance. Clearing these can improve speeds. Especially if the WiFi is being bogged down with data.
- Clear Temporary Files: Use Disk Cleanup (search for it in the Start menu) to remove temporary files and other unnecessary data.
- Clear Browser Cache: Clear your browser's cache and cookies to ensure that you're loading the most up-to-date content.
12. Physical Obstructions: The Invisible Impediments
Sometimes, the problem isn't software at all. Physical obstructions can also interfere with your WiFi signal.
- Move Your Laptop Closer to the Router: Try moving your laptop closer to your router, to check the signal.
- Remove Obstructions: If possible, remove any objects that could be blocking the signal, especially thick walls or metal objects.
13. Keep Your Windows 7 Updated: The Ongoing Battle
While this article is about WiFi, we can't neglect the bigger picture. Make sure your Windows
Windows 7 WiFi Nightmare? FIX Your Laptop Connection NOW!How to disable your network connection in Windows 7

By MHELP2U How to disable your network connection in Windows 7 by MHELP2U
Cara Download & Install Driver WIFI & ETHERNET Manual untuk Windows 781011

By inprez id Cara Download & Install Driver WIFI & ETHERNET Manual untuk Windows 781011 by inprez id
How to Create a WiFi Hotspot with Windows 7

By 1stepatatime How to Create a WiFi Hotspot with Windows 7 by 1stepatatime
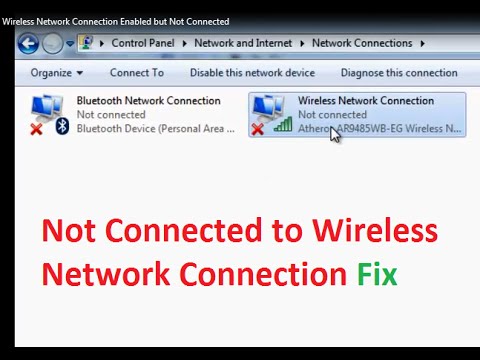
Title: Wireless Network Connection Enabled but Not connected Fix Windows 7
Channel: troubleshooterrors
Wireless Network Connection Enabled but Not connected Fix Windows 7 by troubleshooterrors
Laptop Wifi Hotspot
Unlock Blazing-Fast WiFi From Your Windows 7 Laptop: The Secret Trick!
Are you tired of sluggish internet speeds on your Windows 7 laptop? Do you find yourself staring into the abyss of a buffering video, or watching your downloads crawl at a snail's pace? We understand the frustration. In today's hyper-connected world, reliable and speedy Wi-Fi access is no longer a luxury; it's a necessity. Luckily, you're in the right place. We’re about to unveil a hidden technique that can significantly boost your Wi-Fi performance, transforming your Windows 7 laptop into a speed demon. Forget the days of agonizing lag – prepare for a seamless online experience.
Understanding the Wi-Fi Bottleneck: Why Your Windows 7 Laptop Might Be Slow
Before we dive into the solution, let's briefly examine the common culprits behind slow Wi-Fi performance on older machines. Windows 7, while a robust operating system in its time, is now several generations removed from the latest advancements in network technology. This means your laptop's built-in Wi-Fi adapter may not be optimized for the faster speeds and advanced protocols of modern wireless networks. Furthermore, outdated drivers, network congestion, and even physical obstructions can significantly hamper your Wi-Fi speeds.
The Secret Trick: Unleashing the Power of the Wireless Adapter
The core of this performance boost lies in optimizing your Wi-Fi adapter settings. While the default configuration might be adequate for basic browsing, it often leaves significant performance potential untapped. By making a few strategic adjustments, you can unlock a faster and more stable Wi-Fi connection. Note that this method might not work if you have a hardware failure on your wireless adapter.
Step-by-Step Guide: Optimizing Your Windows 7 Wi-Fi Adapter for Peak Performance
Follow these meticulously detailed steps to supercharge your wireless adapter:
Accessing the Device Manager: Begin by clicking the Windows "Start" button. In the search box, type "Device Manager" and select it from the results. This powerful tool grants access to all the hardware drivers on your system, including your Wi-Fi adapter.
Locating Your Wireless Network Adapter: Within the Device Manager window, expand the "Network adapters" category. You'll see a list of all the network adapters installed on your laptop, including your Ethernet adapter (if you have one) and, crucially, your Wi-Fi adapter. The exact name of your Wi-Fi adapter will vary depending on your laptop's manufacturer, but it will likely include terms like "Wireless," "Wi-Fi," or "802.11." Double-click on the adapter to open its properties.
Navigating to the Advanced Tab: In the properties window for your Wi-Fi adapter, navigate to the "Advanced" tab. This is where the real magic happens. Here, you'll find a list of configurable settings specific to your wireless adapter. These settings directly influence its performance, and understanding them is key to unlocking faster speeds.
Understanding the Crucial Settings and Making Precise Adjustments: The specific settings available may vary slightly based on your Wi-Fi adapter, but several critical settings are commonly found. We will delve into the most important ones and the rationale behind each change:
802.11n Channel Width: This setting dramatically affects the speed of your connection. It specifies the width of the radio channel used for communication. By default, it might be set to "Auto" or a lower value. Change this to "20/40 MHz." This allows your adapter to utilize wider channels, which translates to higher potential data transfer rates. Remember, this setting is only effective if your router and the surrounding environment are also configured to support wider channels.
Wireless Mode: This setting determines the highest Wi-Fi standard your adapter supports. Choose "802.11n" or the highest standard supported by both your adapter and your router (e.g., 802.11ac or 802.11ax.) While older standards like 802.11g are compatible, they offer significantly slower speeds. Selecting the most advanced standard ensures your adapter uses the fastest possible data transmission rates.
Transmit Power: This setting controls the signal strength of your Wi-Fi adapter. A higher transmit power setting can increase signal range and stability. Choose the highest available setting; this is typically labeled "Highest." Be mindful of your local regulations and the proximity of other devices. While increasing the transmit power is usually beneficial, excessively high settings could potentially cause interference with other wireless devices.
Antenna Diversity: If your laptop supports multiple antennas, this setting allows it to select the antenna with the strongest signal. Ensure this setting is enabled, typically set to "Auto" or "Enabled." This maximizes reception quality and helps maintain a stable connection.
Fragmentation Threshold: This setting controls how large packets of data can be before they are fragmented into smaller pieces. A lower threshold can improve reliability in noisy environments. Experiment with values between 2304 and 2346. Start at a slightly lower value (e.g., 2304) and see if it improves performance. If you experience connectivity issues, increase the fragmentation threshold.
RTS Threshold: This setting controls the Request to Send (RTS) threshold. Similar to the fragmentation threshold, a lower value can improve reliability in noisy environments. However, a very low value might decrease overall performance. Experiment with values between 2304 and 2347 as well. Try lowering it slightly if you're experiencing intermittent connection drops; otherwise, leave it at its default value (often 2347).
WMM (Wi-Fi Multimedia) Support: Ensure that WMM is enabled. This feature prioritizes multimedia traffic, ensuring smoother streaming and online gaming experiences.
Applying the Changes and Restarting: After making these adjustments, click "OK" to save the settings. In some cases, your Wi-Fi adapter may require a restart for the changes to take full effect. You might need to disconnect and reconnect to your Wi-Fi network.
Updating Your Wireless Adapter Drivers: Outdated drivers can significantly hinder performance. It's crucial to ensure you have the latest drivers for your wireless adapter. While the Device Manager often provides an option to update drivers, we recommend visiting your laptop manufacturer's website (e.g., Dell, HP, Lenovo) and downloading the latest drivers specifically designed for your laptop model and Windows 7. Install the downloaded drivers; they often include optimization improvements.
Troubleshooting Common Problems and Optimizing Further
Even after applying these settings, you might encounter occasional issues. Here are some troubleshooting steps to further enhance your Wi-Fi experience:
Router Placement and Interference: Ensure your router is strategically placed, ideally in a central location, free from obstructions like walls or metal objects that can interfere with the Wi-Fi signal. Keep your router away from microwave ovens, Bluetooth devices, and other devices that operate on the 2.4 GHz frequency band.
Router Channel Selection: Modern routers often automatically select the least congested Wi-Fi channel. However, you can manually choose a channel to reduce interference from neighboring Wi-Fi networks. Use a Wi-Fi analyzer app (available for smartphones and other devices) to identify the least crowded channels in your area and adjust your router's settings accordingly.
Network Congestion: If multiple devices are simultaneously using your Wi-Fi network, it can slow down your connection. Try limiting the number of devices actively using the network during peak usage times.
Security Protocols: Ensure your Wi-Fi network is secured with a strong password and the latest WPA2 or WPA3 encryption protocol. Weak security can lead to unauthorized access and slow down your network.
Internet Service Provider (ISP) Limitations: While the steps we’ve outlined focus on your laptop's settings, remember that your Wi-Fi speed is ultimately limited by your internet service plan. If you consistently experience slow speeds, consider upgrading to a faster internet plan from your ISP.
The Result: Experiencing a Faster, More Responsive Connection
By carefully following these detailed steps, you can effectively unlock the hidden potential of your Windows 7 laptop's Wi-Fi adapter. You should experience significantly faster download and upload speeds, smoother video streaming, and a more responsive online experience. Keep in mind that the results may vary depending on your hardware and the setup of your wireless network. However, by implementing these optimization techniques, you'll be well on your way to enjoying blazing-fast Wi-Fi speeds, even on your trusty Windows 7 laptop. Enjoy the newfound speed and responsiveness!
