how to connect laptop to pc via wifi router

Title: Transfer Files Between Two Laptops over Wi-Fi
Channel: Techy Druid
Transfer Files Between Two Laptops over Wi-Fi by Techy Druid
how to connect laptop to pc via wifi router, how to connect laptop to pc via wifi windows 10, how do i connect my wifi router to my laptop
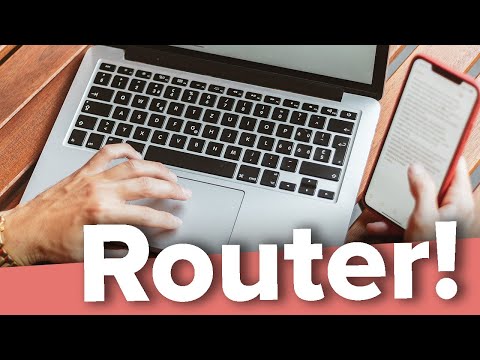
Laptop to PC Wireless: The SHOCKINGLY Easy Trick You NEED!
Blast Off: Unleash Wireless Magic Between Your Laptop and PC!
Ever wished you could magically meld your laptop and PC into a single, seamless digital ecosystem? Well, hold onto your hats, because you absolutely can! Forget clunky cables and endless frustration. This isn't some techy mumbo jumbo. Instead, it's a shockingly easy trick everyone can master. Get ready to unlock a new level of convenience and productivity. Let's dive right in!
Embrace the Wireless Revolution: Ditching the Wires, Embracing the Freedom
For years, we've been tethered to our devices by a tangled web of wires. We know those days are over. We now live in a world where wireless connectivity reigns supreme. Therefore, why should your laptop and PC be any different? Imagine effortlessly transferring files, sharing your internet connection, or even controlling your PC from your laptop. Seriously, it is all possible. This isn't a futuristic fantasy. It's now incredibly easy to make a reality.
Unveiling the Secret Weapon: Your Wi-Fi Connection's Power
The key to this wireless wonder? Your trusty Wi-Fi connection! Before anything else, ensure both your laptop and your PC are connected to the same Wi-Fi network. This simple step is the foundation of everything else. Thus, think of your Wi-Fi router as the invisible bridge connecting your two digital worlds. It allows them to "talk" to each other. So, verify that connection prior to anything else.
Step 1: Sharing is Caring: Configuring File Sharing on Your PC
First, you'll need to configure file sharing on your PC. This part seems complicated, but it is really simple when you break it down. Therefore, navigate to your PC's settings. Then, seek out the "Network and Sharing Center." Next, select "Change advanced sharing settings." Here, you'll find options to enable file and printer sharing. Furthermore, enable network discovery. This will allow your laptop to "see" your PC on the network. After making these changes, save the settings. That is the first step completed!
Step 2: The Laptop's Perspective: Connecting to Your PC
Now, it’s time to turn your attention to your laptop. Open File Explorer. Next, look at the left-hand side of the screen. You should see "Network" listed. Click on it. If you are in the same network, you should see your PC listed there. If you do not yet, give it a moment. Then, you might need to refresh the window. Once your PC appears, double-click on it.
Step 3: Access Granted: Entering Your Credentials (If Needed)
If prompted, you'll need to enter your PC's username and password. This is a security measure to protect your files. So, enter the correct credentials. Then, voila! You should now have access to the shared folders on your PC. You shall be able to view files, copy them, and even run applications, depending on the permissions you've set.
Step 4: Beyond Files: Other Wireless Possibilities
The fun doesn't stop there! This setup opens the door to other exciting possibilities. However, let's explore other applications. For instance, you can set up your PC as a media server. Now your laptop can then stream movies, music, and photos. Additionally, you can use your laptop to remotely control your PC. This is useful if you’re presenting or just want to access your PC from another room. Therefore, the possibilities are truly endless.
Troubleshooting: Conquer Common Challenges
Sometimes, things don't go as planned. But don't worry! Troubleshooting is easy. If you can't see your PC on your laptop, double-check your Wi-Fi connection. Also, make sure file and printer sharing is enabled on your PC. Furthermore, check your firewall settings. It can sometimes block network connections. Finally, restart both devices. A simple reboot often works wonders. Therefore, address these points if anything goes awry.
The Payoff: Efficiency and Convenience, Unlocked!
So, what's the payoff of mastering this simple trick? Think of the time and effort you'll save. No more fumbling with USB drives or emailing yourself files. Instead, you can easily transfer data between your laptop and PC. This allows for seamless collaboration. This makes working on multiple devices a breeze. In addition, you gain the freedom to access your PC files from anywhere in your home.
Conclusion: Go Wireless, Go Ahead and Transform Your Workflow!
You now know the secret to wirelessly connecting your laptop and PC. It is an easy trick with huge rewards. You can easily transform your digital life. So, embrace the power of wireless technology. Therefore, ditch those wires and unlock a new level of convenience, productivity, and freedom of movement. So, go ahead and give it a try. Therefore, you will have an amazing experience. You'll realize how easy it truly is. You might find yourself wondering why you didn't do this sooner! You will not regret it!
Toshiba Satellite C55D-A5120 WiFi Fix: Get Online NOW!Laptop to PC Wireless: The SHOCKINGLY Easy Trick You NEED!
Alright, tech adventurers, let's dive into something that's been driving many of us absolutely bananas: transferring files wirelessly between your laptop and your trusty PC. Remember those days of wrestling with USB drives like they were ancient relics? Ugh, I do! So, we're talking about ditching the cables and embracing the sweet freedom of wireless magic. And trust me, it's far easier than you probably think. We're going to uncover the SHOCKINGLY Easy Trick You NEED!
1. The Cable-Free Dream: Why Go Wireless?
Let's face it, we live in a wireless world. Our phones connect to the internet without wires; our headphones sing to us without wires; even our toothbrushes… okay, maybe not, but you get the picture! The ability to move files—photos, videos, documents, the embarrassing memes you totally meant to send to your friend—seamlessly between your laptop and your PC without having to connect any cables is a game-changer. It's like upgrading from a horse-drawn carriage to a sports car. It's about convenience, practicality, and a whole lot of "Wow, that was easy!" Seriously, who wants to root around for a USB drive anymore? Not this girl, definitely not!
2. The Usual Suspects: The Hurdles We Face
Before we get to the juicy stuff, let's acknowledge the common frustrations. Often, the thought alone of wirelessly transferring files feels daunting. We imagine complicated setup procedures, compatibility issues, and settings that make your brain spin. Sometimes we think of those older methods like Bluetooth - well, those are generally SLOW. Or we might even delve into third-party apps, that you are not really sure you can trust in the first place. It's enough to make you just grab the old USB drive, right? But wait! There's a better way, and it’s delightfully simple.
3. Your Secret Weapon: The Power of Network Sharing
The core of this super-secret, not-so-secret trick is something you probably already have: your home network! Think of your home Wi-Fi as the invisible highway connecting your devices. Most computers, whether laptop or desktop, are already capable of sharing files across this highway. It's like having a digital postal service, but instead of waiting days, your files arrive in seconds! The best part? It's built right into your operating system.
4. Windows Magic: Setting Up File Sharing on Your PC (The Easy Way)
Okay, let's get down to brass tacks. This is where the magic happens. Here’s the Windows version – simplified, of course.
- Step 1: Identify Your PC's Name: First things first, find your PC's name. This is usually found in the System Information or Settings app (search for “System Information” or “Settings” in the Start menu). You’ll need this later.
- Step 2: Enable Network Discovery and File Sharing: Go to the Control Panel (search for it in the Start menu), then navigate to "Network and Internet" > "Network and Sharing Center." Click on "Change advanced sharing settings" on the left.
- Under "Private," turn on "Turn on network discovery" and "Turn on file and printer sharing."
- Under "Guest or Public," turn on "Turn on network discovery" and "Turn on file and printer sharing."
- Under "All Networks," set your sharing option to "Turn on sharing so anyone with network access can read and write files in the public folders.” (This is the easiest way for now, but you can always adjust permissions later if you want to get fancy!)
- Also inside this section, enable "Use 128-bit encryption to help protect file sharing connections"
- Step 3: Share a Folder: Locate the folder containing the files you want to share (e.g., your "Documents" folder, maybe even a specific folder of photos). Right-click on the folder, select "Properties," and then go to the "Sharing" tab.
- Click "Share."
- In the dropdown menu, select "Everyone." (Alternatively, you can select specific users, but “Everyone” is usually the quickest option at this stage.)
- Click "Add," then click "Share."
- Step 4: Note the Network Path: Back in the Sharing Tab of the folder properties, click "Advanced Sharing…" and note the "Network Path." This is the address your laptop will use to access the shared folder. It might look something like this:
\\YourPCName\FolderName
See? Not so scary, right?
5. Laptop to PC Connection: Accessing Shared Folders from Your Laptop
Now, let's get your laptop involved. You’re almost there, you've got this!
- Step 1: Make sure your laptop and PC are on the same network. (This is generally a given, but it's always good to double-check!)
- Step 2: Open File Explorer (Windows Key + E).
- Step 3: Click "Network" in the left-hand navigation pane (or type \YourPCName into the explorer's address bar). You should see your PC listed. If you don't, give it a few moments, or restart both devices.
- Step 4: Double-click on your PC. It may ask for your PC's username and password. If you’ve created one, enter it. If not, you may be able to access the shared folder without a password.
- Step 5: Access Your Files! You'll now see the shared folders. Double-click the folder you shared, and you are good to go! Drag and drop files between your laptop to your PC. Boom! Wireless freedom!
6. Apple's Elegant Solution: Connecting Your MacBook to a PC
Mac users, don't feel left out! While the process is slightly different, it’s just as straightforward.
- Step 1: Open System Preferences: Click on the Apple icon in the top-left corner of your screen and select "System Preferences."
- Step 2: Click "Sharing."
- Step 3: Select "File Sharing."
- Step 4: Enable File Sharing: Check the "File Sharing" box to enable it.
- Step 5: Add the Folder to Share: Click the "+" button under "Shared Folders" and select the folder you want to share.
- Step 6: Set Permissions: Under "Users," select the user you want to grant access and set their permissions to "Read & Write." (Select "Everyone" if you want everyone on the network to have access – but remember, be mindful of security!)
- Step 7: Connect from Your PC (same as above): On your PC, use File Explorer and navigate to "Network." Your Mac should appear. If not, you can try typing the Mac's network name (which you can find in the Sharing settings on the Mac) into the File Explorer’s address bar, like
\\YourMacName.
7. Speed Demons: Boosting Transfer Speeds
While wireless is convenient, it’s not always the speediest. Here are a few tips to optimize transfer speeds:
- Use a 5GHz Wi-Fi network: If you have a dual-band router, connect both devices to the 5GHz band. It generally offers faster speeds.
- Ensure a strong Wi-Fi signal: The closer your laptop and PC are to the router, the better.
- Avoid interference: Microwave ovens and other electronic devices can mess with your Wi-Fi signal.
- Wired Connection (If Possible): If you need to transfer a massive amount of files, consider temporarily connecting your PC to your router via an Ethernet cable.
8. Troubleshooting Time: When Things Go Wrong
Let's be real, sometimes things don't go according to plan. Here are some common hiccups and how to fix them:
- Can't see the PC/Laptop: Double-check that sharing is enabled on both devices, and that they are on the same Wi-Fi network. Firewall settings can also sometimes block access (temporarily disable your firewall as a test, and then configure it to allow network sharing).
- Access Denied: Make sure your user account on your PC has the correct permissions to access the shared folder. Double-check the sharing settings.
- Slow Transfer Speeds: See the tips in section 7!
- Restart: Reboot both your laptop and PC. Seriously, it works more often than you think!
9. Beyond Basic Sharing: Advanced Tips and Tricks
Alright, let's level up your wireless game.
- Create Multiple Shared folders: Organize your files into shared folders for different purposes (e.g., "Photos," "Documents," "Videos").
- Use Mapping Network Drives: This way, you can access your shared folders directly from “This PC” in File Explorer, just like a regular drive. Right-click "Network" > "Map Network Drive".
- Consider Cloud Storage: Services like Google Drive, Dropbox, and OneDrive offer another way to wirelessly share files and access
Help Desktop connect Wi-Fi via Laptop NETVN

By NETVN82 Help Desktop connect Wi-Fi via Laptop NETVN by NETVN82
Use Your PC or Laptop as a Wireless Router
By Guiding Tech Use Your PC or Laptop as a Wireless Router by Guiding Tech
Windows 1110 - How to create a local network and share files between computers over the network

By ipMalik Windows 1110 - How to create a local network and share files between computers over the network by ipMalik

Title: How to transfer files from PC to PC using WiFi Windows 10 7 8
Channel: IT Magics
How to transfer files from PC to PC using WiFi Windows 10 7 8 by IT Magics
Working With Laptop
Laptop to PC Wireless: Unleash Seamless Connectivity with These Expert Secrets
We've all been there. The frustration of hunting for a USB drive, the tangled mess of cables, or the agonizing wait for a file to transfer. In today's fast-paced world, the ability to effortlessly move data between your laptop and PC wirelessly is no longer a luxury; it's an absolute necessity. And the good news? It's far easier than you might think. This guide will unveil the secrets to achieving seamless laptop-to-PC wireless connectivity, transforming your workflow and boosting your productivity. Prepare to be amazed.
Understanding the Wireless Landscape: Deciphering Your Options
Before diving into the how-to, it's crucial to understand the various wireless methods available. Choosing the right approach depends on your specific needs, technical proficiency, and the type of data you'll be transferring. Let's explore the key players:
1. Harnessing the Power of Homegroup (Windows 7, 8.1) / Network Sharing (Windows 10, 11): The Simplified Approach
For users running Windows, the built-in networking features offer a surprisingly straightforward solution. While "Homegroup" is specifically a Windows 7 and 8.1 feature. Windows 10 and 11 utilize "Network Sharing." These tools create a shared network environment, allowing you to access files, folders, and even printers across your connected devices effortlessly.
Setting Up Network Sharing (Windows 10 & 11):
Ensure Devices are on the Same Network: This is paramount. Both your laptop and PC must be connected to the same Wi-Fi network or have a cabled connection to the same router.
Enable Network Discovery: On your PC, open File Explorer. In the left-hand navigation pane, click "Network". If you see a message prompting you to turn on network discovery and file sharing, click it. Otherwise, you can manually enable it by going to "Control Panel" > "Network and Internet" > "Network and Sharing Center" > "Change advanced sharing settings". Under "Private", make sure "Turn on network discovery" and "Turn on file and printer sharing" are selected.
Share the Desired Folders: Right-click the folder you want to share on your PC, select "Properties," and then go to the "Sharing" tab. Click "Share." Choose the users or groups you want to share the folder with. For broad access, select "Everyone" and assign read or read/write permissions as needed.
Access Shared Folders from Your Laptop: On your laptop, open File Explorer and click "Network" in the navigation pane. You should see your PC listed. Double-click it, and you should now be able to access the shared folders you previously configured on your PC.
Setting Up Homegroup (Windows 7 & 8.1):
Create a Homegroup: On either your laptop or PC, open the Start Menu, search for "Homegroup", and click on it with that search bar, this will bring up the Homegroup settings. Select “Create a homegroup.” Once the homegroup is created, a password will be generated. Note this password.
Join the Homegroup on Your Other Device: On your other device (the laptop or PC that didn’t create the homegroup), run the same "Homegroup" search through the start menu. Select "Join now" and enter the Homegroup password.
Choose What to Share: During either creating or joining a Homegroup, you are presented with file sharing options. Select what to share. As soon as you select share, your computer is ready.
Accessing Shared Files: Open File Browser. On the left, select “Homegroup.” You should see files and folders. (If one of the computers is not present, run the troubleshooting utility.
2. Bluetooth: The Short-Range Data Transfer Champion
Bluetooth has evolved significantly. While ideal for smaller files and more basic tasks, it can still be a useful tool for wireless data transfer, especially when you don't require high speeds or are transferring files from a laptop to smartphones or other Bluetooth-enabled devices.
Setting Up Bluetooth Transfer:
Enable Bluetooth: On both your laptop and PC, ensure Bluetooth is enabled. This is usually done through the system tray (on Windows), or in the system's settings.
Pair Your Devices: Search for available Bluetooth devices on your laptop. Select your PC from the list and initiate the pairing process. You may be prompted to enter a pairing code.
Send and Receive Files: Right-click on the file you want to transfer on your laptop, select "Send to," and choose your PC as the destination. On your PC, you'll usually receive a prompt to accept the incoming file.
Note: Bluetooth transfer speeds are significantly slower than Wi-Fi or other methods.
3. The Cloud Connection: Leveraging Online Storage for Seamless Access
Cloud services like Google Drive, Dropbox, OneDrive, and others offer an incredibly flexible approach to wireless file transfer. This method eliminates the need for both devices to be on the same local network, and provides a back-up approach to accessing your files.
Using Cloud Services:
Sign Up for a Service: Choose a cloud storage provider and create an account (or use an existing one).
Install the Desktop Application: Download and install the desktop application for that cloud service on both your laptop and PC.
Sync Your Files: Drag and drop the files you want to transfer into the designated cloud folder on either your laptop or your PC. The files will automatically sync across all your connected devices, making them accessible from anywhere with an internet connection.
Advantages of Cloud Services:
- Accessibility: Access your files from any device with an internet connection.
- Backup and Security: Cloud platforms offer robust data backup and security features.
- Collaboration: Easily share and collaborate on files with others.
4. Wi-Fi Direct: The Wireless Direct Connection
Wi-Fi Direct is a technology that enables direct wireless communication between devices without the need for a router. This is particularly useful for transferring large files quickly.
Setting Up Wi-Fi Direct:
Ensure Device Compatibility: Both your laptop and PC need to support Wi-Fi Direct. Most modern devices do.
Enable Wi-Fi Direct: On your laptop, find the Wi-Fi Direct settings. This might be located in your Wi-Fi settings, the same pane where you see available Wi-Fi networks.
Search for Available Devices: Your laptop should scan for Wi-Fi Direct devices, including your PC.
Connect and Transfer Files: Once you find your PC, select it and initiate the connection. You can then drag and drop files between the devices.
Note: Wi-Fi Direct offers generally good transfer speeds; however, if both your laptop and PC has faster internet access, using a cloud option will be more efficient. It's also typically more complex to set up than cloud solutions.
5. Dedicated File Transfer Software: The Power User's Choice
For users who require more advanced features, control, and speed, dedicated file transfer software offers a powerful alternative. Popular options include:
- FE File Explorer: A free app that transfers files via FTP, SMB, and WebDAV.
- AirDroid: A popular app with many features, including file transfer, remote access, and screen mirroring.
- KDE Connect: A platform that connects KDE desktops with Android phones.
- ShareMe: By Xiaomi, an easy to use software to transfer files between devices.
Choosing the Right Software:
- User-Friendliness: Choose software with an intuitive interface.
- Features: Consider features such as remote access, file management, and cross-platform support.
- Security: Ensure the software offers secure data transfer protocols.
Troubleshooting Common Wireless Transfer Issues
Even with the best methods, occasional problems can arise. Here's how to troubleshoot common issues:
- Network Connectivity: Ensure both your laptop and PC are connected to the same network (for Wi-Fi-based methods). Test your internet connection. Try restarting your router.
- Firewall: Firewalls can sometimes block file transfer. Temporarily disable your firewall to see if it's the cause. Ensure your firewall settings allow the relevant apps (e.g., file sharing service) to access the network.
- Incorrect Permissions: Verify that you've set the correct permissions on the shared folders.
- Driver Issues: Ensure your network adapters have the latest drivers installed. Check the manufacturer's website for updates.
- Bluetooth Pairing Problems: Close any device currently using Bluetooth and restart your devices.
- Software Conflicts: Try closing any running background programs that may be interfering with your data transfer.
- Cloud Synchronization: Ensure the cloud service is properly set up and syncing correctly. Check your internet connection.
Optimizing Your Wireless Experience: Expert Tips
- Use a Fast Wi-Fi Protocol: Ensure both your laptop and PC support the latest Wi-Fi protocols (such as Wi-Fi 5 or Wi-Fi 6) for faster transfer speeds.
- Choose the Right Wireless Channel: Use a Wi-Fi channel that is not congested to obtain the
