how to share wifi network from laptop windows 7

Title: How to Share WiFi From Laptop - Windows 7810
Channel: GizPrime
How to Share WiFi From Laptop - Windows 7810 by GizPrime
how to share internet from laptop windows 7, how can i share my wifi password with my laptop
Unlock Your WiFi: Share Your Laptop's Internet in 60 Seconds (Windows 7)
Share Your Secrets: Turn Your Windows 7 Laptop Into a WiFi Hotspot
Ever find yourself staring at a room full of devices, all clamoring for internet access, but only one lonely Ethernet cable to go around? We've all been there. Especially when you are on the move. Fear not, because your Windows 7 laptop holds a hidden superpower: the ability to become a wireless hotspot! Preparing for this capability is critical. In fact, within a minute, you can share your precious internet connection with all your Wi-Fi-enabled gadgets. This is simpler than you think.
Ignite the Connection: The Magic of HostedNetwork
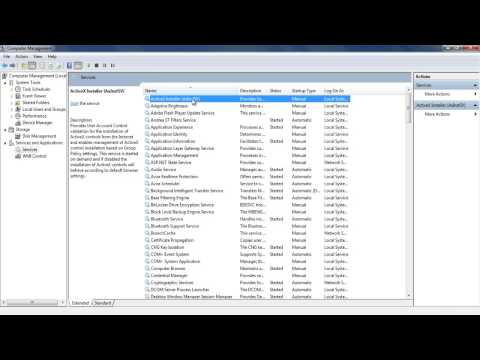
Windows 7 boasts a built-in feature called "HostedNetwork." Its role is fundamental. It permits your laptop to broadcast a Wi-Fi signal. However, you'll need to get your hands dirty. Initially, you must check if your network adapter supports this functionality. The excitement can begin once verified. To do this, open the Command Prompt. You will need to access it as an administrator.
Type the following command and then press Enter: netsh wlan show drivers. Carefully scrutinize the output. Specifically, look for "Hosted network supported: Yes." Success! If you see “Yes,” then you’re ready to proceed. If not, you'll need to investigate your network adapter drivers. Usually, updating them resolves the issue.
Configuring Your Inner WiFi Guru: Setting up the Hotspot
First, consider the essential setup process. Assuming your adapter supports the HostedNetwork, it is time to set up your hotspot. Still in the Command Prompt (as administrator), type and execute this command: netsh wlan set hostednetwork mode=allow ssid="YourNetworkName" key="YourPassword".
Replace "YourNetworkName" with the name you desire your Wi-Fi network to have. Be creative! The network name should be unique. Then, use "YourPassword" and replace it with a strong, secure password. This password protects your network. Make sure it's alphanumeric.
Following that, another command is vital. Start the HostedNetwork with: netsh wlan start hostednetwork. Now your hotspot is created but not yet sharing internet.
Sharing Is Caring: The Internet Connection Sharing Dance
Now that your hotspot is live, sharing the internet is next. Open the "Network and Sharing Center" in the Control Panel. Select "Change adapter settings" from the left-hand sidebar. Find your active internet connection. Right-click on it and select "Properties."
Here comes the critical step. Click the "Sharing" tab. Check the box that says, "Allow other network users to connect through this computer's Internet connection." Once done, select your HostedNetwork adapter from the dropdown menu. Click "OK" to save your changes. You are nearly there!
Troubleshooting Troubles: When Things Go Wrong
Sometimes, things don’t go as planned. Therefore, you may encounter issues. So before you panic, consider a few common culprits.
- The HostedNetwork Won't Start: Ensure your wireless adapter is enabled. Also double-check the commands you entered for typos. Sometimes, a simple restart of your laptop solves the problem.
- Devices Can Connect, But No Internet: Check your internet connection on your laptop. Verify that the correct network adapter is selected in the Sharing settings. You may need to restart the HostedNetwork command.
- Security Concerns: Use a strong password. Avoid using easily guessable words or phrases. Also, regularly change your password.
Beyond the Basics: Enhancing Your Hotspot Experience
While the steps above provide the core functionality, you can fine-tune your hotspot further. First, customize your network name and password. Consider changing these regularly. It’s an extra layer of security. Also, monitor your connected devices.
For more advanced users, you could also explore using third-party software. These applications offer added features. These may include bandwidth control and advanced security options. However, the built-in HostedNetwork solution is more than adequate for most users.
Conclusion: The Freedom of Wireless Connectivity
In conclusion, transforming your Windows 7 laptop into a Wi-Fi hotspot isn't just about sharing internet. It’s about embracing the freedom of wireless connectivity. It's about empowering your devices. Especially when you are on the go. Because now you know, with a few simple commands, you can transform your laptop into a personal Wi-Fi hub. Get ready to unlock a world of seamless connectivity. So, what are you waiting for? Start sharing!
Unlock Your Old Laptop's WiFi: The Secret Trick You NEED!Unlock Your WiFi: Share Your Laptop's Internet in 60 Seconds (Windows 7)
Okay, buckle up, fellow tech travelers! We've all been there: desperate for internet access, stuck in a digital desert, and eyeing that laptop like a shimmering oasis. Maybe your tablet's data connection is dead, your phone's battery is weeping, or you're simply trying to share that sweet, sweet Wi-Fi with a friend. Whatever the reason, sharing your laptop's internet connection is a lifesaver. And guess what? On Windows 7, it's surprisingly easy, quicker than brewing a pot of coffee, and we're going to walk you through it. Forget those complicated, jargon-filled tutorials that leave you more confused than before. We’re going to demystify the process, making it as simple as pie (and just as satisfying!).
1. Why Share Your Internet Anyway? The Digital Lifeline
Think about it. Your laptop is often the hub of your digital universe. It's got the internet already, and sometimes, it’s the only device connected. Sharing that connection can be a game-changer:
- Emergency situations: Lost your phone's data? Need to connect to a printer your phone can't access? Your laptop steps up!
- Guest access: Got visitors who need Wi-Fi? Skip the awkward password sharing and create a temporary hotspot.
- Multiple devices: Perhaps you have a tablet, a smart TV, or another laptop you want to connect. Sharing your Wi-Fi allows multiple devices to access the internet.
It's like having a spare key to the digital world!
2. Setting the Stage: What You'll Need
Before we dive in, let's make sure we have everything we need. This is a quick checklist:
- A Windows 7 Laptop: This is pretty obvious, but necessary!
- An Active Internet Connection: Your laptop needs to be already connected to the internet – either via Wi-Fi or a wired connection.
- A Device to Connect: A phone, tablet, or another laptop to be shared.
- Patience (Just a Little Bit): We promise it won't take long!
3. The Magical Gateway: Creating an Ad-Hoc Network
This is where the magic happens. Windows 7, in its infinite wisdom (most of the time), allows you to create an ad-hoc network. Think of it as building your own mini-Wi-Fi router right inside your laptop!
Here is how to do it:
- Open Network and Sharing Center: Click on the network icon in your system tray (usually in the bottom right corner of your screen). Then, click "Open Network and Sharing Center."
- Set up a new connection or network." In the Network and Sharing Center, look on the right side and click on the option, "set up a new connection or network."
- Choose "Set up a wireless ad hoc (computer-to-computer) network." Click "Next."
- Network Details: Give your network a name (choose something catchy and memorable), select a security type (WPA2-Personal is usually the best for security), and create a security key (a password) for your network.
- Sharing Options: Do NOT enable Internet Connection Sharing at this time. You'll do that in the next steps.
- Check Your Settings: Make sure all the settings are correct and you will get a confirmation message which will state "Windows is now ready to set up your wireless ad hoc network."
- Click "Close" and get ready for the next steps.
4. Enabling Internet Connection Sharing: The Real Secret Sauce
Now that your ad-hoc network is set up, it's time to tell Windows 7 to actually share its internet connection. This is crucial. Consider it the main ingredient in our recipe.
Here’s how to enable internet sharing:
- Go back to the "Network and Sharing Center". Find the network adapter that is currently connected to the Internet.
- Right-click on your Internet connection (the active one, e.g., "Wireless Network Connection" or "Local Area Connection") and select "Properties."
- Go to the "Sharing" tab. Check the box that says "Allow other network users to connect through this computer's Internet connection."
- Select Your Ad-Hoc Network. In the "Home network connection" dropdown, select the name of the ad-hoc network we just created (the one you named in section 3).
- Confirm Your Choices. Click "OK."
- That's it! Windows 7 will automatically configure the connection settings.
5. Fine-Tuning (Optional, But Recommended): The Firewall's Role
Sometimes, Windows Firewall can block the connection. But don’t worry, it’s easy to fix! Check that the firewall is not blocking your connection.
- Open Windows Firewall: Search for "Windows Firewall" in the Start menu and open it.
- Click on "Allow a program or feature through Windows Firewall."
- Ensure "Network Discovery" is checked. You may want to check "File and Printer Sharing" as well.
- Click "OK."
6. Connecting Your Other Devices: Jumping on the Bandwagon
Now, grab your other devices (phone, tablet, another laptop) and start connecting to your newly created network.
- Scan for Wi-Fi Networks. On your device, go to your Wi-Fi settings and scan for available networks.
- Select Your Network. Locate the network name you created earlier and select it.
- Enter Your Password. When prompted, enter the security key (password) you set up for the network.
- Connect and surf! Your device should instantly connect to the internet.
7. Troubleshooting Troubles: Battling the Digital Gremlins
Sometimes, things don't go as planned. Don't worry; here are a few common problems and how to fix them:
- "Limited Connectivity" or "No Internet Access":
- Solution: Double-check steps 4 of enabling internet connection sharing. Ensure your ad-hoc network is selected in the dropdown.
- Device Can't Find the Network:
- Solution: Make sure your laptop's Wi-Fi is turned on and that the ad-hoc network is broadcasting.
- Slow Internet Speeds:
- Solution: The speed depends on your laptop's primary internet connection. Try moving your laptop closer to the device you're sharing with, or limit the number of devices sharing.
- Windows Firewall isn't an issue:
- Solution: Check steps 5 of the setting the stage. Check Windows Firewall.
8. Beyond the Basics: Advanced Tweaks (For the Tech-Savvy)
If you're feeling adventurous, you can delve a little deeper:
- Change the Network Name (SSID): Find the network connection we made, and change the name in the properties.
- Change Security Settings: WEP is less secure (but may be more compatible with older devices). WPA2-Personal is generally recommended.
- Monitor Connected Devices: Keep track of who’s using your internet access.
9. The Power of Patience: Remembering the Human Factor
Remember, technology is not always perfect. If something doesn't work right away, take a deep breath, double-check your steps, and try again. The frustration is probably self-inflicted. We've always had to get it done, but we are capable of it!
10. The Power of Collaboration: Sharing is Caring
Sharing your internet isn't just about getting connected; it's about helping others! You're enabling them to communicate, work, and explore the digital world. You're providing a small act of kindness in a world that desperately needs it.
11. The Enduring Legacy of Windows 7: Still Kicking
Yes, Windows 7 might be getting a little older, but it's still a capable operating system. Its robust features, including internet sharing, remain useful for many users.
12. Security First: Keeping Your Network Safe
Always use a strong password for your ad-hoc network.
- Use a strong password. We want the best security possible, and a great password is the first step.
- Monitor your connection. Watch for any suspicious activity.
13. When to Say Goodbye: Considering Alternatives
Sometimes, an ad-hoc network isn't the best solution.
- A Dedicated Router is usually better. If possible, a Wi-Fi router is a better choice for sharing your internet.
- Consider your needs. Do you need to share the internet often? Is it temporary or long-term?
14. The Future of Connectivity: Moving Forward
Even with older technology, we are thinking about the future.
- Keep learning. The world of internet is always changing.
- Keep exploring. New technologies are always arising.
15. The 60-Second Promise: Did
Laptop WiFi SOS! Connect Your New Laptop in 60 Seconds!How to Create a WiFi Hotspot with Windows 7

By 1stepatatime How to Create a WiFi Hotspot with Windows 7 by 1stepatatime
How to Enable Internet Connection Sharing in Windows 7
By HOWTECH How to Enable Internet Connection Sharing in Windows 7 by HOWTECH
Cara Download & Install Driver WIFI & ETHERNET Manual untuk Windows 781011

By inprez id Cara Download & Install Driver WIFI & ETHERNET Manual untuk Windows 781011 by inprez id

Title: Windows 1110 - How to create a local network and share files between computers over the network
Channel: ipMalik
Windows 1110 - How to create a local network and share files between computers over the network by ipMalik
Wifi Not Found
Unlock Your WiFi: Sharing Your Laptop's Internet in 60 Seconds (Windows 7)
The digital landscape demands connectivity. Perhaps you have a device, lacking built-in WiFi capabilities, that desperately needs an internet connection. Or, maybe your primary WiFi source has become unreliable, and you require a secondary, stable point of access. Whatever the impetus, repurposing your Windows 7 laptop as a WiFi hotspot is a remarkably straightforward process. This guide will equip you with the knowledge and practical steps to achieve this, transforming your laptop into a mobile internet hub within a minute. Prepare to share your internet swiftly and efficiently.
Understanding the Underlying Technology: The Virtual WiFi Adapter
Before diving into the practical steps, grasping the core technology is beneficial. Windows 7, inherently, possesses the capability to act as a WiFi hotspot leveraging the "hosted network" feature, which makes use of your laptops built-in wireless adapter. This adapter is used to generate the new connection and broadcast it for others. In essence, your laptop utilizes the existing WiFi card to create a virtual WiFi adapter, allowing you to rebroadcast the internet connection it is receiving. This process is commonly referred to as "Internet Connection Sharing" or ICS. It's a feature that is available without the need for additional software. The process is secure, provided you create a strong password for the new hotspot.
Initial Preparations: Essential Prerequisites
Before initiating the hotspot setup, verify a few prerequisites. First, ensure your Windows 7 laptop has a functional WiFi adapter. Ordinarily, this is a standard component in almost all laptops. If you are unsure, check your device manager (search for "Device Manager" in the start menu). Locate "Network adapters" under this menu; your WiFi adapter will be represented there. Second, confirm your laptop has an active internet connection. This can be through a wired ethernet connection, existing WiFi connection, or a mobile broadband connection through a USB dongle. It is the source internet connection that will be shared. With those assurances, move to the creation of the hotspot.
Step-by-Step Guide: Creating Your WiFi Hotspot
Now, let's proceed with the step-by-step instructions for creating your hotspot. These steps are designed to be accomplished quickly and efficiently, allowing you to swiftly share your laptop's internet connection.
- Open the Command Prompt as Administrator: Click the "Start" button, then type "cmd" in the search bar. Right-click on "cmd.exe" in the search results and select "Run as administrator." This grants the command prompt the elevated privileges required to control network settings.
- Enable the Hosted Network (Create Your Virtual Adapter): In the command prompt, execute the following command and press Enter:
netsh wlan set hostednetwork mode=allow ssid="YourHotspotName" key="YourPassword". Replace"YourHotspotName"with the desired name for your hotspot. Choose a custom name for your wireless network. Replace"YourPassword"with a strong and complex password to secure your network. Consider a password longer than 12 characters combining letters, numbers, and symbols. The system will acknowledge the actions with a response as the virtual network adapter is created. - Start the Hosted Network: Enter the following command in the command prompt and press Enter:
netsh wlan start hostednetwork. This action starts the virtual WiFi adapter you just created and prepares it to broadcast the signal. You should receive a confirmation message indicating the hosted network has started. - Share Your Internet Connection: Next, you must share the internet connection. This is the final step and the true source of wireless broadcasting. Open the "Network and Sharing Center." You can usually find this by right-clicking on the network icon in your system tray (bottom right of the screen) and selecting "Open Network and Sharing Center." In the Network and Sharing Center, click on "Change adapter settings" on the left panel.
- Locate Your Internet Connection and the Virtual Adapter: In the "Network Connections" window, identify the network adapter representing your active internet connection (the one through which your laptop is receiving the internet). It will be the connection that is actively receiving internet data. Also, you'll see the virtual adapter you created in the previous steps. This will usually be named with something like "Wireless Network Connection 2" or "Local Area Connection 2", depending on the adapter.
- Configure Internet Connection Sharing (ICS): Right-click on your active internet connection (e.g., your Ethernet adapter if you're connected via cable, or your WiFi adapter if you're connected wirelessly). Select "Properties." Go to the "Sharing" tab. Check the box labeled "Allow other network users to connect through this computer's Internet connection." Under the "Home networking connection" dropdown menu, select the virtual WiFi adapter you created in the previous steps. This action allows internet sharing through your virtual WiFi adapter. Click "OK" to save the changes and close the properties window.
- Test Your New WiFi Hotspot: On a different device, like a smartphone, tablet, or another laptop, search for available WiFi networks. Your newly created hotspot (the name you specified) should appear. Connect to it using the password you set. You should now have internet access on that device, proving your hotspot is functioning effectively.
Troubleshooting Common Issues
Even with these straightforward steps, occasional issues might arise. Here are some common problems and their solutions:
- "Hosted network could not be started": This usually means there's a conflict or problem with your network configuration. Try restarting your laptop and retrying the steps. Ensure that the wireless adapter is enabled and drivers are up to date. Check that another program isn't using the same wireless adapter.
- Devices can connect but do not have internet access: This usually indicates a problem with Internet Connection Sharing (ICS). Return to the settings described above and verify that the sharing settings are correctly configured. Ensure the correct virtual adapter has been selected. You may also need to disable and re-enable your current internet connection. Restarting your computer may also fix this issue.
- Slow internet speed: The speed of your hotspot is limited by your laptop's internet connection. If your laptop's internet connection is slow, the hotspot will also be slow. Consider that the wireless signal also depends on the distance between the devices connecting to the hotspot.
- Password Issues: Double-check your password to make sure it is correct. Try deleting the hosted network and creating it again, ensuring you enter the password correctly.
Security Considerations: Protecting Your Network
While the process is straightforward, security is paramount. Always use a strong password for your hotspot. This secures your network from unauthorized access and prevents others from using your internet connection. Regularly update your Windows 7 operating system with the latest security patches. This secures your system against vulnerabilities that can be exploited by malicious actors. Refrain from sharing your password unless you fully trust each of your guests. These protective steps will help guarantee that the use of your newly created hotspot is safe and secure.
Advanced Customization: Fine-Tuning Your Hotspot
For more advanced users, some customization options exist. The SSID (Service Set Identifier, or the name of your hotspot) and password can be easily altered using the netsh wlan set hostednetwork command. This is a method of renaming the hotspot and changing the security settings. Beyond that, though, Windows 7's native functionality offers limited customization capabilities. Consider third-party software solutions for more comprehensive control. They can offer features like bandwidth limiting, advanced security options, and more. However, for the initial setup and basic sharing, the built-in methods are mostly sufficient.
Conclusion: Embracing the Ease of Internet Sharing
Setting up a WiFi hotspot on your Windows 7 laptop is both fast and easy. In a matter of seconds, you can transform your laptop into a readily accessible internet gateway, ready to serve various devices and meet your connectivity needs. By adhering to the steps outlined in this thorough guide, you can quickly share your internet connection, empowering you to stay connected wherever you go. From troubleshooting to security and customization, this article should provide you with everything you need to set up and maintain your WiFi hotspot. Embrace the power of instant connectivity, and make the creation of your hotspot the next step towards a more connected future.
