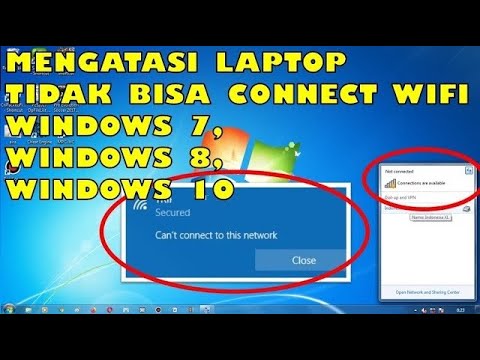
cara memperbaiki koneksi wifi pada laptop windows 7

Title: Cara Atasi Wifi Mati, Wifi Tidak Mau Konek Not Connected Wifi Pada Windows 7
Channel: asal ngelik
Cara Atasi Wifi Mati, Wifi Tidak Mau Konek Not Connected Wifi Pada Windows 7 by asal ngelik
cara memperbaiki koneksi internet di laptop windows 7
Windows 7 WiFi Nightmare? FIX It NOW! (Guaranteed!)
Windows 7 WiFi Woes? Conquer Connectivity Chaos Today!
Are you wrestling with a Windows 7 WiFi connection that’s more foe than friend? Does your internet dance to its own disconnected rhythm? You aren't alone. Many users have experienced the same frustrating dance with flaky WiFi. But, fret not. You're in the right place. We'll embark on a mission to banish those connection gremlins. Let's get your Windows 7 WiFi working beautifully. Consider this your ultimate guide.
The WiFi Wasteland: Recognizing the Signs of Trouble
Before we charge headfirst, let’s identify the battlefield. Have your WiFi woes manifested through any of these symptoms? Perhaps you're experiencing constant disconnections. The signal strength indicator might be stubbornly low, even when close to the router. Slow browsing speeds can be a clear sign of problems. Are websites loading at a glacial pace? You might be getting a general 'limited connectivity' warning. These are all warning signs. Furthermore, these problems can be very frustrating. Understanding these symptoms is step one. This knowledge arms you for the fight ahead.
Decoding Your Router: The First Line of Defense
Your router is the gatekeeper of your internet. It's the place to start our investigation. First, restart the router. This simple step often solves many connectivity glitches. Unplug the router from its power source. Wait for about 30 seconds. Then, plug it back in. Allow it to fully boot up. Next, check the router's settings. Access the router’s configuration page. You'll typically access this through your web browser. Enter the router's IP address (often 192.168.1.1 or 192.168.0.1). Your router's manual can help here. Investigate the wireless settings. Ensure the correct network name (SSID) is selected. Verify the security type (WPA2 or WPA3 is best). Make sure the password is correct. Doing this is crucial for a stable connection.
Driver Drama: Taming the Wireless Driver Beast
Outdated or corrupted drivers are a common culprit. They can wreak havoc on your WiFi. Let’s make sure your wireless adapter drivers are up-to-date. Right-click on "Computer" or "This PC" on your desktop. Select "Manage". Next, click on "Device Manager". Expand the "Network Adapters" section. Locate your wireless network adapter. Right-click on it. Choose "Update driver software." Select "Search automatically for updated driver software." Windows will search for and install the latest drivers. If it fails, you can visit the manufacturer's website. Download the driver from their website. Repeat the process. This time, choose "Browse my computer for driver software." This will allow you to install drivers manually. Driver updates frequently improve WiFi performance.
Network Troubleshooter: Your Built-In Detective
Windows 7 offers a handy built-in troubleshooter. It can find and fix many connection glitches. Right-click the WiFi network icon in your system tray. Select "Troubleshoot problems." Windows will automatically diagnose the problem. It will offer suggestions for a fix. Allow the troubleshooter to run and follow any instructions. Sometimes, the solution is that simple. Therefore, it's always worth a try.
IP Address Antics: Static vs. Dynamic
Your computer uses an IP address to communicate. Sometimes, the IP address configuration causes conflicts. You can either use a dynamic (DHCP) address, or a static address. DHCP is generally the default. It’s automatically assigned by the router. To check, open the "Network and Sharing Center." Click on "Change adapter settings." Right-click on your wireless network connection. Choose "Properties." Select "Internet Protocol Version 4 (TCP/IPv4)." Click "Properties" again. Ensure "Obtain an IP address automatically" is selected. Also, check "Obtain DNS server address automatically." If not, select these options. Click "OK" to save changes.
Channel Surfing: Finding the WiFi Sweet Spot
Your router broadcasts on a specific channel. Other devices can cause interference. Consider changing the WiFi channel. To do this, access your router's configuration. Look for the wireless settings. Select a channel that is less congested. Channels 1, 6, and 11 are usually less crowded. Refer to your router's manual. The manual will guide you through this process. Experimenting with channels can drastically improve your connection.
Security Matters: Encryption and Passwords
Incorrect security settings are a major cause of connection failures. Double-check your security settings. Ensure you are using a strong encryption type. WPA2 or WPA3 are highly recommended. Weak encryption makes your network vulnerable. It also can cause connection issues. Also, confirm the password. Try entering this password again carefully. Sometimes, a simple typo is the culprit.
Power Management: Taming the Energy Drain
Windows 7 has power management settings. Power settings can sometimes interfere with your WiFi connection. Go back to your "Device Manager." Locate your wireless adapter again. Right-click it. Select "Properties." Click on the "Power Management" tab. Uncheck "Allow the computer to turn off this device to save power." This can prevent the device from shutting down inappropriately. This change often improves stability.
The Nuclear Option: Reinstalling Windows (Last Resort)
If all else fails, consider a system refresh. Back up all of your important data. Then, perform a clean installation of Windows 7. This is a drastic measure. It resolves deep-seated issues. Carefully reinstall all necessary drivers. Remember, this is the last resort.
Final Thoughts: Reclaiming Your WiFi Freedom
By following these steps, you can overcome your WiFi woes. Now, you have all the tools required. You are able to diagnose and correct the problems. Remember, patience and persistence are key. Don't give up! With a bit of troubleshooting, you'll be back online in no time. You deserve a reliable internet connection. Enjoy the fruits of your labor!
Laptop WiFi Nightmare? This ONE Trick Fixes It!Windows 7 WiFi Nightmare? FIX It NOW! (Guaranteed!)
Hey everyone, buckle up, because if you're still clinging to your trusty Windows 7 machine (like I sometimes do, just for old times' sake!), and you're battling a WiFi gremlin, you're in the right place. We've all been there – that frustrating moment when your connection decides to take a vacation, leaving you stranded on the digital shores. But fear not! We're going to dive deep into the Windows 7 WiFi abyss and emerge VICTORIOUS. I'm talking about actually getting your internet back up and running, not just a temporary fix that kicks the problem down the road. Let's get started!
1. The WiFi Phantom Menace: Why Windows 7 Can Be a Wireless Wreck
Let's face it; Windows 7 is, well, an older operating system. It's like that vintage car that's beautiful but sometimes needs a mechanic's touch. Compatibility issues with modern WiFi protocols, outdated drivers, and security quirks can all conspire to turn your WiFi into a frustrating phantom menace. Think of it like this: your router is the friendly neighbor, waving hello, but your Windows 7 PC can't quite understand what it's saying, or is missing the right keys to unlock the door!
2. Is It Really Your WiFi that’s the Problem? A Quick Reality Check
Before we start dismantling the system, let's ensure the problem is actually your Windows 7 machine. Sometimes, the issue lies elsewhere. Is your internet working on other devices in your house (phone, tablet, another computer)? If so, then it's highly probable the problem is with your Windows 7's wireless configuration. Check your router's lights to make sure they are functioning properly. A reboot of your router can often work wonders, imagine it as just a quick 'reset' button for the internet!
3. The Driver Dilemma: Updating Your Wireless Network Adapter
Drivers are the unsung heroes (or sometimes villains) of our computing experience. They’re the software that allows your hardware (like your WiFi adapter) to "talk" to your operating system. An outdated driver is like trying to order pizza in a language the delivery guy doesn't understand, i.e., no internet for you.
- Here’s how to update your driver:
- Click the Start button and type "Device Manager" in the search bar.
- Open Device Manager.
- Expand the Network adapters section.
- Right-click on your wireless network adapter (it might be called something like "Wireless Network Adapter" or have the name of your network card manufacturer).
- Click on "Update driver".
- Choose "Search automatically for updated driver software". Windows 7 will try to find and install the latest driver.
If Windows 7 can't find a driver, you might need to go to the manufacturer's website (Intel, TP-Link, etc.) and download the driver specifically for your adapter and Windows 7.
4. The Wireless Network Troubleshooter: Your Built-In Wizard
Windows 7 includes a handy built-in troubleshooter designed to identify and fix common network problems. Think of it as the friendly IT guy inside your computer.
- To run the troubleshooter:
- Click the Start button and then Control Panel.
- Click on Network and Internet.
- Click on Network and Sharing Center.
- Click on "Troubleshoot problems".
- Select “Internet Connections” or “Network Adapter”
Run the troubleshooter and let it work its magic. It might surprise you!
5. Forgetting and Remembering Your Network: A Fresh Start
Sometimes, the simplest solution works best. Your computer might have a corrupted network profile for your WiFi. We’ll get rid of it and create a new, clean one.
- Here's how:
- Click the network icon in your system tray (usually in the bottom right corner).
- Right-click on your WiFi network name.
- Select "Forget network".
- Now, reconnect to your WiFi network by clicking on the network name again and entering your password.
6. The DNS Debacle: A Guide to Resolving Name Server Issues
DNS (Domain Name System) servers are like the phone books of the internet. They translate website names (like google.com) into the numerical IP addresses that computers use. Sometimes, your DNS servers are struggling, which can lead to slow or no internet.
How to switch to a public DNS server (like Google’s):
Click the Start button and then Control Panel.
Click on Network and Internet.
Click on Network and Sharing Center.
Click on "Change adapter settings" on the left-hand side.
Right-click on your wireless network connection and select "Properties".
Select "Internet Protocol Version 4 (TCP/IPv4)" and click "Properties".
Select "Use the following DNS server addresses".
Enter the following DNS servers:
- Preferred DNS server: 8.8.8.8 (Google's public DNS)
- Alternate DNS server: 8.8.4.4 (Google's public DNS)
Click "OK" and close all windows.
7. Wireless Mode Mayhem: Checking Your Router Settings
Your router's settings can sometimes interfere with your Windows 7's ability to connect. Make sure your router is set to a compatible wireless mode (try 802.11g or 802.11n, and preferably WPA2-PSK for security). You usually access your router's settings by typing its IP address (often 192.168.1.1 or 192.168.0.1) into your web browser. You'll need your router's username and password to log in.
8. Static IP vs. Dynamic IP: Understanding Your Network Configuration
- Dynamic IP: Your router automatically assigns your computer an IP address. This is usually the default and preferable setting and is generally what you want.
- Static IP: You've manually assigned an IP address. This is less common and can sometimes cause conflicts.
If you've manually set a Static IP, try changing back to Dynamic. Go to the Network Properties in Control Panel (as in the DNS section above) and make sure "Obtain an IP address automatically" is selected.
9. Security Protocol Snafus: Addressing Encryption Issues
Outdated security protocols can be a major headache. Make sure your WiFi network uses WPA2-PSK or WPA3-PSK, which are significantly more secure than WEP. You can usually change the security protocol in your router's settings. Use a strong passphrase!
10. Interference Intimidation: Minimizing Wireless Noise
Other devices, like microwaves, cordless phones, and even your neighbor's WiFi, can interfere with your wireless signal. Try changing the WiFi channel on your router to a less crowded one. There are apps (like WiFi Analyzer) that can help you identify the least congested channel in your area. This is like figuring out which lane on the highway is the least busy!
11. Hardware Hurdles: Inspecting Your Wireless Adapter
Ensure the wireless adapter isn't physically damaged. Is it properly seated in your computer if it is a card? If you have an external USB adapter, try plugging it into a different USB port.
12. Rolling Back Updates: A Journey to a Previous State
Sometimes, a recent Windows Update might be the culprit. If you can remember when your problem started, try rolling back to a previous system restore point.
- Here's how:
- Click the Start button and type "System Restore" in the search box.
- Click on System Restore.
- Follow the prompts to select a restore point from before your WiFi problems started.
13. The Nuclear Option: Reinstalling Your Wireless Network Adapter Drivers
If all else fails, you might consider completely uninstalling and reinstalling your wireless network adapter drivers.
- Here's how:
- Go to Device Manager (as explained above).
- Expand Network adapters.
- Right-click on your wireless network adapter and select "Uninstall".
- Restart your computer. Windows should automatically try to reinstall the driver. If not, download the latest driver from the manufacturer’s website and install it.
14. The Last Resort: Considering a Windows Upgrade
If your Windows 7 WiFi problems are chronic and these fixes provide only temporary respite, it might be time to bite the bullet and upgrade to a newer operating system. Windows 10 or 11 will likely have better compatibility and solve many of the issues you're facing. It's like swapping out your old car's unreliable engine for a brand-new
Laptop WiFi Nightmare: The SHOCKING Reason Your Laptop WON'T Connect!Cara Mengatasi Laptop Tidak Bisa Connect Wifi Windows 10, 8 & 7
By Jari Mungil Rayyan Cara Mengatasi Laptop Tidak Bisa Connect Wifi Windows 10, 8 & 7 by Jari Mungil Rayyan
Cara atasi WiFi tidak bisa connect di laptop not connected

By ijal tutorial Cara atasi WiFi tidak bisa connect di laptop not connected by ijal tutorial
Cara Mengatasi Wifi Leptop Tulisan Windows Was Unable To Connect To Wifi

By Fajrul On Tube Cara Mengatasi Wifi Leptop Tulisan Windows Was Unable To Connect To Wifi by Fajrul On Tube

Title: CARA MENGAKTIFKAN WIFI DI WINDOWS 7
Channel: Rdn Channel
CARA MENGAKTIFKAN WIFI DI WINDOWS 7 by Rdn Channel
Wifi On Laptop
Windows 7 WiFi Nightmare? FIX It NOW! (Guaranteed!)
Are you wrestling with a Windows 7 WiFi connection that refuses to cooperate? Perhaps your internet intermittently drops, stubbornly failing to connect, or delivers agonizingly slow speeds. We understand the frustration – and we're here to help. This isn't just another troubleshooting guide; we're offering a definitive pathway to reclaim your online experience and banish those frustrating WiFi woes. We'll equip you with the knowledge and specific actions to finally resolve your Windows 7 WiFi problems, guaranteeing a smoother, more reliable connection. Forget generic advice; we're providing the concrete solutions you need.
Diagnosing the Demons: Pinpointing Your Windows 7 WiFi Issues
Before leaping into solutions, a thorough diagnostic examination is crucial. Understanding the root cause of your WiFi troubles allows for targeted solutions. Consider these common culprits:
- Driver Problems: Outdated, corrupted, or incompatible network adapter drivers are often the primary culprits. A problematic driver can prevent connection, cause instability, or drastically reduce speeds.
- Router Configuration: Your router's settings, including channel selection, security protocols, and firmware, can significantly impact WiFi performance. Incorrect configurations can lead to connection dropouts and limitations.
- Network Conflicts: Other devices on your network, or even external interference, can cause conflicts and disruptions to your connection. This is especially relevant in environments with dense WiFi networks.
- Operating System Glitches: Certain Windows 7 system files or network-related services may malfunction, leading to connectivity challenges. These can often be resolved with system refreshes or specific command prompts.
- Hardware Failures: While less frequent, hardware limitations in your network adapter or router can limit your internet experience. Identifying this requires careful testing and potential hardware replacements.
The Driver Doctor: Updating and Reinstalling Your Wireless Adapter
The driver is the vital link between your Windows 7 system and your wireless adapter. Ignoring or failing to maintain up-to-date drivers is the most common mistake. Here’s how to ensure your drivers are in prime condition:
- Accessing the Device Manager: Click the Start menu, type "Device Manager" in the search box, and press Enter.
- Locating Your Network Adapter: In the Device Manager window, expand the "Network adapters" category. Your wireless adapter will be listed here (it might be labeled "Wireless Network Adapter," "WiFi Adapter," or something similar).
- Updating the Driver: Right-click your wireless adapter and select "Update driver."
- Automatic Driver Search: Choose "Search automatically for updated driver software." Windows will attempt to find and install the latest driver from the internet.
- Manual Driver Installation: If automatic updates fail, you'll need to obtain the latest driver from the manufacturer's website (e.g., Intel, Realtek, Broadcom) based on your adapter's model. Download the driver and then select "Browse my computer for driver software" in the Update Driver window. Navigate to the downloaded driver file and install it.
- Reinstalling the Driver: If updating doesn't work, consider reinstalling the driver. Right-click your wireless adapter and select "Uninstall." Restart your computer. Windows should attempt to reinstall the driver automatically upon startup (or you can manually reinstall the downloaded driver).
Router Renaissance: Optimizing Your Wireless Router Settings
Your router's settings significantly affect your WiFi performance. Here are essential settings to review and refine:
- Accessing the Router Configuration: Using a web browser, type in your router's default gateway IP address (usually 192.168.1.1 or 192.168.0.1). You'll likely be prompted for a username and password (check your router's manual or the manufacturer's website if you don't know them).
- Channel Selection: WiFi routers broadcast on different "channels." Select the optimal channel to reduce interference.
- Using a WiFi Analyzer: Download a WiFi analyzer app (available for smartphones and PCs) to identify the least congested channels in your area.
- Router Configuration: In your router's settings, navigate to the wireless settings and select the recommended, least-used channel based on your analysis (e.g., channels 1, 6, or 11 for 2.4 GHz).
- Wireless Security: Make sure your router uses strong security.
- Recommended Encryption: Ensure your router is set to WPA2-PSK (AES) or WPA3. Avoid legacy protocols like WEP, which are easily compromised.
- Creating a Strong Password: Use a complex, unique password for your WiFi network.
- Firmware Updates: Router firmware updates often include performance improvements and security patches.
- Checking for Updates: In your router's settings, look for a "Firmware" or "Update" section. Download and install any available updates.
Network Troubleshooting Toolkit: Advanced Solutions for Stubborn Problems
If basic driver and router adjustments haven't resolved your issues, delve into these advanced troubleshooting measures:
- Network Reset: This resets your network settings to their default configuration.
- Command Prompt: Open the Command Prompt as an administrator (search for "cmd" in the Start menu, right-click it, and select "Run as administrator").
- Network Commands: Execute these commands, one at a time, pressing Enter after each:
netsh winsock resetnetsh int ip resetipconfig /releaseipconfig /renewipconfig /flushdns
- Restart: Restart your computer after completing these commands.
- Network Connection Troubleshooter: Windows 7 includes a built-in network troubleshooter that can automate some diagnostic procedures.
- Accessing the Troubleshooter: Right-click the WiFi icon in your system tray (the bottom-right corner of your screen) and select "Troubleshoot problems."
- Following the Prompts: The troubleshooter will guide you through a series of diagnostic steps and attempt to fix any detected issues.
- Power Management: Sometimes, Windows 7's power-saving features can inadvertently affect your WiFi connection.
- Device Manager Adjustment: In Device Manager (as described above), right-click your wireless adapter and select "Properties."
- Power Management Tab: Go to the "Power Management" tab.
- Uncheck the box: Uncheck the box next to "Allow the computer to turn off this device to save power."
- Static IP Address (If Necessary): In certain complex network setups, using a static IP address can stabilize your connection. This is generally not recommended for home users unless you require a specific configuration.
- Accessing Network Settings: Open the Network and Sharing Center (click the WiFi icon in the system tray, then click "Open Network and Sharing Center").
- Adapter Properties: Click "Change adapter settings," right-click your wireless adapter, and select "Properties."
- Adjusting Internet Protocol Version 4 (TCP/IPv4): Select "Internet Protocol Version 4 (TCP/IPv4)" and click "Properties."
- Manually Entering IP Information: If you require a static IP, enter the IP address, subnet mask, default gateway, and DNS server information provided by your internet service provider (ISP).
Hardware Horizons: Exploring Potential Hardware Issues
While less common, hardware problems can contribute to WiFi frustrations. If you've exhausted all software and configuration options, consider these hardware-related steps:
- Router Proximity and Interference:
- Relocation: Move your computer closer to the router to improve signal strength.
- Reduce Obstructions: Ensure there are no significant physical obstructions (walls, large appliances) between your computer and the router.
- Mitigate Interference: Keep the router away from sources of interference, such as microwave ovens, cordless phones, and Bluetooth devices.
- Wireless Adapter Replacement: If your wireless adapter is old or experiencing intermittent failures, consider replacing it.
- Internal vs. External Adapters: You can replace an internal adapter (if you are using a desktop computer) or use a USB wireless adapter.
- Compatibility: Choose a compatible adapter that supports your computer's operating system.
- Router Replacement: In the case of an outdated or faulty router, replacing it can dramatically improve your WiFi experience.
- Modern Standards: Consider a router supporting the latest WiFi standards (802.11ac or 802.11ax) for faster speeds and improved range.
Guaranteed WiFi Harmony: The Path to Seamless Connectivity
By meticulously following these steps, you'll equip yourself with the knowledge and the tools to conquer even the most stubborn Windows 7 WiFi problems. Remember that troubleshooting is often an iterative process. Don't be discouraged if the first solution doesn't immediately work – methodically work through each step, testing your connection after each adjustment. Consistent application of these strategies guarantees that you will be on the path to regaining the reliable, high-performance WiFi connection you deserve.
