how to create wifi hotspot in windows 8 laptop

Title: Turn Windows 8 Laptop into WiFi HotSpot How To
Channel: TechEmpty
Turn Windows 8 Laptop into WiFi HotSpot How To by TechEmpty
how to create a wifi hotspot on windows 8.1 laptop, windows create wifi hotspot, windows 10 create wifi hotspot
Unlock Your Windows 8 Hotspot: The Secret Trick They Don't Want You To Know!
Unveiling the WiFi Whisperer: Turning Your Windows 8 PC into a Hidden Hotspot
Ever wished you could share your internet connection, but felt tethered by the limitations of your device? Do you yearn for the freedom to connect multiple gadgets without the usual hassle? Well, prepare yourself. I am about to reveal a neat trick. It's a technique that transforms your Windows 8 machine into a fully-fledged, yet somewhat clandestine, WiFi hotspot. It is a power move, really.
The Hidden Power Within Your Windows 8
Your Windows 8 operating system, in its core design, harbors a secret. Within its digital veins flows the capability to create a wireless hotspot. But, it isn't always immediately obvious. The standard user interface conveniently hides this functionality. However, with a simple configuration, you can unlock this powerful ability. So, you can share your internet with several devices. This, however, isn't about technical jargon. It's about empowerment. It's about taking control.
Why the Secret? The Truth Behind the Veil
Why isn't this feature prominently displayed? The official answer is likely related to simplicity. Microsoft probably wanted to keep it less confusing for the average user. However, some speculate that network providers are not fond of users easily sharing their internet. Regardless, don’t be discouraged. Because the ability is there, it's yours to use.
Unlocking the Gateway: Step-by-Step Guide
Let's delve into the steps. Follow these instructions carefully, and you'll be sharing WiFi in no time.
Step 1: The Command Prompt Command. First, you will need to open the Command Prompt as an administrator. Search for "cmd" in the Windows search bar. Right-click on "Command Prompt" and then select "Run as administrator." Trust me, it is a necessary step.
Step 2: The magic command. Next, type the following command. Then, press Enter:
netsh wlan set hostednetwork mode=allow ssid=YourHotspotName key=YourPassword. Replace "YourHotspotName" with the name you desire for your hotspot. Then, substitute "YourPassword" with your desired password. The security of your network rests on this password choice.Step 3: Starting the Hotspot. The next command you'll need to execute is:
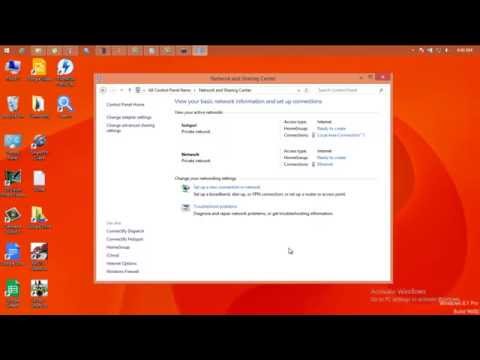
netsh wlan start hostednetwork. This is the command that brings your hotspot to life. Upon successful execution, the hotspot is active.Step 4: Sharing Your Internet Connection. Now, we need to share your existing internet connection. Open the Network and Sharing Center. You can find this in the Control Panel. Then, click "Change adapter settings" on the left side. Identify the connection you are using to access the internet (e.g., Ethernet or WiFi). Right-click on this connection and select "Properties." Navigate to the "Sharing" tab. Check the box that says "Allow other network users to connect through this computer's Internet connection." Under "Home networking connection," select the "Microsoft Hosted Network Virtual Adapter." Click "OK" and you're done!
Troubleshooting Common Issues
Sometimes, things don't go as planned. But fear not. Let us troubleshoot some common problems.
The "Hosted network could not be started" error: This often indicates that your network adapter drivers need an update. Visit your device manufacturer's website. Download and install the latest drivers.
Connection issues: Double-check your password. Ensure the correct network adapter is selected. Verify the hotspot is enabled.
Other devices can't find the network: Make certain your Windows Firewall is not blocking the connection. Temporarily disable it for testing purposes.
Beyond the Basics: Advanced Tweaks
Want to elevate your hotspot game? You can do so. Experiment with different SSIDs. Adjust the channel settings for optimal performance. There are various online resources. They detail these advanced configurations.
The Takeaway: Freedom at Your Fingertips
Now, you possess a newfound freedom. You understand the hidden capabilities within your Windows 8 machine. You can now create your own mobile hotspot. It is a tool for sharing your connection. More importantly, do not be intimidated by technology. The secret is no longer buried. With a few simple commands, you've unlocked a valuable feature. You're in control. You should experiment. The possibilities, like the wireless signal, are virtually limitless. Congratulations!
Is Your CSL WiFi Laptop SECRETLY SLOW? (This FIX Works!)Unlock Your Windows 8 Hotspot: The Secret Trick They Don't Want You To Know!
Hey there, fellow tech adventurers! Ever found yourself in a Wi-Fi wasteland, craving a connection but stuck with a single, lonely Ethernet cable? Or maybe you're on the road, juggling multiple devices, and that hotel Wi-Fi is as reliable as a politician’s promise? We all know the struggle. But fear not, because today, we’re diving deep into a little-known superpower hidden right inside your Windows 8 machine: the ability to turn it into a fully functional Wi-Fi hotspot. And trust me, the method we're exploring is so smooth, so simple, it's like discovering a secret passage to freedom.
The Phantom Wi-Fi: Why Your Windows 8 Hotspot Seems Invisible
Before we crack open the code, let's address the elephant in the room: the "phantom Wi-Fi" phenomenon. You've probably already tried the obvious: right-clicking the Wi-Fi icon, going to "Network and Sharing Center," and attempting to create a network. Only to be met with a whole lot of nothing. Why? Well, Microsoft, in its infinite wisdom, sometimes makes enabling this feature a bit… obscure. It's like trying to find the secret ingredient in grandma’s famous apple pie – you know it’s there, but it’s hidden behind layers of deliciousness.
Unveiling the Truth: The Power of the Hosted Network
The secret to unlocking your Windows 8 hotspot lies in a hidden feature called the "Hosted Network." Think of it as a miniature Wi-Fi router living inside your laptop, waiting to be unleashed. The beauty of this approach is that it's built-in; no fancy software downloads or complicated configurations are required. It's like finding a hidden treasure map in your attic – all the instructions are already there, just waiting to be followed.
Step-by-Step: Activating Your Hidden Hotspot Like a Pro
Alright, enough suspense! Let's get this show on the road. Here's the step-by-step guide to turning your Windows 8 machine into a Wi-Fi hotspot, in a way that's as simple as making a quick cup of coffee.
Step 1: Open the Command Prompt (But Not Just Any Command Prompt!)
We’re talking about the real deal here. Hit the Windows key, type "cmd," and when the "Command Prompt" appears, right-click it and select "Run as administrator." This is crucial – don't skip this step! Think of it as giving your computer the official "go-ahead" to make these changes. Otherwise, you're just butting heads with the system.
Step 2: The Magic Command - Unleash the Host
Inside the Command Prompt, type the following command and hit Enter:
netsh wlan set hostednetwork mode=allow ssid=YourHotspotName key=YourSuperSecretPasswordReplace "YourHotspotName" with the name you want for your Wi-Fi hotspot (e.g., "MyAwesomeHotspot"). And replace "YourSuperSecretPassword" with a strong password (at least eight characters). Remember this password! It's your key to the Wi-Fi kingdom.
Step 3: Enable the Hosted Network
Now, type
netsh wlan start hostednetworkand hit Enter again. This command activates the hosted network. It’s like flipping the switch to power on your brand-new hotspot.Step 4: Share Your Internet Connection
This is the final, crucial step. Go back to the "Network and Sharing Center" (right-click the Wi-Fi icon in your system tray). Click on "Change adapter settings." You'll see your Wi-Fi adapter (e.g., "Wi-Fi") and a new adapter labeled "Microsoft Hosted Network Virtual Adapter." Right-click your internet-connected adapter (the one that's getting the internet, be it Ethernet or Wi-Fi), and then select "Properties."
Navigate to the "Sharing" tab. Check the box that says "Allow other network users to connect through this computer's internet connection." In the "Home networking connection" dropdown, select "Microsoft Hosted Network Virtual Adapter." Click "OK." Now you're essentially sharing your existing internet connection through the hosted network.
Step 5: Connect Your Devices!
On your phone, tablet, or other devices, search for available Wi-Fi networks. You should see your new hotspot name ("YourHotspotName") in the list. Enter your password ("YourSuperSecretPassword"), and voila! You're connected!
Troubleshooting Tips: Common Roadblocks and How to Overcome Them
Sometimes, things don't go perfectly on the first try. No worries, we’ve all been there. Here are a few common issues and how to fix them:
Error: "The hosted network couldn't be started."
- Solution: Make sure you've run the Command Prompt as an administrator (Step 1). Also, double-check your password and hotspot name for any typos.
Error: "The group or resource is not in the correct state to perform the requested operation."
- Solution: This can sometimes mean your Wi-Fi adapter drivers are outdated. Go to Device Manager (search for it in the Windows search bar), expand "Network adapters," right-click your Wi-Fi adapter, and select "Update driver."
Your Devices Can Connect, But There's No Internet!
- Solution: Double-check Step 4. Make sure you've shared your internet-connected adapter and chosen the "Microsoft Hosted Network Virtual Adapter." Try restarting your computer after making these changes, just to play it safe.
The Hosted Network Disappears After a Restart
- Solution: You'll need to re-run the
netsh wlan start hostednetworkcommand after each restart. You could create a batch file to automate this. Create a .txt file, paste the command into it, save it, then change the file extension to .bat. Right-click the .bat file and select "Run as administrator."
- Solution: You'll need to re-run the
Security First: Best Practices for a Secure Hotspot
Creating a hotspot means sharing your internet connection, so security is paramount. Think of your Wi-Fi password as the lock on your front door – you wouldn't leave it open, would you? Here's how to keep your hotspot safe:
- Choose a Strong Password: Use a combination of uppercase and lowercase letters, numbers, and symbols. The longer, the better!
- Keep Your Software Updated: Regularly update your Windows 8 system and your Wi-Fi adapter drivers. Updates often include security patches that protect against vulnerabilities.
- Monitor Connected Devices: Be aware of which devices are connected to your hotspot. If you see an unfamiliar device, you can disconnect it from the "Network and Sharing Center."
- Enable Network Security: In "Network and Sharing Center," ensure your network profile is set to "Private" (if applicable). This limits access to your shared files and folders. Don’t keep any sensitive data on a drive you are sharing.
- Choose a Strong Encryption Method: Make sure your Wi-Fi is using WPA2 or WPA3 encryption. These are the most secure options available.
Beyond the Basics: Expanding Your Hotspot Horizons
Now that you've mastered the basics, let's explore some advanced tips and tricks to elevate your hotspot game:
- Bandwidth Control: While Windows 8 doesn't have built-in bandwidth limiting, You can use third-party software like Connectify to manage bandwidth usage for connected devices.
- Mobile Hotspot Apps: Apps like MyPublicWiFi offer a graphical interface for setting up and managing your hotspot, making the process even easier.
- Troubleshooting Network Issues: If you're having trouble connecting, use the Windows network troubleshooter (accessible through the Wi-Fi icon in the system tray). It can often identify and fix common connection problems.
- Extend the Range: If your laptop's Wi-Fi range is limited, consider using a Wi-Fi extender or a USB Wi-Fi adapter with a stronger antenna.
- Battery Life Considerations: Running a hotspot can drain your laptop's battery quickly. Plug your laptop into a power source whenever possible. If you're on the move, consider using power-saving settings.
The Benefits: Why Embrace Your Windows 8 Hotspot
Why bother with all this effort? The rewards are well worth it! Think of all the situations where a portable hotspot would be beneficial:
- Traveling: Never rely on risky public Wi-Fi again.
- Sharing Internet: Always stay connected in locations where Wi-Fi is weak or non-existent.
- Home Network Flexibility: Quickly connect devices when you need to.
- Emergency Connectivity: Access the internet when your regular connection fails.
- Test and Learn: Explore networking on a practical level.
The Secret They Don't Want You To Know: Why You Can Do This
The fact that this feature is less publicized is a testament to how Microsoft prioritizes their "mobile hotspot" feature in later Windows versions. By making it a little more hidden in Windows 8, Microsoft may have been trying to nudge users toward upgrading. But
Turn Your Ubuntu Laptop into a WiFi Hotspot: The Easiest Trick EVER!Make a Wi fi Hotspot Using your Windows 8 Laptop

By Syed Shah Zahurullah Hussaini Make a Wi fi Hotspot Using your Windows 8 Laptop by Syed Shah Zahurullah Hussaini
Turn Windows 8 Laptop into WiFi HotSpot How To

By Turn Windows 8 Laptop into WiFi HotSpot How To by
Create WiFi Hotspot in windows 8.1, 8, 7 LaptopPC
By ANDREW CRUZ Create WiFi Hotspot in windows 8.1, 8, 7 LaptopPC by ANDREW CRUZ

Title: How to Turn a Windows 8 Laptop into a Wi-Fi Hotspot
Channel: Tom's Hardware
How to Turn a Windows 8 Laptop into a Wi-Fi Hotspot by Tom's Hardware
Change Wifi Settings
Unlock Your Windows 8 Hotspot: The Secret Trick They Don't Want You To Know!
We've all been there: yearning for a reliable Wi-Fi connection when our primary network fails, or perhaps needing to share our precious internet access with a visiting friend or family member. Windows 8, a pivotal operating system in Microsoft's history, introduced a built-in feature that allows us to transform our laptops or desktops into portable wireless hotspots. However, the simplicity of the feature often hides subtleties that can significantly enhance its functionality and ensure a smoother, more secure experience. This guide delves deep into the nuances of creating and optimizing a Windows 8 hotspot, unveiling techniques that go beyond the standard setup procedures and unlock the true potential of your device's wireless capabilities.
Understanding the Foundation: The Hosted Network
Before we delve into configurations, it's crucial to grasp the underlying technology: the Hosted Network. Windows 8 leverages this feature, enabling the software-simulated creation of a virtual Wi-Fi adapter. Think of it as your computer cleverly pretending it's both a Wi-Fi receiver (connecting to the internet) and a Wi-Fi transmitter (broadcasting your connection). This is fundamentally different – and often more reliable – than simply using a wireless adapter as a bridge or extender. This direct approach bypasses the limitations and potential performance issues that come with other hotspot solutions. Windows 8 streamlines this process, building the foundation for a seamless experience. When the Hosted Network is started it creates a second Wi-Fi adapter. It does so using your existing adapter, but it will create virtual device.
The Basic Setup: Activating the Hidden Feature
While the Windows 8 interface doesn't always explicitly showcase this feature, the underlying infrastructure is ready. We'll guide you through the initial steps to get your hotspot up and running.
Open the Command Prompt as Administrator: This is the gateway to fine-tuning the Hosted Network. Search for "cmd" in your Windows 8 search bar, right-click on "Command Prompt," and select "Run as administrator." This ensures that we have the necessary permissions to modify system settings.
Initiate the Hosted Network: Type the following command and press Enter:
netsh wlan set hostednetwork mode=allow ssid="YourHotspotName" key="YourStrongPassword"YourHotspotName: Replace this with the desired name for your Wi-Fi hotspot. Choose something memorable and, if you wish, descriptive.YourStrongPassword: This is where you set the key. The password should be complex, incorporating a mix of uppercase and lowercase letters, numbers, and symbols. This is vital for securing your network. Ensure the password is at least eight characters long.
Start the Hosted Network: After setting the credentials, activate the Hosted Network by entering:
netsh wlan start hostednetworkIf everything went according to plan, your virtual Wi-Fi adapter should now be active, waiting for internet access configuration.
Sharing Your Internet Connection: The Crucial Link
With the Hosted Network enabled, the next step is to configure internet sharing. This allows your designated devices to connect to your computer’s internet connection.
Open Network Connections: Press the Windows key + R to open the Run dialog. Type
ncpa.cpland press Enter. This command opens the Network Connections window, which displays all network adapters on your system.Identify Your Primary Internet Connection: Look for the adapter that's connected to the internet (e.g., Ethernet, Wi-Fi). Its status will show "Connected."
Share the Connection: Right-click on your primary internet connection and select "Properties."
Navigate to the Sharing Tab: In the Properties window, click on the "Sharing" tab.
Enable Internet Connection Sharing (ICS): Check the box labeled "Allow other network users to connect through this computer's Internet connection."
Select Your Hosted Network: From the "Home networking connection" dropdown menu, select the name of your virtual Wi-Fi adapter, the one that you created in the Command Prompt. The adapter will likely be in the form of
Microsoft Hosted Network Virtual Adapter.Confirm and Apply: Click "OK" to save these settings. Windows 8 will now share your internet connection through your created hotspot.
Advanced Configuration: Optimizing for Performance and Security
The basics have been covered, but optimizing your hotspot for performance and security requires a deeper dive. We’ll provide strategies for a superior hotspot experience.
Wireless Channel Selection: The default wireless channel selection may lead to interference from other Wi-Fi networks in the area.
- Identifying Congestion: Utilize a Wi-Fi analyzer app (there are many free options available, like those from Nirsoft or Acrylic Wi-Fi) on your laptop or another mobile device. This will help determine the least congested Wi-Fi channels in your location.
- Changing the Channel: Unfortunately, there is no direct command in the
netshutility to change the channel. You may need to look for settings that allow you to change the wireless channel within your Wi-Fi adapter drivers. Most of the time you will be able to do it by following these steps:- Open Device Manager (type
devmgmt.mscin the Run dialog). - Expand "Network adapters."
- Find your active Wi-Fi adapter, right-click it, and go to "Properties."
- Click the "Advanced" tab.
- The interface will vary depending on your Wi-Fi adapter. Look for a property related to the "Wireless Channel," "Channel," or "802.11 Channel." Select the channel number that is least congested based on your earlier Wi-Fi analysis.
- Apply the settings and restart your Hosted Network (stop and start again using
netsh wlan stop hostednetworkandnetsh wlan start hostednetwork).
- Open Device Manager (type
Monitoring and Managing Connections:
- While Windows 8 doesn't offer a user-friendly interface for real-time connection monitoring, you can use the
netsh wlan show hostednetworkcommand in the Command Prompt. This will display the number of connected devices. - To disconnect a specific device, you'll need to explore third-party applications. There are utilities available that allow you to view connected devices and optionally block them from accessing your hotspot.
- While Windows 8 doesn't offer a user-friendly interface for real-time connection monitoring, you can use the
Security Best Practices: Strengthening Your Defenses
- Regular Password Updates: Change your hotspot password periodically, especially if you suspect a security breach or regularly share the password with others.
- Network Name Concealment (SSID Broadcasting): While not directly available through
netsh, some Wi-Fi adapters’ driver settings allow you to disable SSID broadcasting. This makes your hotspot less visible to casual users, adding a layer of security. However, connected devices will need to manually enter the network name. - Firewall Protection: Ensure your Windows Firewall is active and configured to protect your network. Consider using a personal firewall application for enhanced security.
Troubleshooting Common Problems
Even with careful configuration, issues can arise. Here are some common problems and solutions.
"The hosted network couldn't be started."
- Driver Compatibility: Ensure your wireless network adapter drivers are up to date. Outdated drivers can prevent the Hosted Network from initializing. Reinstalling them may also help.
- Virtual Adapter Conflicts: Occasionally, conflicts with other virtual network adapters may occur. Try disabling any other virtual adapters you have installed (like those created by VPN software) and restarting the Hosted Network.
- Service Dependencies: Make sure the "WLAN AutoConfig" service is running. You can check and restart this service by typing
services.mscin the Run dialog and finding the service in the list.
"No internet access" on connected devices.
- Incorrect Internet Connection Sharing Configuration: Double-check the steps for sharing your internet connection, ensuring you've selected the correct network adapter for bridging connectivity.
- Firewall Interference: Your firewall might be blocking traffic. Temporarily disable your firewall (for testing purposes only) to see if it resolves the problem. If it does, create rules to allow inbound and outbound traffic for the Hosted Network.
- Router Issues: If you're using a router, it might be conflicting with the Hosted Network. Try restarting your router and your computer.
Slow Speeds
- Channel Congestion: As mentioned earlier, use a Wi-Fi analyzer to determine and adjust the wireless channel.
- Distance and Obstacles: Position your laptop in a central location to minimize distance and obstructions between your hotspot and connected devices.
- Device Limitations: Older devices might have slower Wi-Fi capabilities. Consider the wireless standards supported by your connected devices.
- Concurrent Connections: The more devices connected, the more the bandwidth is divided. Consider limiting the number of devices connected.
Beyond the Basics: Advanced Tweaks and Considerations
- Power Management: Optimize power settings to ensure the Hosted Network remains active when your laptop is running on battery power. Go to "Power Options" in the Control Panel and adjust the power plan settings.
- Scripting for Convenience: Create batch scripts to automate starting and
