lenovo laptop wifi driver download

Title: Cara Download Dan Instal Driver Wifi Laptop & Komputer Bisa Untuk Windows 7,8,10,11
Channel: logistech ID
Cara Download Dan Instal Driver Wifi Laptop & Komputer Bisa Untuk Windows 7,8,10,11 by logistech ID
lenovo laptop wifi driver download, lenovo laptop wifi driver download for windows 7, lenovo thinkpad wifi driver download, lenovo ideapad wifi driver download, lenovo laptop internet driver download, lenovo g50 laptop wifi driver download, lenovo l420 laptop wifi driver download, lenovo g500 laptop wifi driver download, lenovo thinkpad wireless driver download, lenovo laptop g580 wifi drivers download
Download Lenovo Laptop WiFi Driver NOW! (Fix Your Wi-Fi Today!)
Get Your Lenovo Laptop's Wi-Fi Back Online! (Instant Fix Guide)
Picture this: you're ready to dive into a crucial online meeting, or maybe you're just itching to stream your favorite show. But suddenly, your Lenovo laptop’s Wi-Fi decides to stage a rebellion. The dreaded “no internet” message stares you down. Frustration mounts quickly, doesn’t it? Breathe easy because you’re in the right place. This guide is your lifeline. It’s designed to get your Lenovo laptop connected and surfing the web again.
Why Won't My Lenovo Laptop Connect to Wi-Fi?
The causes behind Wi-Fi woes can be surprisingly varied. Sometimes, the solution is incredibly simple. Other times, it requires a bit of detective work. First, let’s tackle the most common culprits, therefore, we can streamline the troubleshooting process. Your Wi-Fi adapter driver could be outdated, corrupted, or simply missing. Secondly, there might be an issue with your network configuration. Your router could be experiencing problems or misconfigured. Thirdly, hardware malfunctions can sometimes happen, but let’s hope not! In addition, interference from other electronic devices can also disrupt your signal. Finally, in some cases, a simple software glitch could be the root of the problem.
Locating the Right Lenovo Laptop Wi-Fi Driver: Your First Step
The first step is paramount. You need the correct Wi-Fi driver for your specific Lenovo laptop model. Consequently, avoid the temptation to grab the first driver you see online. This is crucial for compatibility. Here's a streamlined method. Firstly, you must know your laptop's exact model number. You can find this information on a sticker on the underside of your laptop or its original packaging. Next, make sure you visit Lenovo’s official support website. You need its official driver download portal. Then, simply enter your laptop’s model number into the search bar. The system should identify your specific model and provide you with the correct drivers. Select the “Network” or “Wireless LAN” section. Download the most recent Wi-Fi driver available. It tends to offer the best performance and stability.
Installing the Driver: A Step-by-Step Guide
Now that you have your Wi-Fi driver, it’s time for installation. It’s a relatively straightforward process. However, following each step accurately is essential. First, locate the downloaded file. It usually resides in your “Downloads” folder. Double-click the file to start the installation wizard. It'll guide you through the process. Follow the on-screen prompts. Accept the license agreement. Then, click “Next” at each stage. The wizard handles most of the heavy lifting, so it’s user-friendly. The installation will likely ask you to restart your laptop. Be sure to do so when prompted! This ensures the new driver takes effect.
Troubleshooting Wi-Fi Connection Issues
Even after installing the correct driver, you might still experience Wi-Fi connection problems. Don't fret. Here’s some troubleshooting tips. First, restart your laptop, again. Sometimes, a simple restart can clear up glitches. Second, ensure your Wi-Fi is enabled. On most Lenovo laptops, there’s a physical switch or a function key combination (usually Fn + a key with a Wi-Fi icon) to turn Wi-Fi on and off. Thirdly, check your router. Make sure it's powered on and broadcasting a Wi-Fi signal. Try restarting your router as well. Often, that can reset its settings. Also, try forgetting and reconnecting to your Wi-Fi network. Go to your network settings and select “forget” the network. Then, reconnect, entering your Wi-Fi password again. Finally, run the Windows Network Troubleshooter. Windows has a built-in troubleshooter that can identify and fix common connection problems automatically.
Advanced Solutions for Stubborn Wi-Fi Problems
Sometimes, you need a bit more intervention. In such scenarios, you may have to explore slightly more advanced solutions. First, consider rolling back your driver. If the current driver is causing problems, you can revert to a previous version. In Device Manager, go to your Wi-Fi adapter, then go to the "Driver" tab. You should have an option, “Roll Back Driver.” Second, consider updating your network adapter settings. Open “Device Manager.” Right-click your Wi-Fi adapter. Select “Properties.” Go to the “Advanced” tab. Experiment with different settings. Changing the “802.11 Mode” or “Wireless Mode” can sometimes improve connectivity. Also, consider resetting your network settings. This will erase all network configurations and restore them to default settings. Open “Settings” -> “Network & Internet” -> “Network reset.”
Keeping Your Lenovo Laptop Connected: Ongoing Maintenance
Maintaining good Wi-Fi connectivity is an ongoing process. Keep your drivers updated. Check for driver updates regularly through the Lenovo support website or Windows Update. Secondly, protect your network with a strong password. This prevents unauthorized access. Thirdly, regularly scan for malware. Malware can interfere with your network connection. Fourth, consider using a Wi-Fi analyzer app. Such an app can help identify and mitigate interference from other devices. These proactive measures can minimize future connection problems.
Final Thoughts: Stay Connected!
Getting your Lenovo laptop’s Wi-Fi to work again doesn’t have to be a headache. By following these steps, you’ll quickly regain your internet access. Remember to be patient, methodical, and persistent. With a little troubleshooting, you'll be back online quickly. Keep this guide handy. It’s your go-to resource for any future Wi-Fi woes. Enjoy your browsing!
WiFi Vanished?! Find Your Missing Internet Connection NOW!Download Lenovo Laptop WiFi Driver NOW! (Fix Your Wi-Fi Today!)
Hey there, fellow tech travelers! Ever felt like your Lenovo laptop is trapped in a digital desert, yearning for the sweet oasis of the internet? That frustrating moment when you desperately need to send an email, stream a show, or just exist online, but your Wi-Fi decides to play hide-and-seek? Believe me, we've all been there. And more often than not, the culprit is a missing or outdated Wi-Fi driver. Fear not, because we're about to dive headfirst into the solution: downloading and installing the right Lenovo laptop WiFi driver. Consider this your digital rescue mission!
1. The Mystery of the Missing Wi-Fi: Understanding the Problem
Think of your Wi-Fi driver as the translator between your laptop and the vast digital ocean that is the internet. Without it, your laptop is like a ship without a sail, adrift and unable to connect. Drivers are essentially software programs that allow your hardware to communicate with your operating system. When your Wi-Fi driver goes missing, or the version is outdated, your wireless adapter (the component that handles Wi-Fi) simply can't "speak" to your router. This translates to no internet access. It’s like trying to order pizza in a language nobody understands. So, before we charge ahead, let's understand why this happens.
2. Symptoms: Can You Spot the Wi-Fi Woes?
Knowing the symptoms is half the battle. Let’s unpack the tell-tale signs that your Lenovo laptop is suffering from a Wi-Fi driver malfunction.
- No Wi-Fi Networks Listed: You click the Wi-Fi icon, but instead of a list of available networks, you’re greeted with… nothing. Nada. Zilch. It's like the network fairy forgot to visit.
- Limited Connectivity: You see the networks, but you can't connect to them. You might get an "Unable to connect to this network" error message, leaving you in digital limbo.
- Slow or Intermittent Connection: You're connected, but the internet experience is slower than a snail in molasses. Page load times are agonizing, and streaming buffers more than a politician on a fundraising spree.
- Yellow Triangle of Doom: The dreaded yellow triangle with an exclamation mark over your Wi-Fi icon screams trouble. It's a universal symbol of "something's not right" in the digital world.
- Driver Errors in Device Manager: We'll get to this later, but checking Device Manager is a great place to start troubleshooting. If you see a yellow exclamation mark next to your Wi-Fi adapter, your driver is likely causing the problem.
3. Gathering Intel: Identifying Your Lenovo Model
Before we download anything, we need to know what we're dealing with. Knowing your Lenovo laptop’s exact model number is crucial. Think of it like ordering a tailor-made suit; you need the right measurements. Here’s how you can find it:
- Look on your laptop: Sometimes, the model number is printed on a sticker on the bottom or inside the battery compartment.
- Check the BIOS/UEFI: Restart your laptop and repeatedly press a key (like F2, Del, or Esc) to enter the BIOS. The model number is usually displayed there.
- Use the Lenovo Support Website: Go to the Lenovo support website and enter your serial number or model number. This is your golden ticket to driver downloads.
- Use the System Information: Type “System Information” in the Windows search bar and open the app. The model number will be displayed under “System Model.”
4. The Direct Route: Downloading Drivers from Lenovo's Official Website
Alright, detective, now you have your model number. It's time to go to the source. This is the safest and most reliable way to get the right driver. Here's a step-by-step guide:
- Go to the Lenovo Support Website: Open your browser and go to the official Lenovo support site.
- Enter your Model Number: Type your model number in the search bar and press Enter.
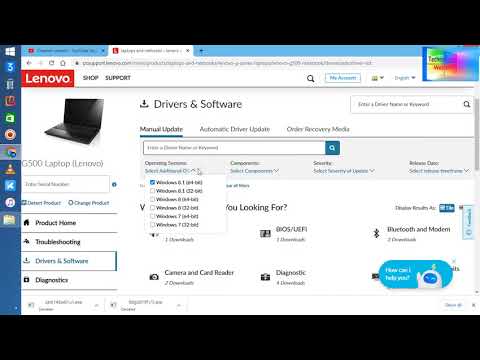
- Navigate to Drivers & Software: Look for a tab or section labeled "Drivers & Software," "Downloads," or something similar.
- Select Your Operating System: Choose the operating system installed on your laptop (e.g., Windows 10, Windows 11).
- Find the Network/Wireless Driver: Scroll through the list of drivers and look for the one labeled "Wireless LAN Driver," "WLAN Driver," or something similar.
- Download the Driver: Click the download button. The driver file will likely be a
.exefile. - Save the File: Save the downloaded file to a location you can easily find, like your desktop.
5. The Installation Dance: Installing the Driver
Now for the main event! Installing the downloaded driver is usually a straightforward process.
- Locate the Downloaded File: Find the
.exefile you downloaded. - Run the Installer: Double-click the file to run the installer.
- Follow the On-Screen Instructions: The installer will guide you through the process. Accept the license agreement and click "Next" through the prompts.
- Restart Your Laptop: The installer may ask you to restart your laptop. Do so to complete the installation.
- Test Your Connection: After restarting, check your Wi-Fi connection. Did it work? If you’re connected and surfing, you nailed it!
6. The Device Manager Detective: Checking the Status
If you're still having issues, it's time to turn into a digital detective. Device Manager can give you clues about what's happening with your Wi-Fi adapter.
- Open Device Manager: Press the Windows key + X, select "Device Manager" from the menu.
- Expand "Network Adapters": Click the arrow next to "Network adapters" to expand the list.
- Locate Your Wireless Adapter: Look for an entry that includes "Wireless," "Wi-Fi," or your adapter's name (e.g., "Intel Wi-Fi 6 AX200").
- Check for Errors: Look for a yellow exclamation mark or a red "X" next to the adapter.
- Right-click and Update Driver: If you see an issue, right-click on the adapter and select "Update driver." Choose "Search automatically for drivers." Let Windows search for an updated driver online.
7. Driver Update Through Windows Update: A Simple Shortcut
Microsoft often releases driver updates through Windows Update, which can be a quick way to solve connection issues.
- Open Settings: Click the Start button and select the gear icon (Settings).
- Go to Update & Security: Click on "Update & Security."
- Check for Updates: Click "Check for updates." Windows will download and install any available updates, including driver updates.
- Restart Your Laptop: After the updates are installed, restart your laptop.
8. Troubleshooting Tips: When Things Go Awry
Even with the best intentions, things can go wrong. Here are some troubleshooting tips:
- Restart Your Router: Sometimes, the problem isn't your laptop at all; it's your router. Restarting your router can often resolve connection issues. Unplug it, wait 30 seconds, and plug it back in.
- Check Your Router's Settings: Make sure your router is broadcasting a Wi-Fi signal and isn't blocking your laptop's MAC address.
- Run the Network Troubleshooter: Windows has a built-in network troubleshooter that can often identify and fix common connection problems. In Settings, go to "Network & Internet" and then "Troubleshoot."
- Disable and Re-enable Your Wi-Fi Adapter: In Device Manager, right-click on your Wi-Fi adapter and select "Disable device." Then, right-click again and select "Enable device." This can sometimes kickstart the connection.
- Consider a System Restore: If you recently installed software or made changes to your system, and the Wi-Fi issue started afterward, you might consider performing a system restore to revert to an earlier state.
9. The Importance of Regular Driver Updates: Staying Ahead of the Curve
Drivers are constantly evolving, just like the operating systems they support. Regular driver updates are like giving your car a tune-up; they keep things running smoothly. They can fix bugs, improve performance, and enhance security. The best practice is to periodically check for updates, particularly from the Lenovo support website.
10. Advanced Techniques: Uninstalling and Reinstalling (If Needed)
In some cases, you might need to take sterner measures. Uninstalling and reinstalling the driver can sometimes clear up stubborn issues.
- Open Device Manager: (See Step 6)
- Uninstall the Driver: Right-click on your Wi-Fi adapter and select "Uninstall device." Check the box that says "Delete the driver software for this device" and click "Uninstall."
- Restart Your Laptop: Restart your laptop. Windows should either automatically reinstall the driver or you'll have to install it manually (using the downloaded file from Step 4)
- **Re
Cara Download Software Driver Lenovo ManualAuto Resmi Untuk LaptopPC Lenovo 2021
By Technology Welfare Cara Download Software Driver Lenovo ManualAuto Resmi Untuk LaptopPC Lenovo 2021 by Technology Welfare
Cara Download Driver Laptop Lenovo Bluetooth

By logistech ID Cara Download Driver Laptop Lenovo Bluetooth by logistech ID
Cara Download Versi Terbaru Driver WiFi Realtek di Laptop Windows 10 11

By Habibi Edukasi Teknologi Cara Download Versi Terbaru Driver WiFi Realtek di Laptop Windows 10 11 by Habibi Edukasi Teknologi

Title: Cara Download & Install Driver WIFI & ETHERNET Manual untuk Windows 781011
Channel: inprez id
Cara Download & Install Driver WIFI & ETHERNET Manual untuk Windows 781011 by inprez id
Wifi On Laptop
Download Lenovo Laptop WiFi Driver NOW! (Fix Your Wi-Fi Today!)
Are you experiencing frustrating Wi-Fi connectivity issues on your Lenovo laptop? Do you find yourself battling dropped connections, slow speeds, or the dreaded "no internet access" message? You're not alone. Countless Lenovo laptop users face these challenges, but the good news is that the solution often lies in ensuring you have the correct and up-to-date Wi-Fi driver installed. This guide will walk you through the process, providing clear, concise instructions to get your Wi-Fi functioning at its optimal performance. We'll cover everything from identifying your specific Lenovo model to downloading and installing the correct driver, ensuring a seamless online experience.
Understanding the Importance of Wi-Fi Drivers
Think of your Wi-Fi driver as a translator. It acts as the crucial software component that allows your Lenovo laptop's Wi-Fi adapter to communicate effectively with your router and the internet. Without the appropriate driver, or with an outdated one, your laptop won't know how to "speak" to the Wi-Fi network, leading to a host of connectivity problems. These issues can manifest in various ways, including:
- Failure to connect to Wi-Fi networks: Your laptop might simply not detect available Wi-Fi signals.
- Intermittent Wi-Fi dropouts: Your connection might be unstable, repeatedly disconnecting and reconnecting.
- Slow internet speeds: Even when connected, your browsing, streaming, and downloading speeds might be significantly reduced.
- Error messages: You might encounter specific error messages related to Wi-Fi, such as "Limited connectivity" or "Unable to connect to this network."
Keeping your Wi-Fi driver updated is paramount to maintaining a stable and efficient wireless connection. Driver updates often include bug fixes, performance enhancements, and compatibility improvements that can significantly improve your overall online experience.
Identifying Your Lenovo Laptop Model
Before you can download the correct Wi-Fi driver, you must first identify your Lenovo laptop model accurately. This information is crucial, as different models require specific drivers tailored to their hardware. Here's how to find your model information:
- Look for the sticker: Most Lenovo laptops have a sticker located on the bottom or inside the battery compartment. This sticker typically displays the model name (e.g., "Lenovo IdeaPad 3 15IIL05").
- Check the BIOS or UEFI setup: Restart your laptop and repeatedly press Del, F2, F10, or Esc (the specific key varies by model) during startup to enter the BIOS or UEFI setup. The model information is usually displayed on the main screen.
- Use the Lenovo Vantage software: Lenovo Vantage is a pre-installed software utility on many Lenovo laptops. Open the application, and navigate to "Device" and then "Device Information" to find your model details.
- Use the command prompt: Press the Windows key, type "cmd," and press Enter to open the command prompt. Type
wmic csproduct get nameand press Enter. The model name will be displayed.
Once you have your model number, you can proceed to the next step.
Downloading the Correct Lenovo Wi-Fi Driver
Now that you have your Lenovo laptop model information, follow these steps to download the correct Wi-Fi driver:
- Visit the Lenovo Support Website: Go to the official Lenovo support website. This is the most reliable source for drivers for your device.
- Navigate to the Support Section: Locate the "Support" or "Drivers & Software" section on the website.
- Enter Your Model Information: In the search box, enter your Lenovo laptop model number (e.g., "IdeaPad 3 15IIL05").
- Select Your Operating System: The website will likely prompt you to select your operating system (e.g., Windows 10, Windows 11). Choose the operating system that's installed on your laptop.
- Locate the Network Driver: Browse the list of available drivers. Look for the "Network" category, which usually includes Wi-Fi drivers. You might see options like "Wireless LAN Driver" or "WLAN Driver."
- Download the Driver: Click the "Download" button next to the appropriate Wi-Fi driver. The drivers are usually in the .exe format and are self-executable.
Installing the Lenovo Wi-Fi Driver
After downloading the Wi-Fi driver, installing it is usually a straightforward process:
- Locate the Downloaded File: Find the downloaded .exe file in your "Downloads" folder or the location where you saved it.
- Run the Driver Installation: Double-click the .exe file to start the installation process.
- Follow the On-Screen Instructions: The installation wizard will guide you through the steps. Accept the license agreement, and click "Next" or "Install" as prompted.
- Restart Your Laptop: Once the installation is complete, the wizard will prompt you to restart your laptop. Restart your laptop to apply the changes.
Alternative Driver Installation Methods
In addition to the standard method of downloading from the Lenovo support website, you can also use the following methods:
- Using Device Manager: Device Manager is a built-in Windows tool. Press the Windows key, type "Device Manager," and press Enter. Expand "Network adapters." Right-click on your Wi-Fi adapter (it may be labeled as "Wireless Network Adapter" or something similar), and select "Update driver." Choose "Search automatically for drivers." Windows will attempt to find and install the latest driver. This method can be helpful, but it isn't always the most up-to-date driver available.
- Using Lenovo Vantage Software: The Lenovo Vantage software has a "System Update" feature. This feature can automatically scan for and install the latest drivers, including Wi-Fi drivers. This is a convenient option since it keeps the software automatically updated.
Troubleshooting Wi-Fi Problems After Driver Installation
If you still experience Wi-Fi issues after installing or updating your driver, try these troubleshooting steps:
- Restart your router and modem: Sometimes, the problem lies with your home network. Power cycle your router and modem to refresh the connection. Unplug them from the power outlet and wait for 30 seconds before plugging them back in.
- Check your Wi-Fi password: Make sure that you are entering the correct Wi-Fi password. Double-check the password for any typos or errors.
- Ensure Wi-Fi is enabled: Ensure your Wi-Fi adapter is enabled. You can usually do this by pressing the Wi-Fi key on your keyboard (often a function key) or in the Windows settings. Check the "Network & Internet" settings on your laptop.
- Check the distance to the router: Ensure you are within range of your Wi-Fi router. Move closer to the router if the signal strength is weak.
- Update your router's firmware: Outdated firmware can cause compatibility issues. Consult your router's manual or the manufacturer's website for instructions on updating the firmware.
- Run the Windows Network Troubleshooter: Windows has a built-in troubleshooter that can help diagnose and fix common network problems. Search for "Network troubleshooter" in the Windows search bar and run the tool.
Advanced Troubleshooting Steps
If the above steps have not resolved your issue, consider these more advanced solutions:
- Roll back the driver: If you updated the driver recently and your Wi-Fi issues started after the update, try rolling back to the previous driver version. You can do this in Device Manager. Right-click on your Wi-Fi adapter, select "Properties," go to the "Driver" tab, and choose "Roll Back Driver."
- Reinstall the driver: Uninstall the Wi-Fi driver from Device Manager, and then reinstall it using the method described above.
- Check for hardware problems: While rare, there could be a hardware issue with your Wi-Fi adapter. If you suspect a hardware problem, contact Lenovo support or a qualified technician.
- Reset network settings: You can reset your network settings to their default configuration in Windows. This might resolve the issues but will require you to re-enter your Wi-Fi password and other network configurations.
Final Thoughts and Staying Connected
Updating your Lenovo laptop's Wi-Fi driver is a crucial step in maintaining a stable and reliable internet connection. By following the steps outlined in this guide, you can quickly diagnose and resolve Wi-Fi issues, ensuring a smooth and enjoyable online experience. Remember to regularly check for driver updates on the Lenovo support website to keep your connection optimized and secure. Staying connected is essential in today's world, and with the right driver, you can be confident your Lenovo laptop is ready to handle all your online needs.
