can my laptop be used as a wifi hotspot

Title: How to use Your Laptop as WiFi Hotspot
Channel: Ricardo Gardener
How to use Your Laptop as WiFi Hotspot by Ricardo Gardener
can my laptop be a wifi hotspot, can i use my laptop as a wifi hotspot, can you turn your laptop into a wifi hotspot, can i use my laptop with hotspot, can i use my laptop with mobile hotspot
Laptop WiFi Hotspot? This SHOCKING Trick Works!
Unleash the WiFi Genie: A Laptop Hotspot Secret You NEED to Know!
Ever found yourself stranded, yearning for the sweet embrace of the internet? We’ve all been there. That desperate scramble for a signal, the frantic search for free WiFi, the crushing realization you're utterly disconnected. But what if I told you there was a simple solution, something hidden in plain sight, a trick that transforms your laptop into a WiFi-slinging superhero?
The Secret Weapon in Your Arsenal: Turning Your Laptop Into a Hotspot
Forget expensive mobile hotspots or the anxiety of relying on public WiFi. You hold the key to always-on connectivity right in your hands. Your trusty laptop, that workhorse of productivity, can be a personal WiFi hotspot. This is unbelievably useful. It's a game-changer. In essence, you’re becoming the internet provider.
Unlocking the Magic: How to Breathe Life Into Your Laptop's WiFi Abilities
Okay, let's dive into the nitty-gritty. First, locate the network settings on your laptop. This process differs slightly based on your operating system. For example, in Windows, you'll find it under "Network & Internet" within your settings panel. Then you can set up a mobile hotspot. Alternatively, go to your control panel.
Now, search for "Mobile Hotspot". Click, and the magic begins. You’ll see options for setting up your network name (SSID) and password. Choose a strong password. This protects your network from unauthorized access. It's like picking a secure lock for your digital castle. After configuring your network settings, toggle the "Share my internet connection with other devices" switch.
Why This Works: The Technical Brilliance Behind the Curtain
Think of your laptop as a miniature base station. It receives the internet from your existing connection - whether it's wired Ethernet or your home WiFi - and then rebroadcasts it wirelessly. It’s a clever dance of signals. Think of it as a translator, converting one language into another. This process uses the laptop's built-in WiFi adapter. Furthermore, it creates a separate, independent network. Thus, your other devices connect to this new network.
Beyond the Basics: Customizing Your Hotspot Experience
Don’t stop at the basics. You can customize your hotspot settings to suit your needs. For example, you can limit the number of devices that can connect. This can help control data usage. You can also set a data limit. This protects your existing internet plan from unexpected overages. Additionally, you can adjust the security settings. Change encryption to WPA2 or WPA3. These are the industry-standard protocols. Lastly, you can monitor data usage per connected device.
Troubleshooting Common Hurdles: Smooth Sailing on the Digital Seas
Sometimes, things get a little choppy. If your hotspot isn't working, don't panic! Start by checking your internet connection. Is your laptop receiving a signal? Second, ensure your WiFi adapter is enabled. Is it turned on in your settings? Also, check your firewall settings. Sometimes, these can block the hotspot function.
If all else fails, try restarting your laptop. It’s the universal solution, often. Finally, research more. Numerous online resources will help you.
The Benefits Galore: Why This Trick Is a Total Life-Saver
The advantages are numerous. First, you get instant internet access. It’s available wherever your laptop goes. It’s ideal when traveling or in areas with unreliable WiFi. Second, you can share your connection with several devices. Family and friends can benefit. Third, it is a cost-effective solution. It avoids the need for extra data plans. Furthermore, it’s a secure way to connect. You can trust your network.
Embracing the Future: The Power of Connection at Your Fingertips
In conclusion, turning your laptop into a WiFi hotspot isn’t just a trick. It’s a powerful tool. It empowers you to stay connected in a disconnected world. So, the next time you're facing a WiFi crisis, remember this. You have the solution right in your laptop. Embrace the power, and stay connected. You're now the master of your digital domain!
Unlock Your Laptop's Wi-Fi Power: The Easiest Way EVER!Laptop WiFi Hotspot? This SHOCKING Trick Works!
Hey tech enthusiasts! Ever found yourself in a digital desert, craving that sweet, sweet Wi-Fi nectar but stranded without a connection? We've all been there. Imagine this: You're on a road trip, desperately needing to finalize that presentation, or stuck in a hotel with notoriously terrible internet. Frustrating, right? Fear not, because we're about to unveil a surprisingly simple trick that can transform your laptop into a personal Wi-Fi hotspot, a digital lifeline in times of need. Prepare to be amazed!
1. The Wi-Fi Hotspot Predicament: A Common Struggle
Let’s be honest, unreliable internet is a universal pain. We've all experienced the agonizing buffering wheel of death, the slow downloads that feel like they're moving in slow motion, and the sheer frustration of being disconnected when you need to be online the most. It’s like being marooned on a deserted island, only instead of coconuts, you're craving cat videos and work emails. This is where the magic of a laptop Wi-Fi hotspot comes in, turning your laptop into your personal internet oasis.
2. Why Your Laptop is Secretly a Wi-Fi Superhero
Did you know that your trusty laptop, the one you use for everything from binge-watching shows to managing your finances, is secretly a Wi-Fi superhero? Almost every modern laptop is equipped with the hardware necessary to broadcast its internet connection, turning it into a hotspot. Think of it as your own personal Wi-Fi router, ready and willing to share the internet love.
3. Unleashing the Power: The Shocking Simple Trick (Windows Edition)
Alright, here’s the juicy part. We’re going to walk you through the process of creating a Wi-Fi hotspot using your Windows laptop. It's so easy, it's almost embarrassing how many years we suffered without knowing this!
- Step 1: The Gateway to Settings: Click the Start button (that little Windows logo in the corner) and then select "Settings" – it looks like a little gear. This is your control panel for all things techy.
- Step 2: Network & Internet: In the Settings window, click on "Network & Internet." This is where we’ll find the Wi-Fi controls.
- Step 3: Mobile Hotspot: On the left-hand side, you'll see a list of options. Click on "Mobile Hotspot."
- Step 4: The Switch is On: Now you're in the hot seat! Flip the "Share my internet connection from" switch to "On."
- Step 5: Choose Your Connection: If you have multiple internet connections, choose the one you want to share using the "Share my internet connection from" dropdown menu. This is usually your Wi-Fi or Ethernet connection.
- Step 6: The Golden Ticket: Edit: To personalize your hotspot (and make it more secure), click the "Edit" button.
- Step 7: Name Your Oasis and Set a Password: Give your hotspot a memorable name (like "TheAwesomeLaptop") and create a strong password. This is crucial for security!
- Step 8: Save, and Done! Click "Save." Your hotspot is now ready to connect!
There you have it. Just eight simple steps and you have your own personal Wi-Fi cloud.
4. Hotspot Harmony: The macOS Method
Don’t worry, Mac users! We haven't forgotten about you. Creating a Wi-Fi hotspot on a Mac is equally straightforward. Here's the quick rundown:
- Step 1: Apple Menu: Click on the Apple icon in the top-left corner of your screen.
- Step 2: System Preferences: Select "System Preferences."
- Step 3: Sharing: Click on "Sharing."
- Step 4: Internet Sharing: In the left sidebar, select "Internet Sharing."
- Step 5: Share Connection From: In the right-hand pane, select the internet connection you want to share (e.g., Wi-Fi or Ethernet) from the "Share your connection from" dropdown menu.
- Step 6: Share to Computers Using: Check the box next to "Wi-Fi."
- Step 7: Wi-Fi Options: Click on "Wi-Fi Options."
- Step 8: Network Name and Password: Give your hotspot a name and create a password. Click "OK."
- Step 9: Enable the Magic: Check the "Internet Sharing" box to turn on your hotspot.
Isn't it great? Your Mac is now a Wi-Fi powerhouse!
5. Security First: Protecting Your Digital Fortress
While setting up a Wi-Fi hotspot is incredibly convenient, it's crucial to prioritize security. Think of your hotspot like a digital front door. You wouldn't leave your front door unlocked, would you?
- Strong Passwords: Use a strong, unique password for your hotspot. Avoid easily guessable passwords like "password123" or your pet's name.
- Encryption: Ensure your hotspot uses WPA2 or WPA3 encryption. These are the most secure encryption methods available.
- Monitor Connected Devices: Keep an eye on which devices are connected to your hotspot. If you see any unfamiliar devices, block them.
- Turn it Off When Not in Use: When you're done using your hotspot, turn it off. This prevents unauthorized access.
6. Boosting the Signal: Making Your Hotspot Stronger
Sometimes, your hotspot signal might be a bit weak. Fear not! Here are a few tips to boost its strength:
- Proximity: Place your laptop in a central location, ideally elevated. Avoid placing it near walls or metal objects, which can interfere with the signal.
- Restart Your Laptop: Sometimes, a simple restart can fix a weak signal.
- Check the Connection: Make sure your laptop is connected to a strong Wi-Fi signal or Ethernet connection.
- Limit Connected Devices: Too many devices connected to your hotspot can slow down the signal.
7. Troubleshooting Troubles: Common Hotspot Headaches and How to Fix Them
Things don’t always go smoothly. Let's talk about some common hotspot problems and how to fix them.
- Problem: Can't Connect: Double-check your password, ensure Wi-Fi is enabled on the connecting device, and restart both your laptop and the connecting device.
- Problem: Slow Speed: Limit the number of connected devices, place your laptop closer to the connecting device, and ensure you have a stable internet connection.
- Problem: Doesn't Show Up: Make sure your hotspot is enabled and broadcasting. Also, check your laptop's Wi-Fi settings to ensure it's not in "hidden" mode.
8. Beyond the Basics: Advanced Hotspot Hacks
Ready to level up your hotspot game? Here are a few advanced hacks:
- Use the Hotspot for Gaming: While not ideal, you can use your hotspot for online gaming. Just be prepared for possible lag.
- Share Your Hotspot Safely: Share your hotspot with trusted friends and family, but always emphasize the importance of strong passwords and secure browsing.
- Use a VPN: For added security, consider using a Virtual Private Network (VPN) while connected to your hotspot. This encrypts your internet traffic and protects your data.
9. The Perfect Travel Companion: Hotspot on the Go
Picture this: you’re on a plane, and the in-flight Wi-Fi is a joke. With your laptop hotspot, you can turn that moment into a productive session or catch up on your favorite shows. It’s like having a pocket-sized internet router wherever your journey takes you.
10. Streaming Serenity: Watching Movies Anywhere
Who doesn’t love a good movie night? Imagine streaming your favorite shows or movies on your tablet or smart TV using your laptop's hotspot. It’s the ultimate in convenience and freedom!
11. The Business Traveler's Best Friend: Stay Connected and Productive
For the frequent business traveler, staying connected is vital. Turning your laptop into a hotspot ensures you can always check emails, attend video conferences, and get work done, no matter where you are.
12. Bandwidth Basics: Understanding Your Data Usage
Be mindful of your data usage! Streaming videos, downloading large files, and video calls can quickly eat through your data allowance. Keep an eye on your data usage to avoid any surprises on your bill.
13. The Unexpected Benefits: More Than Just Internet
We discovered this when we were traveling. A Wi-Fi hotspot isn't just for internet access. It can turn your laptop into a media server, allowing you to stream your music, photos, and videos to other devices! Talk about versatility!
14. Mobile Hotspot vs. Laptop Hotspot: Weighing the Options
While your laptop can create a hotspot, there are also dedicated mobile hotspots. Both have their pros and cons. Mobile hotspots are generally more portable and often use a dedicated data plan. Laptop hotspots are free to set up (using your existing internet) but require you to have your laptop on. Choose the option that best fits your needs and budget.
15. Unleashing the Power:
Chromecast WiFi Setup: Laptop Trick For Instant Streaming!Use PC as WiFi Hotspot with Ethernet
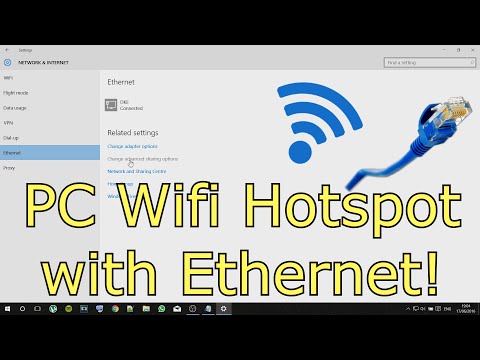
By Tech4Time Use PC as WiFi Hotspot with Ethernet by Tech4Time
Tethering a Phone to a Laptop - Tech Tips from Best Buy

By Best Buy Tethering a Phone to a Laptop - Tech Tips from Best Buy by Best Buy
Turn Windows 8 Laptop into WiFi HotSpot How To

By TechEmpty Turn Windows 8 Laptop into WiFi HotSpot How To by TechEmpty

Title: How to Create a WiFi Hotspot with Windows 7
Channel: 1stepatatime
How to Create a WiFi Hotspot with Windows 7 by 1stepatatime
My Laptop Work
Here's the title for your article: The Ultimate Guide to Crafting the Perfect Sourdough Starter and Baking Exceptional Bread
The Alchemy of Flour and Water: Unveiling the Secrets of Sourdough
We embark on a journey, a culinary odyssey into the heart of sourdough. More than just a bread, sourdough represents a living ecosystem, a whisper of ancient wisdom captured in a bubbling culture. Our purpose is not merely to provide instructions, but to cultivate a deep understanding of this transformative process, enabling you to unlock the potential within every loaf. Prepare to elevate your baking from the realm of the ordinary to the extraordinary.
Building Your Foundation: The Art of the Sourdough Starter
The cornerstone of magnificent sourdough is, undoubtedly, the starter. This vibrant microbial community, a symphony of wild yeasts and lactic acid bacteria, is the lifeblood of our loaves. We will explore the meticulous process of building a robust and reliable starter from scratch, ensuring your future breadmaking endeavors are crowned with success.
Day 1: The Genesis – Water, Flour, and Hope
Our adventure begins with equal parts whole wheat flour and unchlorinated, room-temperature water. The choice of flour is critical. Whole wheat, with its intact bran and germ, provides the nutrients necessary to nourish our fledgling microorganisms. Mix these components gently in a clean, non-reactive container, such as a glass jar. Aim for a consistency resembling pancake batter. Cover the jar loosely with a lid or cheesecloth to allow air circulation and prevent contamination. Place it in a warm, undisturbed location, ideally between 70-75°F (21-24°C).
Days 2-7: The Transformation – Nourishment and Observation
Over the next week, we will feed our starter daily. Discard approximately half of the existing mixture, and replenish it with equal parts fresh flour and water, repeating the recipe from Day 1. This process is not arbitrary; discarding a portion prevents the starter from becoming excessively acidic while simultaneously providing the food necessary for the microorganisms to flourish. Observe the changes. Bubbles will begin to appear, a visual testament to the activity within. You might also notice a slight sour aroma, a subtle indication that the lactic acid bacteria are beginning their work. Record your observations. These notes will be invaluable in understanding the unique characteristics of your starter.
Weeks 2-4: The Maturation – Assessing and Refining
As the days turn into weeks, a transformation will occur. Your starter will become more active, doubling in size within a few hours after feeding. The aroma will intensify, evolving from a mild tang to a vibrant, slightly vinegary scent. This is the sign of a mature, ready-to-bake starter. If the starter does not double in size within about 4-8 hours of feeding, it may need more time to mature. Continue feeding it daily until it is consistently active, doubling in size within the aforementioned timeframe. Temperature plays a significant role. In cooler environments, fermentation will proceed at a slower pace. Don't be discouraged. Patience is a virtue in the sourdough world.
Maintaining Your Culture: Feeding, Storing, and Troubleshooting
Once established, your sourdough starter requires regular care.
Feeding Frequency and Ratios:
A mature starter can be stored in the refrigerator and fed weekly. The feeding ratio is crucial. A 1:1:1 ratio (starter:flour:water) is a good starting point, meaning you discard all but one part of the starter and add one part flour and one part water. Monitor the activity; adjust the feeding schedule or ratio as needed, based on the characteristics of your starter and your baking schedule.
Storage Strategies:
Refrigeration slows down the fermentation process, allowing you to store your starter between baking sessions. Before returning it to the refrigerator, ensure the starter is fed and has reached its peak activity. When ready to bake, remove the starter from the refrigerator at least 4-6 hours before use, and feed it. This will ensure it is active and ready to leaven your dough.
Troubleshooting Common Issues:
- Lack of Activity: This is often a result of cold temperatures or a lack of food. Move the starter to a warmer location or increase the feeding frequency.
- Weak Rise: This can indicate an inactive starter or insufficient feeding before baking. Experiment with different feeding ratios or pre-fermenting a portion of the starter for several hours before incorporating it into the dough.
- Unpleasant Odor: An overly acidic starter can have a sharp, vinegary odor. Increase the feeding frequency, change the flour, or consider discarding and rebuilding a portion of the starter.
Crafting the Perfect Sourdough Dough: A Symphony of Ingredients and Techniques
Now that our starter is robust and ready, we turn our attention to the bread itself. The ingredients are deceptively simple: flour, water, salt, and our beloved starter. The magic lies in the quality and the technique.
Choosing Your Flour: Exploring the Grain's Potential
The type of flour significantly impacts the final result.
- Bread Flour: Provides the structure and elasticity necessary for a good rise.
- Whole Wheat Flour: Adds flavor, texture, and nutrients. Incorporating whole wheat flour in varying percentages adds depth of flavor and complexity.
- All-Purpose Flour: Can be used, but the results will be less consistent.
Experiment with different flour combinations to find your preferred flavor profile.
The Autolyse: Unfolding Hydration
The autolyse is a crucial step in developing gluten and maximizing hydration. In a large bowl, combine the flour and water, mixing until just combined the components are integrated. Cover and let rest for 30-60 minutes. During this resting period, the flour absorbs the water, initiating gluten development.
Incorporating the Starter and Salt: The Flavor-Building Phase
Add the active starter to the autolysed dough. Mix well, ensuring the starter is fully incorporated. Next, add the salt. Salt controls fermentation, strengthens the gluten network, and, most importantly, enhances flavor.
Bulk Fermentation: The Slow Dance of Flavor and Structure
This stage is where the dough develops flavor and structure. Cover the dough and let it ferment at room temperature, performing stretch and folds every 30-60 minutes for the first 2-3 hours. Stretch and folds help develop gluten strength. As fermentation progresses, the dough will increase in volume and develop a network of gas bubbles.
Shaping and Proofing: The Final Preparations
Gently shape the dough into your desired form, such as a boule or a batard. Place the shaped dough in a banneton basket or a bowl lined with a floured cloth, seam-side up. Proof in the refrigerator for 12-24 hours, developing the final flavor complexity.
Baking to Perfection: The Crucible of Heat
Baking sourdough requires a hot oven and a method to create steam.
Preheating and Steam:
Preheat your oven to 450°F (232°C) with a Dutch oven inside. The Dutch oven creates the ideal steamy environment for the initial bake. Alternatively, you can use a baking stone or steel and create steam by adding ice cubes or hot water to a pan in the oven.
Baking Technique:
Carefully remove the hot Dutch oven and place the proofed dough inside. Score the top of the dough with a sharp knife or lame. This controls the expansion of the loaf and creates beautiful patterns. Cover the Dutch oven and bake for 20 minutes. Remove the lid and continue baking for 25-35 minutes, or until the crust is deeply golden brown and the internal temperature reaches 200-210°F (93-99°C).
Cooling and Enjoying: The Sweet Reward
Allow the bread to cool completely on a wire rack before slicing. This process allows the internal structure to set, preventing a gummy texture. Resist the temptation to cut into the bread too soon; patience is essential.
The Art of Variation: Embracing Experimentation
Once you have mastered the basic techniques, the world of sourdough opens up. Experiment with different flours, additions, and baking times to create your signature loaves.
- Add-ins: Incorporate seeds, nuts, herbs, or dried fruits for added flavor and texture.
- Flour Variations: Try spelt, rye, or other ancient grains.
- Proofing Times: Adjustable for flavor intensity.
Conclusion: A Lifelong Journey of Discovery
