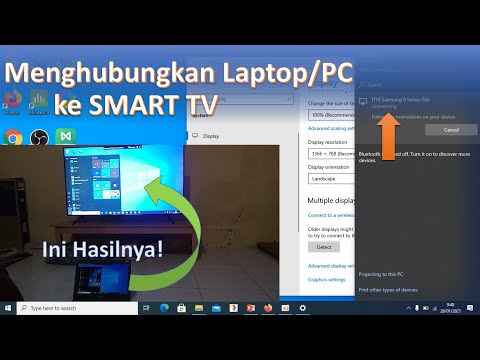
connect your pc/laptop to your tv via wifi

Title: Cara Menghubungkan & Mencerminkan Layar Laptop di Smart TV Apa Pun Secara Nirkabel Tanpa Aplikasi
Channel: MJ Tube
Cara Menghubungkan & Mencerminkan Layar Laptop di Smart TV Apa Pun Secara Nirkabel Tanpa Aplikasi by MJ Tube
Connect Your Laptop to Your TV Wirelessly: The SHOCKINGLY Easy Trick!
Unlock Your Entertainment: Stream Your Laptop to Your TV Effortlessly!
Ever wished you could effortlessly display your laptop's screen on your big-screen TV? Well, prepare to be amazed! It’s simpler than you think. Forget tangled wires. Ditch complicated setups. You're about to learn the shockingly easy trick to connect your laptop to your TV wirelessly!
The Wireless Revolution: Why Bother?
Why endure the confinement of your laptop's tiny screen? Your TV offers a far superior experience. Picture this: you're streaming your favorite movie. Or maybe you're sharing vacation photos with family. It’s all possible. In fact, it’s incredibly convenient. The wireless connection frees you from the couch. You can control everything from your laptop, which is amazing. Moreover, the days of squinting at a laptop screen are over. So, let’s get started with this incredible journey.
Decoding the Wireless Magic: Your Tech Toolkit
First, let's gather your essentials. Fortunately, you likely already have most of what you need. Essentially, you need two key components. Your laptop. And your smart TV. Many modern TVs have built-in wireless capabilities. They can connect directly to your laptop. However, some older models require a small, inexpensive upgrade. We’ll cover both scenarios.
Option 1: Unleash the Power of Built-In Features
If your TV is relatively new, rejoice! It probably has built-in screen mirroring. These features go by different names. They typically include Miracast, AirPlay (for Apple devices), or simply “Screen Mirroring.” Consequently, you'll want to consult your TV's manual. Additionally, check the settings menu. Usually, finding screen mirroring is straightforward.
Step-by-Step Guide for Screen Mirroring
The process is surprisingly simple.
- Ensure Compatibility: Confirm both your laptop and TV support the same mirroring technology.
- Enable Screen Mirroring on Your TV: Access your TV's settings. Look for the screen mirroring option and activate it.
- Initiate Connection on Your Laptop: On your laptop (Windows or Mac), search for “Connect to a wireless display” or similar.
- Select Your TV: Your TV should appear in the list of available devices. Click on it.
- Enjoy the Show: Your laptop's screen should now appear on your TV. And it's ready to use.
Option 2: Embracing the Power of Streaming Devices
If your TV lacks built-in screen mirroring, don't despair! There’s an even easier solution. Streaming devices are game-changers. You can use devices like Chromecast, Roku, or Amazon Fire TV Stick.
Setting Up Your Streaming Device
This process is incredibly straightforward.
- Plug and Play: Connect your streaming device to an HDMI port on your TV. Additionally, plug it into a power source.
- Connect to Wi-Fi: Follow the on-screen prompts to connect your device to your home Wi-Fi network.
- Install the App: You might need to install an app on your laptop. The app depends on your streaming device.
- Mirror Your Screen: In the app, select the option to mirror your laptop's screen.
- Beam Away: Your laptop screen should now appear on your television.
Troubleshooting Common Glitches
Sometimes, things don't go smoothly. Let's tackle some common issues.
- Connection Failure: Ensure both devices are on the same Wi-Fi network. Restart both devices. Also, verify the software is updated.
- Lagging or Choppy Playback: Minimize interference. Move your devices closer to the router. Close unnecessary applications on your laptop.
- Sound Problems: Check your TV's audio settings. Adjust the volume on both your laptop and TV.
Enhance Your Experience: Tips and Tricks
Want to elevate your wireless streaming experience? Here are some pro tips.
- Optimize Video Quality: Adjust your laptop's display settings. Match the resolution to your TV's.
- Use Headsets: Connect your headphones to your laptop. Enjoy your content without disturbing others.
- Explore Additional Features: Experiment with your TV's remote control. You might find specific options. These options include controlling the volume or other media features.
The Ultimate Entertainment Upgrade: Your Next Steps
Now you're armed with the knowledge to transform your home entertainment setup. This simple trick brings convenience. And it provides an expansive viewing experience. So, gather your essentials. Follow the steps outlined above. Consequently, you will be ready to revolutionize the way you stream. Moreover, share this secret with your friends and family. Let them experience the wireless freedom too! Have fun streaming, and enjoy!
Unlock Your Windows 8 WiFi Password: The Secret's Inside!Connect Your Laptop to Your TV Wirelessly: The SHOCKINGLY Easy Trick!
Ever felt the frustration of huddling around a tiny laptop screen, squinting to see the details of your favorite movie or desperately trying to share those vacation photos with family without a decent display setup? Trust me, we've all been there. It's like watching a majestic eagle through a keyhole – losing the grandeur entirely. But what if I told you there's a ridiculously simple way to liberate your content and fling it onto the big screen, wirelessly? Forget tangled HDMI cables and the inevitable search for the right adapter. Today, we're unveiling the shockingly simple trick to connect your laptop to your TV wirelessly, transforming your living room into your own personal cinema.
1. The Cable-Free Revolution: Why Ditch the Wires?
Okay, let's be honest, who actually enjoys wrestling with cables? They're the bane of my existence, a constant reminder of the messy underbelly of modern technology. The allure of wireless is undeniable – it's freedom, it's simplicity, it's like magic (but with a technical explanation, of course!). Ditching the wires means you can:
- Enjoy Flexibility: Watch from the comfort of your couch, in your pajamas, without being tethered to any specific spot. Freedom, baby!
- Reduce Clutter: Say goodbye to the cable jungle and hello to a clean, minimalist aesthetic. Your living room will thank you.
- Share Easily: Show off vacation photos, give presentations, or share a hilarious video with friends and family with zero hassle.
- Future-Proof Your Setup: Embrace the modern era of wireless connectivity.
2. Your Tech Toolkit: What You’ll Need to Get Started
Before we dive into the nitty-gritty, let's make sure you have the right tools for the job. The good news? It's probably less than you think. In most cases, you’ll need:
- A Laptop: Windows or Mac, either is compatible. (Unless you're rocking a vintage Commodore 64, you should be good.)
- A Smart TV: This is crucial. Modern TVs with built-in Wi-Fi capabilities are your best friends here. (Older TVs might require a streaming device, which we'll touch on in the next section.)
- A Stable Wi-Fi Connection: This is the backbone of our operation. Make sure both your laptop and your TV are connected to the same Wi-Fi network. Think of it as a digital handshake.
3. Unveiling the Magic: Two Primary Methods
Now for the main event! There are two primary methods to connect your laptop to your TV wirelessly, and both are surprisingly easy.
3.1. The Built-In Brilliance: Using Miracast & AirPlay
This is the simplest, most streamlined option. If your TV is a smart TV (and most are these days), it likely supports either Miracast (for Windows laptops) or AirPlay (for Mac laptops). Think of it as a direct line between your laptop and your TV.
- For Windows Users (Miracast):
- Press the Windows key + K (or click the notification icon in the bottom right corner of your screen).
- A list of available devices will appear.
- Select your TV's name.
- Done! Your screen should mirror automatically.
- For Mac Users (AirPlay):
- Click the AirPlay icon in your menu bar (it looks like a rectangle with a triangle in the bottom corner). If you don't see it, you may need to enable it in System Preferences > Displays.
- Select your TV's name.
- Voila! Your Mac screen is now on your TV.
3.2. The Streaming Device Symphony: Adapting Older TVs
What if your TV isn't a smart TV? Fear not! You can still join the wireless revolution with a streaming device. Think of these as digital translators. Popular options include:
- Chromecast (Google): A small dongle you plug into your TV's HDMI port. It uses Google Cast technology, allowing you to cast content from your laptop (using the Chrome browser) or directly from compatible apps.
- Roku: Another popular choice, offering a wider range of apps and services. Roku devices can also support screen mirroring.
- Amazon Fire TV Stick: Works similarly to Chromecast and Roku, specializing in Amazon content and ecosystems.
The setup process for these devices is generally straightforward:
- Plug it in: Connect the streaming device to your TV's HDMI port.
- Connect to Wi-Fi: Connect the device to your home Wi-Fi network.
- Download the App/Use Built-in Feature: Typically, you'll use the device's built-in screen mirroring feature or install an app that allows you to mirror your laptop's screen.
4. Troubleshooting the Troubles: Common Hiccups and How to Fix Them
Nothing is perfect (except maybe pizza), and you might hit a few snags along the way. Here are some common problems and how to troubleshoot them:
- "My TV Isn't Showing Up":
- Make sure both your laptop and your TV (or streaming device) are connected to the same Wi-Fi network.
- Double-check that the TV's screen mirroring or casting feature is enabled.
- Restart both your laptop and your TV. Sometimes, a simple power cycle does the trick.
- "The Connection is Laggy or Choppy":
- Try moving your laptop and TV closer to your Wi-Fi router, or consider upgrading your router to boost your Wi-Fi signal.
- Close any unnecessary applications on your laptop to free up resources.
- "The Picture Quality Isn't Great":
- Ensure your TV's resolution settings are set to the highest possible setting.
- Check your Wi-Fi speed. If your connection is slow, the picture quality will suffer.
5. Beyond the Basics: Level Up Your Wireless Game
Once you've mastered the basics, you can take your wireless experience to the next level:
- Extend Your Desktop: Instead of mirroring your screen, you can extend your desktop, giving you extra workspace. This is particularly useful for presentations or multitasking.
- Optimize for Gaming: If you're a gamer, make sure your TV has a low latency mode to minimize lag.
- Utilize Specific Apps: Many streaming services (Netflix, Hulu, etc.) have built-in casting features, allowing you to directly stream content from their apps.
6. The Joy of the Big Screen: Benefits Galore
Connecting your laptop to your TV wirelessly isn't just about convenience. It unlocks a whole new world of possibilities:
- Enhanced Entertainment: Watch movies, shows, and videos on a much larger screen, making your viewing experience more immersive.
- Productivity Boost: Give presentations, work on documents, or browse the web with a bigger, clearer view of your content.
- Family Fun: Share photos and videos with loved ones, creating lasting memories.
- Personalized Cinema: Create your own home theater experience, customized to your liking.
7. The Art of the Setup: Step-by-Step Guide
Let's put it all together. Here's a simplified walkthrough to connect your laptop to your TV wirelessly (using Miracast as an example, but the process is similar for other methods):
- Ensure Compatibility: Make sure your TV supports screen mirroring (often called "screen cast," "wireless display," or similar).
- Connect to Wi-Fi: Ensure both your laptop and your TV are on the same Wi-Fi network.
- Initiate the Connection: Press the Windows key + K on your laptop.
- Select Your TV: Choose your TV's name from the list of available devices.
- Enjoy the Show! Your laptop's screen should now be mirrored on your TV.
8. Maximizing Your Experience: Tips and Tricks
Here are a few extra tips to make your wireless experience even smoother:
- Position Your Devices: Place your laptop and TV in clear sight of each other for optimal connectivity.
- Manage Your Wi-Fi: Close unnecessary apps on your laptop to reduce bandwidth usage.
- Update Drivers: Keep your laptop's display drivers up-to-date for the best performance.
- Embrace Experimentation: Don't be afraid to try different methods and settings to find the perfect setup for your needs.
9. The Future is Wireless: Embrace the Evolution
Wireless technology isn't just a trend; it's the future. As technology advances, wireless connectivity will only become more seamless, reliable, and integrated into our lives. By embracing wireless solutions like connecting your laptop to your TV, you're not just simplifying your life; you're staying ahead of the curve.
10. Beyond the Screen: Other Cool Uses
Think beyond just movies and presentations. Connecting your laptop to your TV wirelessly opens up a world of cool possibilities:
- Video Games: Play your favorite games
Cara Menghubungkan LaptopPC ke SMART TV dengan WiFi
By Eko Zulkaryanto Cara Menghubungkan LaptopPC ke SMART TV dengan WiFi by Eko Zulkaryanto
Cara Menghubungkan Dekstop PC ke TV Nirkabel, Gratis, Tanpa WIFI, Tanpa HDMI Langkah demi Langkah 2022

By rizisuper Cara Menghubungkan Dekstop PC ke TV Nirkabel, Gratis, Tanpa WIFI, Tanpa HDMI Langkah demi Langkah 2022 by rizisuper
How To Connect Laptop To Smart TV Wirelessly

By Tech is Easy How To Connect Laptop To Smart TV Wirelessly by Tech is Easy

Title: How to Fix Cast Device Not Working on Windows 11 PC Easy Settings
Channel: YourSixTech
How to Fix Cast Device Not Working on Windows 11 PC Easy Settings by YourSixTech
Wifi Not Found
Here is the title: The Ultimate Guide to Mastering Cold Email Outreach in 2024
The Ultimate Guide to Mastering Cold Email Outreach in 2024
Navigating the digital landscape of 2024 demands a nuanced understanding of communication. Amongst the myriad strategies available, cold email outreach remains a potent force, capable of forging valuable connections and driving tangible results. This guide serves as a comprehensive blueprint, meticulously crafted to empower you to craft and execute cold email campaigns that not only reach their intended recipients but also resonate deeply, eliciting meaningful engagement and conversions. We will delve into a practical approach to cold email, equipping you with the knowledge and skills necessary to stand out from the deluge of generic messages and achieve remarkable outcomes.
I. Defining the Scope of Optimal Cold Email: Beyond the Broadcast
The prevailing misconception surrounding cold email often frames it as a mass-broadcasting method, a digital shotgun blast aimed at a vast, undifferentiated audience. Such an approach is frankly obsolete. Success in 2024 hinges on adopting a highly targeted, strategically personalized approach. This means moving beyond the superficiality of name-dropping and generic templates. Instead, we need to focus on generating real value for the recipient.
A. Segmentation and Targeting: Precision is Paramount
Before composing a single word of your email, you must define your ideal recipient. Invest significant time in researching and segmenting your target audience. This isn't merely about job titles; it's about understanding their pain points, aspirations, and the specific problems they grapple with daily. Utilize tools like LinkedIn Sales Navigator, industry-specific databases, and even company websites to gather detailed information about each prospect.
Example: Instead of targeting "Marketing Managers," segment further: "Marketing Managers in SaaS companies with 50-200 employees experiencing low lead generation on their blogs." This level of precision allows you to tailor your message to directly address their unique challenges.
Actionable Step: Create a spreadsheet dedicated to audience segmentation. List key criteria such as industry, company size, role, responsibilities, and known pain points. This will become the foundation for your personalized messaging.
B. Research as a Foundation: Unveiling the Hidden Needs
Thorough research is the cornerstone of a successful cold email campaign. It goes beyond superficial LinkedIn profiles. Dive deep into the prospect's online presence. Read their recent articles, listen to their podcasts, explore their social media activity. This meticulous investigation allows you to identify specific aspects of their work or interests that can be integrated into your email, demonstrating a genuine understanding of their world.
Example: Find a recent article the prospect wrote about a particular industry trend. In your email, you can reference the article, demonstrating your understanding of their perspective and highlighting how your offering can provide them with unique solutions.
Actionable Step: Develop a research template that includes fields for the prospect's recent activity, their company's recent challenges, and any potential connections between their work and the value you offer.
II. Crafting Emails that Convert: The Art of Persuasive Communication
Once you have established your target audience and conducted meticulous research, it is time to craft emails that captivate your readers. To be effective, your email must accomplish several key objectives: it must grab their attention quickly, demonstrate value, and compel them to take action.
A. Subject Lines that Command Attention: The First Impression
The subject line is the gateway to your email. It is the first, and often the only, element the recipient sees. It has to be compelling enough to make them open it. Avoid generic subject lines like "Follow Up" or "Meeting Request." Instead, focus on curiosity, personalization, and the potential value you offer.
Example:
- Weak: "Introduction to [Your Company]"
- Strong: "[Prospect's Name], a thought on [Industry Trend] and its impact on [Prospect's Company]"
Actionable Step: Test different subject lines for each segment of your audience to track which ones generate the highest open rates. Embrace A/B testing to continuously refine.
B. The Anatomy of a High-Converting Cold Email: Structure and Substance
Each email needs a clear structure that can deliver its message in a clear and concise manner. The following structure is highly effective:
- Personalized Greeting: Start with a personalized greeting that acknowledges an element of their recent activity or shared connection, such as a mutual contact, or a comment about their recent professional article.
- The Hook: Start strong. Within the first sentence or two, capture the recipient's attention by immediately addressing their pain points, offering a solution, or presenting a compelling benefit.
- Build the Bridge: Position your offering as the answer to their challenges. Clearly explain how your product or service delivers value that aligns with their specific needs.
- Social Proof: Build credibility by including testimonials and other examples of how you have helped similar organizations.
- Call to Action (CTA): Guide the recipient towards a desired action. Be specific, provide a clear explanation of what you want them to do, and make it easy for them to take action.
C. The Psychology of Persuasion: Words That Work
Mastering the language of persuasion is crucial. Utilize compelling language that resonates with your audience, focusing on benefits rather than features.
- Emphasize Benefits: Instead of stating the features of your product, highlight how those features will create benefits for the recipient.
- Create Urgency: To encourage action, include a sense of time sensitivity in your message.
- Utilize Social Proof: Establish credibility with testimonials, case studies, and other evidence of your success.
- Focus on the "You": Make the email about the recipient, using their name and referencing their company's specific challenges.
III. Optimizing Your Cold Email Campaign: Advanced Techniques
Once you've mastered the art of crafting compelling emails, the next step is to optimize your campaign’s effectiveness. Sophisticated techniques can significantly boost your conversion rates and improve your overall results.
A. A/B Testing and Data Analysis: Learning from Successes and Failures
A/B testing is an indispensable tool. Experiment with different elements of your email, such as subject lines, calls to action, and email copy to see what resonates most with your audience. Track open rates, click-through rates, and conversion rates to analyze performance.
Example: Test two different subject lines with the same email body to determine which one generates more opens. Similarly, test two different CTAs or two different versions of the email copy.
Actionable Step: Utilize an email marketing platform with A/B testing capabilities. Regularly analyze your data to identify patterns and continually improve your campaign’s performance.
B. Email Deliverability: Avoiding the Spam Folder
Email deliverability is an inescapable challenge. If your emails end up in the spam folder, your efforts will be futile. Follow these tips:
- Use a Reputable Email Service Provider: Choose a reliable provider known for its strong deliverability rate.
- Warm Up Your Email: Gradually increase your sending volume over time to establish positive email reputation.
- Avoid Spam Triggers: Eliminate or minimize the use of spam trigger words like "free", "guaranteed", and excessive exclamation points.
- Authenticate Your Domain: Set up SPF, DKIM, and DMARC records to verify your email sender and domain.
- Monitor Your Bounce Rate: Remove undeliverable email addresses from your list to maintain a healthy sender reputation.
- Provide an Unsubscribe Link: Ensuring an easy method for removing recipients from your list will reduce spam complaints.
C. Automation and Follow-Up: Nurturing the Lead
Strategic automation can save valuable time and increase your efficiency.
- Automated Follow-Up Sequences: Implement a follow-up sequence for leads who aren't immediately responsive, addressing any concerns and offering additional information.
- Personalization: Tailor your follow-up emails based on the recipient’s interactions with your initial email.
- Segmentation: Segment your email list based on engagement levels to customize your follow-up approach.
- Actionable Step: Use automation tools to schedule follow-up emails, track opens, clicks, and other metrics.
IV. Measuring Success and Iterating for Continuous Improvement
The journey to cold email mastery is ongoing. Continuous measurement and iteration are essential for sustained results.
A. Key Metrics to Track: Your Scorecard for Success
Track these crucial metrics to gauge the effectiveness of your campaigns:
- Open Rate: Represents the percentage of recipients who open your email.
- Click-Through Rate (CTR): Shows the percentage of recipients who click on links in your email.
- Response Rate: Measures the percentage of recipients who respond to your email.
- Conversion Rate: Calculates the percentage of recipients who take a desired action, which might include booking a call, submitting a form, or making a purchase.
- Unsubscribe Rate: Indicates the percentage of recipients who unsubscribe from your email list.
- Spam Complaint Rate: The percentage of recipients who mark your email as spam.
B. Iterative Refinement: Never Stop Learning
Use the data gathered from your tracking efforts to continuously refine your campaigns:
- Analyze Trends: Observe patterns in your data to identify what works and what doesn’t.
- Experiment Continuously: Regularly test different subject
