how to turn on wifi on my gateway 6510gz laptop

Title: How FIX WIFI Gateway Connection Problems Notebook Desktop Ultra Slim Creator NV NE M Series NE LT
Channel: Helping Hermit
How FIX WIFI Gateway Connection Problems Notebook Desktop Ultra Slim Creator NV NE M Series NE LT by Helping Hermit
Gateway 6510gz WiFi: The SHOCKINGLY Easy Fix!
Baffled by Your Gateway 6510gz WiFi? Don't Throw in the Towel Just Yet!
So, your Gateway 6510gz WiFi is acting up. You’re tearing your hair out, aren't you? It happens to the best of us. But before you toss that router out the window in a fit of frustration, hear me out. Believe it or not, there's a good chance you can fix this yourself. And the solution might be far simpler than you think.
The WiFi Woes: Recognizing the Problem
First things first: what exactly is going wrong? Is your connection dropping like a hot potato? Are speeds painfully slow? Maybe you can't connect at all? Accurately identifying the symptoms is crucial. Because, after all, a correct diagnosis is half the battle won. This information helps you in the next step, which is fixing the problem.
Consequently, let's consider some common culprits behind WiFi woes. Obstructions like walls sometimes interfere with the signal. Also, interference from other electronic devices could be an issue. Therefore, understanding what’s happening is the initial step.
Troubleshooting 101: Simple Steps to Take First
Okay, let's dive into some easy fixes. They are quick and don’t require advanced technical skills. Initially, a simple reboot can work wonders. Therefore, switch off your Gateway 6510gz, as well as your modem, for a minute or two. Next, power them back up. Then, test your internet connection.
Furthermore, ensure your router's firmware is up-to-date. The manufacturer often releases updates that improve performance and security. Because these updates are significant, check the manufacturer's website. Then, follow their instructions.
Channel Surfing: Might Your WiFi Channel Be to Blame?
WiFi routers broadcast on specific channels. In areas with numerous WiFi networks, these channels can become congested. To resolve this, you will need to find a less crowded channel. Then, log into your router’s settings. Thus, you can access the admin panel. There, you can usually adjust the channel settings.
Moreover, several apps will analyze your network. These apps discover the best available channels. Therefore, you can identify the ideal one.
Location, Location, Location: Where Is Your Router Placed?
Believe it or not, the location of your router dramatically impacts its performance. Place it in a central, elevated position. Keep it away from walls and other obstructions. Therefore, its signal can reach more areas of your home. Also, make sure to keep it away from other electronics.
For instance, microwave ovens and cordless phones can disrupt the signal. Consequently, be attentive to these elements.
Security Matters: Protecting Your WiFi Network
Security is also important. Without proper protection, anyone can access your network. As a result, your speed decreases. To combat this, set a strong password. Then, use WPA2 or WPA3 encryption. These security protocols protect your data. Also, they prevent unauthorized access.
Also, change your router's default password. This is a common security vulnerability. However, it is frequently overlooked. So, protect yourself.
Beyond the Basics: Exploring Advanced Options
If simple fixes don't work, it's time to explore more advanced solutions. Consider upgrading your router's antennas. They will improve signal strength. If you have a large home, a WiFi extender helps. They increase the range of your network.
However, before you make a purchase, consider your needs. Therefore, select the correct options for your situation.
When to Call in the Experts: Knowing Your Limits
Sometimes, DIY solutions aren’t enough. If you’ve tried everything, and the problem continues, seek professional help. Contacting an internet service provider is a good starting point. Also, a local computer repair shop can help. They might have additional diagnostic tools.
Moreover, don't be afraid to ask for assistance. It could save you hours of stress.
The Takeaway: Don't Give Up!
Fixing your Gateway 6510gz WiFi isn't always a daunting task. Often, a simple fix is all you need. Consequently, implement the tips offered. Then, check again. You might just be pleasantly surprised.
Finally, remember to be patient. Troubleshooting takes time. Nonetheless, with persistence, you can restore your WiFi. Therefore, you’re back to streaming videos and browsing without interruption. Good luck! Now get to it!
🔥Download Dell N5110 WiFi Driver NOW! (Fix Your Wi-Fi Today!)🔥Gateway 6510gz WiFi: The SHOCKINGLY Easy Fix!
Alright, fellow tech travelers! Picture this: you're nestled in your cozy corner, ready to binge-watch your favorite show, or maybe you're prepping for an important online meeting. Then BAM! The dreaded buffering wheel of doom appears. Your Gateway 6510gz WiFi, once a reliable companion, has decided to take a vacation. Frustration flares, doesn't it? We've all been there. But before you start wrestling with the router like it owes you money, take a deep breath. Because, guess what? The fix for your Gateway 6510gz WiFi woes is often simpler than you think. We're talking shockingly easy. Let's dive in and get you back online faster than you can say “bandwidth boost”!
1. The WiFi Woes: Recognizing the Enemy
First things first: let's identify the enemy. Is it your internet connection itself, or is it specifically a problem with the WiFi signal coming from your Gateway 6510gz? Before you start tweaking settings, run a quick diagnostic. Try these simple checks:
Restart Everything: The classic cure-all. Unplug your modem and router (the Gateway 6510gz is likely both in one neat package), wait a minute, and plug them back in. Patience is key! Let them fully boot up.
Wired Connection Test: If you have a device with an Ethernet port (like a desktop computer), connect it directly to the Gateway 6510gz with an Ethernet cable. Does the internet work then? If yes, the problem is almost certainly your WiFi. If no, you've got a bigger issue (call your internet provider!).
Device Check: Try connecting other devices to your WiFi. Do they all have problems? This tells you whether it's a device-specific issue or a broad WiFi breakdown.
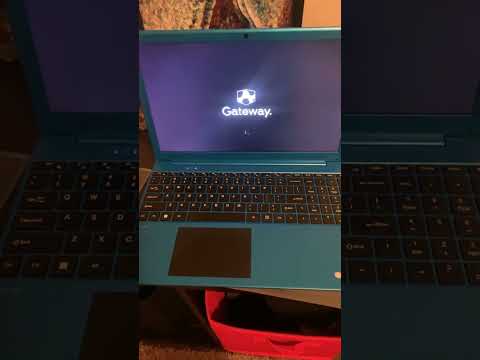
2. Decoding the Gateway 6510gz: Your WiFi's Brain
The Gateway 6510gz is, at its heart, a router, a modem, and a WiFi access point all rolled into one. It's the brain of your home network, directing traffic and beaming out that precious WiFi signal. Understanding its basic functions helps immensely when troubleshooting. This particular model, while sometimes a bit long in the tooth (let's be honest!), usually performs pretty well when it's behaving. My own experience taught me that sometimes the simplest things are the culprits!
3. The Secret Weapon: Router Reboot (Seriously!)
Let’s be crystal clear: we're not talking about a simple “off and on” here. We need the full reset. Unplug the power cord from your Gateway 6510gz. Leave it unplugged for a truly agonizing 30-60 seconds. This gives the device's internal components a chance to completely reset. Think of it like clearing your computer’s RAM. This is the single most effective first step in virtually any WiFi issue. Trust me, it works more often than you’d believe. I've lost count of the number of times it's saved my sanity.
4. Checking for Interference: WiFi's Invisible Enemies
WiFi signals, like shy introverts, don’t like crowded spaces. They're prone to interference from other devices emitting radio waves. Think microwaves (they're WiFi signal saboteurs!), Bluetooth devices, cordless phones, and even certain types of Christmas lights.
Location, Location, Location: Your Gateway 6510gz's location matters. Is it tucked away in a cupboard? That's like putting a concert speaker in a closet. Try elevating it, placing it in a central location in your home, and keeping it away from those interference culprits.
Channel Surfing: Your router broadcasts on a specific WiFi channel. Sometimes, neighboring WiFi networks use the same channel, causing congestion and slower speeds. Most routers, including the Gateway 6510gz, allow you to change channels. Access your router’s settings (we’ll show you how later) and try changing the channel to a less crowded one.
5. Accessing Your Gateway 6510gz Control Panel: The Command Center
To make many of these fixes, you'll need to access your router's settings. This is usually done via a web browser. Here's how:
Find the IP Address: This is typically printed on a sticker on the Gateway 6510gz itself. Look for something like "Default Gateway Address" or "Router Address," followed by a number like 192.168.1.1 or 192.168.0.1.
Type it in: Open your web browser (Chrome, Firefox, Safari, etc.) and type that IP address into the address bar.
Login: You'll be prompted for a username and password. The default credentials (often "admin" for both username and password) are usually printed on the sticker or in the router's manual. If you've changed them, use your customized credentials.
6. Navigating the Settings: Finding the Good Stuff
Once you’re logged in, you’ll find yourself in the router’s control panel. It might look a bit intimidating at first, but don't panic! You're mainly looking for a section about WiFi settings or wireless settings.
7. Channel Selection: The WiFi Highway
In the WiFi settings, you should find an option for channel selection. Experiment with different channels (1, 6, and 11 are often the least congested). Save your changes, and then test your WiFi speed again. There are free apps available that can scan your network and tell you the best channels to use.
8. Firmware Updates: Keeping Your Router Young
Like your phone or computer, your Gateway 6510gz router needs occasional updates. These updates (firmware) often include bug fixes and performance improvements. Check the router's control panel settings for a section on firmware updates. If an update is available, install it. It’s like giving your router a shot of espresso!
9. Securing Your WiFi: Keeping the Intruders Out
While we're in the settings, it’s always a good idea to review your WiFi security settings. Make sure you have a strong password. Switch from WEP encryption (which is easily hackable) to WPA2 or WPA3. This is like putting a high-security lock on your front door.
10. Resetting to Factory Default: The Nuclear Option (Use with Caution!)
If all else fails, you can reset your Gateway 6510gz to its factory default settings. This wipes all your custom settings and reverts the router to its original configuration. There’s usually a small reset button on the back of the router. Press and hold it for about 10-15 seconds (while the router is powered on). Be warned: you’ll have to re-enter your internet provider's settings and reconfigure your WiFi network. This is often a last resort.
11. Speed Testing: Measuring the Results
After implementing these fixes, run a speed test. There are many free online speed test tools available. Compare the results to the speeds you're supposed to be getting from your internet provider. Seeing an improvement means you've won!
12. Troubleshooting Specific Devices: Pinpointing the Weak Link
If one specific device is having WiFi problems, the issue might not be the router itself. Try these steps:
Device Reboot: Restart the device having problems. This includes your phone, laptop, smart TV, etc.
Forget and Reconnect: On the problematic device, "forget" your WiFi network and then reconnect using your password.
Driver Updates: Make sure your device's WiFi drivers are up to date.
13. When to Call the Professionals: Knowing When to Fold
Sometimes, the issue is beyond your abilities. If you've tried all the above steps and your WiFi is still spotty, it's time to call in the reinforcements. Contact your internet service provider (ISP). There might be a problem with your internet connection itself, or they can help you troubleshoot the Gateway 6510gz specifically. They might even offer to replace it if it’s faulty.
14. The Power of Patience: Persistence Pays Off
Fixing WiFi issues can be a bit like detective work. You might not find the solution immediately. Be patient. Try each step methodically. Celebrate the small victories, and don’t be afraid to ask for help when you need it. Remember, we've all been there, and you're not alone!
15. Preventive Maintenance: Keeping the WiFi Happy
Once you've got your WiFi working smoothly, take steps to keep it that way:
Regular Reboots: Give your router a reboot once a month or so as a preventative measure.
Keep it Clear: Regularly assess your router's environment, removing any new sources of interference.
Stay Updated: Keep an eye out for firmware updates and install them promptly.
Closing Segment: Back to Binge-Watching (and Beyond!)
So there you have it! The "shockingly easy fix" for your Gateway 6510gz WiFi. We've covered everything from basic troubleshooting to advanced settings. Now go forth, conquer those
Dell Laptop WiFi Nightmare? Solved! (Easy Fix Inside!)Gateway laptop start up
By Jasmine Johnson Gateway laptop start up by Jasmine Johnson
How to Turn on Wifi on Window 10 in Laptop Wifi Not Turning on Problem Solved Wifi Turned Off

By Zeeshan Awan How to Turn on Wifi on Window 10 in Laptop Wifi Not Turning on Problem Solved Wifi Turned Off by Zeeshan Awan
Wifi Button Not Working to Laptop Wifi Problem Fix 100macniteshwifi 2023shorts

By Mac Nitesh Wifi Button Not Working to Laptop Wifi Problem Fix 100macniteshwifi 2023shorts by Mac Nitesh

Title: WiFi Not Showing Up on Windows 10 laptoprepair
Channel: Tech White
WiFi Not Showing Up on Windows 10 laptoprepair by Tech White
Working With Laptop
The Untapped Potential of Cold Brew Coffee: A Deep Dive into Flavor, Brewing, and Beyond
We, the creators of this exploration into the captivating world of cold brew coffee, understand the ubiquitous nature of this beverage. It has transcended its niche origins and established itself as a staple. However, while its popularity swells, a deeper understanding of its nuances often lags behind the casual consumer's familiarity. This article will illuminate the rich tapestry of cold brew, moving beyond the surface level to offer a comprehensive guide for enthusiasts and newcomers alike. We will uncover the secrets behind superior cold brew, from bean selection to the final, perfect pour.
Unveiling the Superiority of Cold Brew: A Sensory Experience
The allure of cold brew lies in its distinct flavor profile. Unlike its hot-brewed counterparts, cold brew avoids the bitterness often associated with heat extraction. The slow, patient steeping process in cold water coaxes out a smoother, more naturally sweet essence from the coffee grounds. This results in a coffee experience that is remarkably low in acidity, making it easier on the stomach and offering a nuanced complexity that surpasses those found in traditional methods. The absence of heat allows for a different extraction of volatile compounds, leading to a flavor profile often described as chocolatey, nutty, or even fruity, depending on the bean selection and brewing practices. Imagine a rich, chocolatey base, complemented by subtle hints of caramel and dried fruit. This is the promise of a well-crafted cold brew.
The Alchemy of the Bean: Selecting the Perfect Coffee for Cold Brew
The foundation of exceptional cold brew is, without a doubt, the coffee bean itself. Not all coffees are created equal when it comes to cold brewing. The ideal beans possess certain characteristics. We recommend selecting high-quality beans, ideally single-origin varieties, to truly appreciate the subtleties of flavor. Consider coffees that are known for chocolate, nutty, or fruit-forward tasting notes. Dark roasts work wonderfully if you favour those, but light roasts can offer surprising complexity when brewed cold. Ultimately, experimentation is key. We encourage the exploration of different origins, from the rich, earthy tones of Sumatran beans to the bright, citrusy notes of Ethiopian Yirgacheffe. The roast level plays a significant role: dark roasts tend to deliver bold, intense flavors, while medium roasts offer a balanced approach. Light roasts present the most complex and nuanced flavours. Freshness is of paramount importance. Buy whole beans and grind them just before brewing to preserve the delicate aromatic compounds. A burr grinder is essential for achieving a uniform grind size.
The Art of the Grind: Mastering the Crucial Grind Size
Grind size is a crucial factor. For cold brew, a coarse grind is essential. Think of the consistency of coarse sea salt. Too fine a grind will lead to over-extraction and a bitter, muddy brew. The coarse grind allows for optimal water penetration and extraction over the extended steeping time, allowing the coffee to be steeped without adding bitterness. The coffee grounds should be allowed to steep slowly, at a steady and consistent rate, at a controlled temperature. This approach is the key to the flavour profile. It allows for a smooth, clean finish, with optimal, flavorful results.
The Brewing Process: A Symphony of Time and Temperature
The brewing process is deceptively simple but requires precision and patience. The ratio of coffee to water is critical. A general guideline is a 1:4 to 1:6 ratio of coffee to cold, filtered water by weight. The amount of coffee used will be impacted by the number of cups you wish to produce. For example, if you desire one litre of coffee, you could use 150 grams of ground coffee. The temperature of the water is equally important. Cold, filtered water is the key to a clean, smooth extract. While tap water can be used, we advise against it due to its potential for affecting the flavor. Place the coarsely ground coffee in a container suitable for brewing. Examples of vessels include a French press, a mason jar, or a purpose-built cold brew system. Pour the water over the grounds, ensuring they are completely saturated. Gently stir the mixture to ensure all the grounds are fully submerged. Cover the container and allow it to steep in the refrigerator for 12 to 24 hours. The time allowed will change the flavour profile. Twelve hours will generally create a lighter, less intense brew. Twenty-four hours will produce a stronger, bolder flavour. Taste the brew periodically to determine when the desired flavor has been achieved.
The Extraction of Flavor: Filtration and Dilution
Once the steeping process is complete, it is time to filter the coffee. This is a crucial step to remove the grounds and sediment, resulting in a clear and enjoyable final product. A French press relies on its built-in filtering mechanism. Some people prefer to use a fine-mesh sieve. Regardless of your chosen method, it's vital to remove all the grounds, ensuring a clear, smooth mouthfeel. The concentrate will typically be a heavy and strong brew. The coffee concentrate is then ready to be diluted with water, ice, milk, or any preferred addition. Experiment to find your perfect dilution ratio. We recommend starting with a 1:1 ratio of concentrate to water or milk and adjusting to your taste.
Beyond the Basics: Creative Applications and Flavor Enhancements
Cold brew's versatility extends far beyond a simple cup of coffee. It is a versatile ingredient in many creative applications. Mix it into smoothies. It can be part of many baking recipes, and used to make many delicious dishes. Consider incorporating cold brew into your morning smoothie for an energizing boost. Add a few tablespoons to your favorite chocolate cake recipe for a richer flavor. Cold brew opens doors to exciting culinary explorations. Flavored syrups and extracts can enhance the cold brew experience. Vanilla, caramel, and hazelnut are classic choices, but the possibilities are endless. Experiment with homemade syrups. Enhance your cold brew with spices like cinnamon or cardamom. The options are limited only by your imagination.
The Longevity of Cold Brew: Storage and Shelf Life
Proper storage is crucial for preserving the flavor of your cold brew. Store the concentrate in an airtight container in the refrigerator. Properly stored, it can last for up to two weeks. However, we recommend drinking it within a week for optimal freshness. As the coffee ages, its flavor will gradually degrade. Prevent flavor loss by storing your cold brew in the back of the refrigerator, where the temperature is more stable. This will protect it from fluctuations that could impact the quality.
Troubleshooting Common Cold Brew Issues
Even experienced brewers sometimes encounter problems. Here are solutions to a few common issues. If your cold brew tastes bitter, the most likely culprit is over-extraction. Possible reasons include grinding the coffee too finely, steeping for too long, or using water that is too hot. Address this by using a coarser grind, reducing the steeping time, and ensuring the water is cold. If your cold brew tastes weak, you may have used too little coffee, steeped for too short a time, or diluted the concentrate too much. Increase the coffee-to-water ratio, extend the steeping time, or reduce the amount of dilution. If your cold brew is muddy, it could be due to a too-fine grind or a poor filtration method. Ensure you are using a coarse grind, and use a fine-mesh filter or a French press to remove all the grounds.
Conclusion: Embarking on Your Cold Brew Journey
We trust this comprehensive guide has provided you with the knowledge and inspiration to embark on your own cold brew journey. Experiment with different beans, grind sizes, and brewing times. Enjoy the process of discovery. The perfect cup of cold brew is within your reach. Embrace the art of slow brewing. Savor the smooth, complex flavors. And most importantly, enjoy the experience.
