how to send wifi from motorola g5 plus to laptop
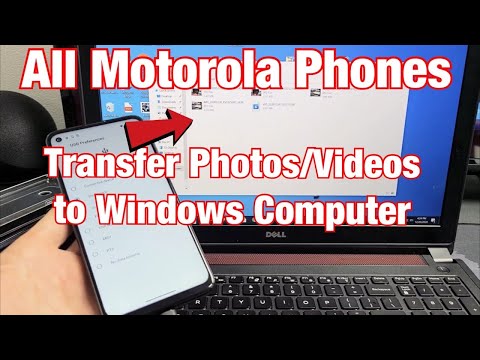
Title: All Motorola Phones How to Transfer Photos & Videos Windows ComputerPCLaptop
Channel: WorldofTech
All Motorola Phones How to Transfer Photos & Videos Windows ComputerPCLaptop by WorldofTech
Motorola G5 Plus Wi-Fi Hotspot: Laptop Connection HACK!
Unleash Your Motorola G5 Plus: The Wi-Fi Hotspot Secret You NEED to Know!
The Motorola G5 Plus. You likely have one. Perhaps you're wondering how to get the absolute most out of it, specifically when it comes to connecting your laptop. Hold onto your hats, because we’re about to dive into a nifty little trick. It's a secret weapon for those moments when Wi-Fi is scarce, or spotty. Let's explore!
Beyond the Basics: Decoding the G5 Plus Hotspot
We all know the basics, right? The settings menus, the "mobile hotspot" toggle. But are you truly maximizing the potential of your Motorola G5 Plus's built-in Wi-Fi hotspot functionality? Think about it. You are in a pinch. Maybe you’re at a coffee shop with weak Wi-Fi, or traveling on a train. What if you could connect your laptop seamlessly to the internet, using your phone as the gateway? That’s exactly what we're discussing. It's not just a feature; it's a necessity.
The Laptop Connection Labyrinth: Navigating the Setup
So where do we begin? First, let's acknowledge the conventional path: turning on the hotspot, finding it on your laptop's Wi-Fi list, and connecting. That’s simple, yes. Unfortunately, sometimes it isn’t so simple in practice. This is where the secret sauce kicks in. Before we proceed, ensure your data plan allows for hotspot usage. Now, let's assume that the standard methods fail. What then?
Troubleshooting Tactics: When Connection Conundrums Arise
Let's say your laptop doesn't immediately see your phone's hotspot. First off, don't panic! Consider these common culprits. Double-check your hotspot settings. Ensure it's enabled, and your password is correct. Is your laptop’s Wi-Fi adapter functioning properly? Sometimes, a simple reboot can resolve these issues. If you’ve done all this, but things are still not working properly, then look a bit deeper.
Unveiling the Hidden Settings: The Real Hotspot Hack
Now, let's get into the real "hack," the step many overlook. Go deep into your Motorola G5 Plus settings. Search for the "hotspot configuration" (or similar phrasing; the exact wording varies a bit). Here’s where things get interesting. You will usually find options controlling the network name (SSID) and the password. But, look closely. Can you change the band? Some phones let you choose between 2.4 GHz and 5 GHz bands.
Why Band Matters: The Frequency Factor
Why is this crucial? Because different bands handle different situations. The 2.4 GHz band offers wider range. Because of this, it is suitable for longer distances and areas where signal strength varies. However, 5 GHz band offers faster speeds. This is ideal if you're in a congested area with many Wi-Fi networks. It’s often less crowded and can handle more data.
The Ultimate Hotspot Optimization: Bandwidth Bonanza
Here’s the crux of the "hack." Consider what your laptop actually needs. If you’re primarily browsing the web or checking emails, 2.4 GHz should do the trick, and is most likely to provide stability. Conversely, if you're streaming video, playing online games, or transferring large files, switch to 5 GHz if your laptop and the network at your location support it. This is the key to unlocking faster more reliable connectivity. It is crucial.
Beyond the Connection: Data Usage Dynamics
Also, be mindful of your data consumption. Streaming HD video eats data. Online gaming also demands a significant amount. While using your data, keep a close eye on your data usage meter. This is easy in settings. There are usually alerts available to assist you.
Final Thoughts: Mastering Your Motorola G5 Plus Hotspot
So, there you have it. You now possess the knowledge to make your Motorola G5 Plus's Wi-Fi hotspot perform at its peak. Remember. The 2.4 GHz/5 GHz band selection is just the tip of the iceberg. Experiment. Discover what works best for your needs, and the environments you find yourself in. Now go forth and enjoy the ultimate mobile connectivity! Your laptop will thank you. Ultimately, by embracing these simple tweaks, you can transform your phone into a powerful and reliable internet bridge. By understanding the settings, you unlock a wealth of possibilities, no matter where you are. Happy surfing!
Laptop WiFi Software: Download the FASTEST & Easiest Fix NOW!Motorola G5 Plus Wi-Fi Hotspot: Laptop Connection HACK!
Hey tech enthusiasts, gadget gurus, and fellow travelers of the digital frontier! Ever been stranded, laptop in hand, with a desperate need for Wi-Fi? We’ve all been there. The frustration, the sigh of disappointment, the frantic search for a signal… it’s a universal struggle. But what if the answer to your Wi-Fi woes was right there in your pocket, nestled within your trusty Motorola G5 Plus? Today, we’re diving deep into the world of mobile hotspots, specifically focusing on how to turn your G5 Plus into a Wi-Fi powerhouse for your laptop. Forget scouring coffee shops for a weak signal – we're about to unleash the power of your phone.
Unlocking the Mobile Hotspot Potential: The Motorola G5 Plus Edition
The Motorola G5 Plus, a phone that truly punched above its weight class, offered a fantastic array of features for its time. One of these, often overlooked, is its built-in mobile hotspot functionality. Essentially, it’s like having a tiny, personalized Wi-Fi router in your pocket. But how do you unlock this hidden gem and get it working seamlessly with your laptop? Let's embark on a journey to discover this secret weapon, breaking down the process step-by-step.
- Why Use Your Motorola G5 Plus as a Hotspot? Think about it. Need to check emails on your laptop while commuting? Working remotely from a park? Avoiding those pesky public Wi-Fi networks that feel like a hacker's buffet? A mobile hotspot provides a secure, convenient, and often faster alternative. It's a game-changer.
Before We Begin: Checking Your Data Plan and Understanding the Basics
Before leaping headfirst, let's make sure we’re on the right track. This is where common sense and preparation reign supreme. The first thing to check is your data plan. Activating the hotspot feature on your G5 Plus consumes data, and you don’t want a hefty bill at the end of the month because you binged on Netflix while tethering. So, take a quick peek at your plan's data allowance.
- Data Allowance Deep Dive: Ensure you have enough data to support your laptop's activities. Streaming video eats up data like a starving zombie.
- Network Speed Considerations: The speed of your hotspot will be directly related to your phone's cellular connection. If you're in a slow-signal area, don't expect lightning-fast downloads.
The Simple Step-by-Step Guide to Setting Up Your Hotspot
Now for the fun part! Setting up your Motorola G5 Plus as a Wi-Fi hotspot is incredibly straightforward. Here’s the cheat sheet:
- Access the Settings Menu: Locate the "Settings" app on your phone. It often looks like a gear or a cogwheel.
- Find the "Network & Internet" Section: The exact wording might vary slightly depending on your Android version, but this is where the hotspot settings live.
- Choose "Hotspot & Tethering": Tap on this option. You might see sub-options like "Wi-Fi hotspot," "USB tethering," and "Bluetooth tethering." We're focusing on Wi-Fi right now.
- Enable the Wi-Fi Hotspot: Toggle the switch to activate the hotspot. Your phone is now broadcasting a Wi-Fi signal!
- Customize Your Hotspot (Highly Recommended): Before connecting your laptop, tap on the hotspot settings to change the network name (SSID) and password. Choose something secure but memorable. It's like giving your Wi-Fi its own secret identity.
Connecting Your Laptop to Your G5 Plus Hotspot: The Seamless Link
With your hotspot activated and configured, it’s time to connect your laptop. It's like connecting your laptop to any other Wi-Fi network:
- On Your Laptop: Click on the Wi-Fi icon in your system tray (usually near the clock).
- Find and Select Your Hotspot's Network Name: The name you chose in the previous steps will appear in the list of available Wi-Fi networks.
- Enter the Password: When prompted, enter the password you established earlier.
- Connect and Surf! Your laptop should now be connected to the internet via your G5 Plus’s hotspot. Embrace the digital freedom!
Troubleshooting Common Connection Hiccups
Sometimes, things don't go quite as planned. Don't panic! Here are a few common issues and how to fix them:
- Can't See the Hotspot: Double-check that the hotspot is enabled on your phone. Also, verify the network name and password.
- Slow Speeds: This is often due to a weak cellular signal. Try moving to a different location with better coverage.
- Limited Data: Keep an eye on your data usage! Consider setting a data limit on your phone just in case.
- Intermittent Connection: Sometimes, restarting both your phone and laptop can fix the issue. It's like hitting the reset button on your digital reality.
Boosting Your Hotspot's Performance: Optimizing for Speed and Reliability
Want to squeeze every last drop of performance out of your hotspot? Here are some pro tips:
- Choose the Right Wi-Fi Band: The Motorola G5 Plus is likely limited to 2.4 GHz Wi-Fi. This band offers better range than 5 GHz, which comes with other devices.
- Positioning Power: Place your phone in an area with a strong cellular signal. The closer your phone is to your laptop, the better.
- Background Activity Reduction: Close unnecessary apps on your phone to free up processing power and bandwidth.
- Keep Your Phone Charged: A dying battery can hinder performance. Plug in your phone if possible.
Wi-Fi Security: Protecting Your Connection Like Fort Knox
Security is paramount, especially when using a mobile hotspot. Public Wi-Fi is like a crowded marketplace with pickpockets. Secure your hotspot to safeguard your data:
- Strong Password: Use a strong, unique password for your hotspot. Avoid easily guessable passwords like "password" or your birthday.
- WPA2/WPA3 Encryption: Ensure your hotspot uses WPA2 or WPA3 encryption (the latest standards) for robust security.
- Avoid Public Wi-Fi if Possible: If you can help it, stick to secure connections like your own hotspot rather than public Wi-Fi.
Beyond the Basics: Exploring Advanced Hotspot Settings
The G5 Plus might have a few extra settings for advanced users:
- Data Usage Limit: Set a data limit to prevent exceeding your plan.
- Band Selection: (If available) Choose between 2.4 GHz or 5 GHz Wi-Fi bands.
- Power Saving Mode: Optimize your phone's battery life during hotspot use.
USB Tethering: A Wired Alternative for Maximum Speed
Did you know you could connect your laptop to your G5 Plus with a USB cable for a more stable and potentially faster connection? It's like a direct pipeline to the internet!
- Connect Your Phone to Your Laptop: Using a USB cable.
- Enable USB Tethering: In the hotspot settings, select "USB tethering."
- Enjoy the Speed: Your laptop should automatically connect to the internet via your phone's data connection.
Bluetooth Tethering: A Low-Power Option for Light Tasks
Bluetooth tethering, while slower than Wi-Fi or USB, can be a good option if battery life is a major concern, and you only need to perform basic tasks such as checking emails.
- Pair Your Devices: Pair your phone and laptop via Bluetooth.
- Enable Bluetooth Tethering: In the hotspot settings, select "Bluetooth tethering."
- Connect and Enjoy: Your laptop should now connect to the internet via Bluetooth.
Comparing Hotspot Options: Wi-Fi vs. USB vs. Bluetooth
Each method of tethering has its pros and cons:
- Wi-Fi Hotspot: Most convenient, offers good speed, but can drain battery life.
- USB Tethering: Fastest and most stable connection, but requires a cable. This is ideal for gaming or downloading large files.
- Bluetooth Tethering: Lowest power consumption, but slowest speeds.
The Power of Optimization: Fine-Tuning for the Perfect Experience
Fine-tuning your setup can make a world of difference:
- Regular Updates: Keep your phone's software updated for the best performance and security.
- Monitor Your Data Usage: Use your phone's data usage tracker to monitor your consumption.
- Experiment with Settings: Play around with the different settings to find what works best for you.
Maximizing Your Motorola G5 Plus & Laptop Connection
Now, let's consolidate. Have you established Wi-Fi connectivity between your Motorola G5 Plus and your laptop? You’re on the cusp of a digital breakthrough.
The Future of Mobile Hotspots and Your Motorola G5 Plus
Mobile hotspot technology is constantly evolving. While the G5 Plus might be showing its age, the principles of mobile connectivity remain relevant. The lessons learned here apply to newer phones and technologies
WiFi Nightmare? Fix Your Windows Laptop's Connection NOW!How to Transfer Files & Docs to Moto G5 Plus from Computer

By Joseph Thompson How to Transfer Files & Docs to Moto G5 Plus from Computer by Joseph Thompson
How To Setup Moto G5 WiFi Hotspot

By Mobile How To How To Setup Moto G5 WiFi Hotspot by Mobile How To
Portable Hotspot in LENOVO Moto G5 Plus - Allow Mobile Hotpsot

By HardReset.Info Portable Hotspot in LENOVO Moto G5 Plus - Allow Mobile Hotpsot by HardReset.Info

Title: How to Put Videos on Moto G5 Plus from Computer
Channel: iStarsoft
How to Put Videos on Moto G5 Plus from Computer by iStarsoft
Laptop Wifi Connect
Here's the title: The Ultimate Guide to Mastering the Art of French Macarons
The Ultimate Guide to Mastering the Art of French Macarons
Embark on a culinary journey through the delicate world of French macarons, those petite, colorful confections that epitomize Parisian elegance. This isn't merely a recipe; it's a comprehensive exploration, a deep dive into the nuances and secrets of achieving macaron perfection. We'll demystify the process, address common pitfalls, and equip you with the knowledge to create macarons that are both visually stunning and exquisitely delicious. Prepare to transform your kitchen into a macaron atelier.
Understanding the Fundamentals: What Makes a Macaron a Macaron?
A true French macaron is more than just a cookie; it's a delicate dance of textures and flavors. It's a meringue-based sandwich cookie, characterized by a smooth, slightly domed shell, a distinct "foot" (the ruffled base), and a luscious filling. The shell provides a satisfying, crisp exterior with a soft, chewy interior. The filling offers a complementary flavor profile, ranging from simple ganaches to complex fruit curds and creamy buttercreams. Achieving this delicate balance requires precision, patience, and a thorough understanding of the ingredients and techniques involved. The hallmark of a successful macaron is its foot – a skirt-like ruffle that forms at the base during baking, lending to both aesthetic appeal and textural contrast. This foot is formed by the batter’s expansion during the baking process, a telltale sign of perfect macaronage and properly baked meringue.
The Essential Ingredients: Sourcing Quality for Exceptional Results
The quality of your ingredients directly impacts the final result. While the macaron process appears simple, each component plays a critical role.
- Almond Flour: The heart of the macaron shell is almond flour. Choose finely ground, blanched almond flour. This ensures a smooth shell and eliminates any gritty texture. Sifting the almond flour and powdered sugar together multiple times is crucial to remove any lumps and ensure a uniform texture within the batter. Look for almond flour that's specifically labeled for macarons; it often has a finer grind.
- Powdered Sugar (Icing Sugar): Powdered sugar provides structure and sweetness to the shell. Ensure your powdered sugar is fresh and free of any lumps. Sifting with the almond flour is essential.
- Egg Whites: Fresh egg whites, aged slightly, contribute to the meringue's stability. Allow the egg whites to reach room temperature for optimal volume and whipping potential. Avoid any trace of yolk, as fat will inhibit the meringue from forming properly. Some bakers swear by aging egg whites for a day or two in the refrigerator. This allows the proteins to relax and whip up to a greater volume.
- Granulated Sugar: Granulated sugar is incorporated into the meringue to provide sweetness and structure.
- Food Coloring: Gel food coloring is generally preferable to liquid food coloring. Gel colors are more concentrated and will not add extra moisture to the batter, which could affect the texture. If using liquid coloring, use it sparingly.
The French Macaron Method: A Step-by-Step Guide to Success
The French macaron method is the most widely used for its simplicity and consistent results.
- Prepare the Dry Ingredients: In a food processor, pulse the almond flour and powdered sugar together. This step ensures that the almond flour is finely ground and free of lumps. Then, sift the almond flour and powdered sugar mixture through a fine-mesh sieve into a large bowl. Discard any coarse pieces that remain in the sieve.
- Whip the Egg Whites: In a clean, grease-free bowl, begin whipping the egg whites with an electric mixer until soft peaks form. Gradually add the granulated sugar, continuing to whip until stiff, glossy peaks form. The meringue should hold its shape and not collapse. At this stage, incorporate the food coloring, adding a small amount at a time until the desired shade is achieved.
- Macaronage: The Crucial Mixing Stage: This is where many aspiring macaron bakers falter. Gently fold the dry ingredients into the meringue in several additions, using a spatula. The goal is to deflate the meringue slightly, achieving a lava-like consistency. The batter should flow slowly off the spatula and ribbon back into itself. Overmixing will result in flat macarons; undermixing will result in cracked shells. Test the batter by lifting the spatula and letting the batter flow back into the bowl. After about 10 seconds, the ribbon should smooth out.
- Piping the Macarons: Transfer the batter to a piping bag fitted with a round tip. Pipe even circles onto parchment paper or a silicone baking mat, leaving space between each macaron.
- Taping and Resting: Gently tap the baking sheet on a hard surface several times to release air bubbles and flatten the piped macarons. This step is crucial for the formation of the foot. Allow the macarons to rest at room temperature for 30-60 minutes. This allows a skin to form on the surface, which aids in the “foot” formation during baking. The resting time may vary depending on humidity levels. The macarons are ready to bake when you can gently touch the surface without the batter sticking to your finger.
- Baking the Macarons: Bake in a preheated oven at the specified temperature (usually between 300-325°F / 150-160°C) for 12-15 minutes. The baking time will depend on your oven and the size of the macarons. Monitor the macarons closely during baking. Carefully check after 10 minutes, and if the feet are forming, keep a close eye on the macarons for the remaining time.
- Cooling and Assembly: Once baked, allow the macarons to cool completely on the baking sheet before removing them. Gently peel the shells from the parchment paper or silicone mat. Pair the shells by size and shape. Fill with your desired filling and gently sandwich the two shells together. Allow the filled macarons to mature in the refrigerator for at least 24 hours to allow the flavors to meld and the shells to soften slightly.
Troubleshooting: Common Macaron Challenges and Their Solutions
Macarons can be temperamental; understanding common issues and their solutions is essential.
- Cracked Shells: This could be due to several factors, including overmixing the batter, not resting the macarons long enough before baking, or oven temperature that is too high. Adjust your macaronage and verify your oven temperature.
- No Foot: This is often caused by undermixing the batter, not tapping the baking sheet, or an oven temperature that is too low. Ensure that your batter has the correct lava-like consistency. Verify that you are tapping the baking sheet firmly after piping.
- Hollow Shells: This can be caused by underbaking, not resting the macarons, or issues with the humidity in your environment. Extend baking time slightly and be sure to let the macarons rest before baking.
- Flat Macarons: Overmixing the batter causes the meringue to lose its structure and flatten. Practice your macaronage and stop mixing as soon as the batter is flowing off the spatula like a ribbon.
- Bumpy Shells: This can happen because of undissolved granules of sugar in your batter. Ensure your sugar is well dissolved when making the meringue.
Flavor Combinations: Unleashing Your Macaron Creativity
The possibilities for flavor combinations are virtually endless. Experiment with different fillings, extracts, and colors.
- Classic Flavors: Vanilla bean, chocolate ganache, raspberry filling, salted caramel.
- Citrus Delights: Lemon curd, key lime buttercream, orange blossom filling.
- Nutty Temptations: Hazelnut praline, pistachio buttercream, almond-infused filling.
- Exotic Adventures: Earl Grey ganache, matcha buttercream, lavender-infused filling.
Tips for Macaron Mastery: Secrets from the Experts
- Invest in a Kitchen Scale: Measuring ingredients by weight is crucial for accuracy, especially when working with delicate confections like macarons.
- Use a Silicone Baking Mat: This prevents the macarons from sticking and makes removal much easier.
- Practice Makes Perfect: Don't be discouraged if your first batch isn't perfect. Macarons are a skill that improves with practice.
- Control Your Environment: Humidity can affect macaron success. Try to bake on a day with moderate humidity.
- Oven Thermometer: Always use an oven thermometer to ensure your oven is at the correct temperature.
- Careful with the Food Coloring: Add food coloring a drop at a time to prevent the batter from becoming too wet.
- Resting is Key: Do not rush the resting process. Properly resting the macarons helps the surface of the shell to dry and form a skin, which enables the foot to form during baking, resulting in a desirable shape and texture.
Storing and Serving: Preserving Your Macaron Masterpieces
Proper storage ensures that your macarons maintain their optimal texture and flavor.
- Storage: Store filled macarons in an airtight container in the refrigerator for up to 5 days.
- Freezing: Macarons can be frozen for up to 2 months. Place them in a single layer in an airtight container. Thaw in the refrigerator overnight.
- Serving: Allow the macarons to come to room temperature for about 15-20 minutes before serving to enhance their flavors and textures
