how to determine wifi card in laptop

Title: WiFI Card vs USB WiFi Adapter Check out this comparison
Channel: ADVANTI
WiFI Card vs USB WiFi Adapter Check out this comparison by ADVANTI
how to check wifi card in laptop, how to check wifi card in laptop windows 11, how to know wifi card in laptop, how to check wifi card in laptop is working, how to find wifi card in laptop, how to check wifi card in laptop ubuntu, how to detect wifi card in laptop, how to see wifi card in laptop, how to check wifi card in laptop linux, how to test wifi card in laptop
Is Your WiFi Dying? Find Your Laptop's Secret WiFi Card NOW!
Is Your WiFi a Digital Ghost? Unmasking Your Laptop's Hidden WiFi Champion!
It's a familiar scenario, isn't it? Your internet connection seems to be gasping its last breath. You’re staring at the buffering wheel of doom. Before you throw your laptop across the room, take a deep breath. Then, let’s embark on a secret mission. We're going to become WiFi detectives. We'll uncover the hidden hero inside your laptop. This hero is your WiFi card.
The Whispers of a Weak Signal: Decoding the Symptoms
A sluggish internet connection whispers a tale of woe. Pages load at a glacial pace. Streaming videos stutter and freeze. Downloads crawl like snails. Furthermore, you might experience intermittent disconnects. Your device might frequently lose its connection. These are all telltale signs. These are potential cries for help from your WiFi card. They could be a sign that something is profoundly wrong.
Why Location Matters: Positioning Your Digital Fortress
Before we delve into technicalities, consider something fundamental. Where is your laptop situated? Is it nestled deep within reinforced concrete walls? Are you surrounded by microwave ovens or other electronic devices? These factors can significantly impact your WiFi signal. In fact, these obstacles can act as WiFi signal killers. Now, move your laptop closer to your router. See if the performance enhances. Just because a good signal isn't present doesn't mean that there's a problem.
Unveiling the Mystery: Locating Your WiFi Card
Now, let’s get to the core of the matter. We need to locate the WiFi card. Identifying the specific location isn't always straightforward. However, it's rarely a digital mystery. First, you should understand that it's generally integrated with the motherboard. It usually resides inside your laptop.
A Guided Expedition: Accessing the Digital Heart
Finding your WiFi card depends on your laptop's model. It’s time to channel your inner explorer.
- The Manual Maven: Consult your laptop's manual. It should detail where the WiFi card resides. It will also give you clear instructions for accessing it. It’s often the easiest method.
- The Online Oracle: Search online for your laptop's model. Look for “WiFi card location” or “how to replace a WiFi card.” You’ll likely find helpful videos or forum posts. Many resources exist.
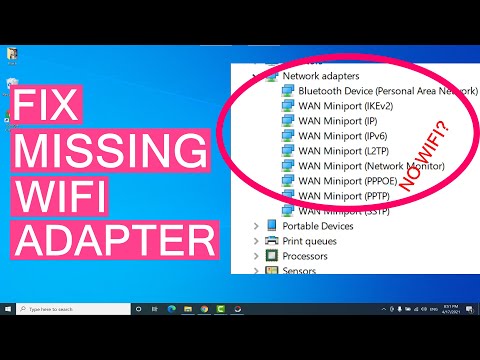
- The Diagnostic Detective: Use your laptop's operating system. It contains valuable information. Open Device Manager (Windows) or System Information (Mac). Look for devices. Specifically, look for “Network adapters” or similarly described devices. The WiFi card should be listed there. The list provides a confirmation of your computer's WiFi card.
- The Technical Toolkit: Before you begin, remember to power down your laptop. Disconnect the power adapter. Then, you may need a small screwdriver. You'll also need a calm, steady hand. First, you'll probably need to remove the battery. Next, you'll need to unscrew the back panel. Now, begin the gentle process of uncovering the card. Keep track of your screws.
- The Internal Investigation: Upon removing the cover, inspect the internal components. The WiFi card is often a small, rectangular card. It might have two antenna wires attached. It will likely reside near the edge of the laptop. Carefully. You are now able to see the WiFi card.
Potential Culprits and Clever Solutions
Once you've identified your WiFi card, consider these common problems:
- Physical Obstruction: Sometimes, the card has debris in the way. Dust or other obstructions could obstruct its operation. Clean it gently to ensure its proper functioning.
- Driver Dilemma: Your WiFi card's drivers may be outdated. Upgrade the drivers to the latest version.
- Antenna Antics: The antenna cables might be loose or damaged. Inspect the connections for any potential issues.
- Card Craziness: The WiFi card could be damaged. It's very rare, but it is possible.
Troubleshooting Tactics: Bringing the WiFi Back to Life
If you suspect issues, try these strategies.
- Restart the Machine: It sounds simple, but often it works. Power off your laptop. Then, restart it. This can refresh the connection.
- Update Drivers: Go to the Device Manager (Windows) or System Information (Mac). Locate your Wi-Fi adapter. Right-click and select "Update driver."
- Router Reconnaissance: Make sure your router is working. Restart your router. Also, check the router's firmware.
- Seeking Professional Guidance: If you’ve tried troubleshooting, and nothing works, seek professional help. A technician can diagnose and fix complex Wi-Fi issues.
Conclusion: Reclaiming Your Digital Domain
So, there you have it. You now know where your laptop's WiFi card hides. You are a WiFi detective. You know how to identify and troubleshoot potential problems. You've armed yourself with knowledge. You're ready to enhance your online experience. Now, get back to those streams and downloads. Enjoy your fast and reliable internet connection. You deserve it.
Laptop WiFi Router: The SHOCKINGLY Simple Trick You NEED!Is Your WiFi Dying? Find Your Laptop's Secret WiFi Card NOW!
Hey everyone, ever felt like you're battling a digital tortoise while everyone else is zooming around in a race car? We've all been there – that frustrating lag, buffering videos that feel like they're in slow motion, and downloads that take longer than it takes to watch the entire Lord of the Rings trilogy extended edition (with the breaks!). If your WiFi is consistently sluggish, the problem might not just be your internet provider or your router. Believe it or not, the secret to a faster, more responsive connection might be tucked away inside your trusty laptop: its WiFi card. Let's dive in and find out how to troubleshoot and potentially turbocharge your wireless experience!
1. The Silent Culprit: Why Your WiFi Might Be a Slowpoke
Before we start cracking open your laptop (don't worry, it's easier than you think!), let's pinpoint the potential reasons for a sluggish WiFi experience. Think of your WiFi card as the heart of your laptop's wireless connection. If it's struggling, everything else – the router, the internet connection itself – is essentially working with a weak pulse. Could your WiFi card be the culprit? Absolutely! Here's why:
- Aging Hardware: Just like any other component, WiFi cards degrade over time. They might not be supporting the latest WiFi standards, leading to slower speeds.
- Obstructions: Think of your router as a radio station and your WiFi card as its antenna. Walls, furniture, and even certain appliances can weaken the signal.
- Interference: Other devices emitting radio waves (microwaves, baby monitors, etc.) can cause interference, creating a digital traffic jam.
- Driver Issues: Outdated or corrupted drivers – the software that allows your card to "speak" to your operating system – can cause performance hiccups.
- Card Failure: In worst-case scenarios, the card itself might have physically failed.
2. Decoding Your Laptop's WiFi Card: A Quick Diagnostic
So, how do we know if your WiFi card is the problem? Before we start replacing hardware, let's do some basic troubleshooting. Think of it as a medical check-up for your laptop’s connectivity.
- Speed Test: Run a speed test (there are lots online – speedtest.net is popular) to see if the speeds you're getting are significantly below what you're paying for. This is our first clue, like a doctor taking a patient's temperature.
- Router Restart: A simple reboot of your router can often clear up temporary glitches. Think of it as a digital reset button.
- Check Other Devices: Does the problem persist on other devices connected to the same WiFi network? If so, the issue likely lies with your router or internet connection. If not, the laptop (or possibly the WiFi card) is the likely suspect.
3. Unveiling the Mystery: Locating Your Laptop's WiFi Card
Now for the fun part: finding your laptop's secret WiFi card. The location varies slightly depending on your laptop's make and model, but the process is generally the same.
- Consult Your Laptop's Manual: This is the gold standard! Your manual (either the paper one or a PDF you can download) should provide specific instructions and diagrams.
- The Bottom Line: In most laptops, the WiFi card is located under a small access panel on the bottom of the laptop. This panel is usually held in place by screws.
- Look for the Wireless Symbol: The access panel might have a small icon that looks like the WiFi symbol. This is a clear sign that it leads to the WiFi card.
- Careful Opening: Use a small screwdriver to remove the screws. Be extra gentle and try not to force anything.
- Check the Battery: Some laptops require that you remove the battery before accessing the WiFi card. Refer to your manual for guidance.
4. The Sneaky Peek: What Your WiFi Card Looks Like Inside
Once you open the access panel, you'll likely see the WiFi card itself. It usually looks like a small circuit board, approximately the size of a stick of chewing gum, with one or two antennas attached. It's a delicate piece of tech, so handle it with care. They are generally connected via two tiny wires, which are the antenna connections.
5. Upgrading the Engine: Replacing or Upgrading Your WiFi Card
Replacing your WiFi card can be a straightforward procedure once you know the steps. Upgrading to a newer card with better speed support can breathe new life into your laptop.
- Compatibility Check: Before buying a new card, check your laptop's manual or online specifications to ensure it's compatible.
- Identifying the Format: Different laptops use different form factors for their WiFi cards like m.2 or mini pcie. Confirm your card's type before buying.
- The Replacement: Once you've got your new card, gently unplug the antenna wires from the old card and unscrew the old card. Slide the new card into the slot, connect the antennas, and screw it in.
- Driver Installation: After replacing the card, you might need to install new drivers. These can usually be found on the manufacturer's website.
6. Software Whispers: Updating Your WiFi Card Drivers
Even if you're not replacing your card, updating the drivers is crucial. Think of drivers as translators, ensuring your card and operating system can understand each other.
- Windows Device Manager: Search for "Device Manager" in the Windows search bar.
- Network Adapters: Expand the "Network Adapters" section.
- Find Your WiFi Card: Look for your WiFi card's name (e.g., "Intel Wireless-AC 9260").
- Update Driver: Right-click on your WiFi card and select "Update driver." Follow the prompts.
7. The Router's Role: Ensuring Your WiFi's Buddy is Ready
Your router is your laptop's best friend when it comes to WiFi. Ensure you've maintained the router.
- Router Firmware Updates: Ensure your router's firmware is updated. These updates often include performance improvements and security patches.
- Router Placement: Position your router in a central location, away from walls, metal objects, and other potential sources of interference.
- Channel Selection: Your router operates on a specific channel. Check its settings and try switching to a less congested channel for improved performance.
8. Signal Strength and Interference: The Invisible Battles
WiFi signals are like invisible waves. Understanding signal strength (how strong the signal is) and interference (what's blocking the signal) is key to optimizing your connection.
- Signal Strength Tools: Use a WiFi analyzer app on your smartphone or laptop to check the strength of your WiFi signal in different areas of your home.
- Reduce Obstructions: Move your router to a more open area or remove any obstructions.
- Minimize Interference: Keep your router away from other electronic devices, especially microwaves and cordless phones.
9. The Hidden Costs: Power Consumption and WiFi Cards
More modern WiFi cards often incorporate power-saving technology. However, older cards or those operating with outdated drivers can drain battery life more quickly.
- Power-Saving Settings: Check your laptop's power settings and ensure your WiFi card's power-saving features are enabled.
- Driver Updates: Updated drivers often include power optimization improvements.
10. Security First: Protecting Your Wireless Network
A strong WiFi connection also needs to be secure. Think of it as a lock and key.
- Strong Passwords: Use a strong, unique password for your WiFi network.
- Encryption: Make sure your router is using WPA2 or WPA3 encryption (the latest and most secure standards).
- Guest Network: Create a guest network for visitors to use, which keeps them separate from your main network and devices.
11. When to Call an Expert: Knowing When to Seek Help
Sometimes, the problem requires a professional touch.
- Hardware Damage: If you accidentally damage your WiFi card during replacement, don't hesitate to call a qualified computer technician.
- Persistent Issues: If you've tried all the troubleshooting steps and are still experiencing persistent WiFi problems, it might be time for expert help.
12. The Warranty's Whisper: Does Your Laptop's Policy Cover This?
Check to see if your laptop's warranty covers any replacements or repairs.
- Warranty Information: Review your laptop's warranty information to understand what's covered.
- Manufacturer's Guidance: Contact the manufacturer for guidance on warranty claims.
13. Beyond the Card: Other Contributing Factors
While the WiFi card is a major component, other factors can affect your WiFi performance.
- Antenna Issues: Faulty antennas can impact reception.
- Operating System Errors: Ensure your operating system is up-to-date.
14. A Future-Proofing Perspective: The Benefits of Upgrading
Upgrading your WiFi card provides several potential benefits:
- Faster Speeds: Experience noticeably faster download and upload speeds.
- Improved Range: Enjoy a more reliable connection across a wider area.
- Support for New Standards: Keep up with the latest WiFi technologies.
15. The Final Verdict: Reviving Your WiFi
Laptop WiFi Anywhere? Reddit's Secret Tricks Revealed!How To Check Inbuild Wi-Fi Card Supports Monitor Mode With cmd In Windows 10

By EtHaRay How To Check Inbuild Wi-Fi Card Supports Monitor Mode With cmd In Windows 10 by EtHaRay
How to Know if My Desktop PC Is Equipped for Wireless Know Your Computer

By eHowTech How to Know if My Desktop PC Is Equipped for Wireless Know Your Computer by eHowTech
How To Fix Wireless Adapter Missing In Windows 10 Get WiFi Adapter Back
By Sandeep Singh How To Fix Wireless Adapter Missing In Windows 10 Get WiFi Adapter Back by Sandeep Singh

Title: How to upgrade my Laptop's WiFi to WiFi 6E with M.2 card - Great choice
Channel: Technology Moments
How to upgrade my Laptop's WiFi to WiFi 6E with M.2 card - Great choice by Technology Moments
Working With Laptop
Let's begin.
Title: The Definitive Guide to Mastering the Art of Sourdough Bread Baking at Home
Introduction: Unveiling the Alchemy of Sourdough
The aroma. The texture. The taste. Sourdough bread, a testament to the transformative power of time, patience, and a thriving colony of wild yeast, has captivated palates for millennia. More than just a loaf of bread, it represents a connection to the past, a celebration of natural processes, and a rewarding culinary experience. For the home baker, the journey into sourdough is an initiation into the art of breadmaking, a challenge that promises both delicious results and profound satisfaction. This comprehensive guide will equip you with the knowledge, techniques, and troubleshooting tips necessary to confidently bake exceptional sourdough bread in your own kitchen. We’ll delve into the intricacies of each step, from cultivating your own starter to achieving that perfect crust and airy crumb. Get ready to unlock the secrets of sourdough and transform your kitchen into a haven of artisanal baking.
Section 1: Cultivating Your Sourdough Starter: The Heart of the Matter
The sourdough starter, often affectionately called the “mother,” is the soul of sourdough bread. It's a living culture of wild yeasts and beneficial bacteria, a symbiotic community that leavens the dough and imparts the characteristic tang and flavor.
1.1 The Initial Embrace: Crafting Your Starter from Scratch
Creating a sourdough starter from scratch is an exercise in patience and observation. It typically takes 7-14 days, or even longer, for the wild yeasts to colonize and establish a stable, active culture. Here’s how to begin:
- Day 1: The Flour and Water Ritual. In a clean jar (a wide-mouth mason jar is ideal), combine 50 grams of unbleached all-purpose flour (or a blend of all-purpose and whole wheat for added flavor) with 50 grams of lukewarm, non-chlorinated water. Mix well, ensuring no dry flour remains. Cover loosely with a lid or plastic wrap and let it rest at room temperature (ideally between 70-75°F/21-24°C).
- Days 2-7 (or longer): The Feeding Cycle. Each day (or every 12 hours in warm conditions), discard approximately half of the starter. Add 50 grams of flour and 50 grams of water. Mix well, scrape down the sides, and cover loosely. Observe the changes. You will notice bubbles, slight increases in volume, and a developing sour aroma.
- Monitoring the Transformation. During this initial period, observe the starter carefully. Note the rise and fall, the bubbling activity, and the evolving scent. Initially, the aroma may be unpleasant (a hint of acetone is common); however, as the culture matures, it will develop a pleasant, tangy, yeasty fragrance.
- Signs of Readiness. The starter is typically ready when it doubles in size within 4-8 hours after feeding at room temperature, displays a vibrant bubbling activity throughout the jar, and has a distinct, pleasant aroma. It will also float when a teaspoon is dropped into water (the "float test").
1.2 Maintaining a Thriving Starter: Long-Term Care
Once your starter is active, regular maintenance is crucial for its health and longevity.
- Feeding Schedule. A well-maintained starter is fed regularly. Frequency depends on usage and storage. If you bake frequently (every 1-3 days), you can keep your starter at room temperature and feed it daily. For less frequent baking, store it in the refrigerator and feed it weekly.
- Refrigerated Storage. In the refrigerator, the starter will slow down its activity. When feeding a refrigerated starter, remove it from the refrigerator, bring it to room temperature, and feed it. Allow it to rise and fall before returning it to the refrigerator.
- Feeding Ratios. The feeding ratio (flour:water:starter) influences the starter's activity and flavor. The standard ratio is 1:1:1 (e.g., 50g starter, 50g flour, 50g water). Experiment to find what works best for your climate and ingredients.
- Troubleshooting Common Issues. A sluggish starter can be revived by increasing the feeding frequency, using a warmer environment, or trying a different type of flour. A starter with an overly sour or off-putting odor may have a bacterial imbalance. Re-feeding with fresh ingredients and maintaining good hygiene usually resolves the issue.
Section 2: Mastering the Sourdough Dough: From Flour to Flavor
With a healthy starter in hand, you can begin crafting the dough, the foundation of your sourdough masterpiece.
2.1 The Basic Sourdough Recipe: A Foundation for Success
This recipe provides a robust starting point. Adjust according to your preferences and experience.
- Ingredients:
- 100 grams active sourdough starter
- 400 grams bread flour (or a blend of bread flour and whole wheat)
- 300 grams lukewarm water
- 10 grams salt
- Instructions:
- Autolyse (Optional, but recommended): In a large bowl, combine the flour and water. Mix until just combined. Cover and let rest for 30-60 minutes. This allows the flour to fully hydrate, developing gluten and improving the texture.
- Combine Ingredients: Add the starter and salt to the autolysed dough. Mix until everything is well incorporated. The dough will be shaggy and sticky initially.
- Bulk Fermentation: The Rise: Place the dough in a lightly oiled bowl, cover with plastic wrap or a damp cloth, and let it ferment at room temperature. This is where the magic happens. For a standard loaf with a good amount of sourness, bulk fermentation takes 4-6 hours in a warm environment.
- Folding: During bulk fermentation, perform a series of folds to strengthen the dough. Every 30-60 minutes for the first 2-3 hours, gently stretch and fold the dough. This helps develop gluten and trap gas.
- Shaping: After bulk fermentation, gently turn the dough out onto a lightly floured surface. Shape the dough into a round (boule) or oblong (batard).
- Proofing (Cold Fermentation): Place the shaped dough in a banneton basket (basket lined with flour) or a bowl lined with a floured cloth. Cover and refrigerate for 12-24 hours. Cold fermentation slows down the rising, develops flavor, and improves the texture.
- Baking: Preheat your oven to 450°F (232°C) with a Dutch oven inside for at least 30 minutes. Gently remove the hot Dutch oven, carefully place the dough (seam-side up or down, depending on your desired look) and score the top using a sharp knife or lame. Cover with the lid and bake for 20 minutes. Remove the lid and bake for another 25-30 minutes, or until the crust is deeply golden brown.
- Cooling: Transfer the baked loaf to a wire rack and let it cool completely (at least 1-2 hours) before slicing and enjoying. This allows the crumb to set and prevents a gummy texture.
2.2 Understanding the Variables: Adaptation and Experimentation
Sourdough baking is a process of discovery. Adjust the recipe and techniques to suit your specific needs and preferences.
- Flour Variety: Experiment with different flours, such as whole wheat, rye, spelt, or other alternative grains, to vary the flavor and texture of your bread. Whole wheat adds a nutty flavor and increases the rate of fermentation.
- Water Temperature: Varying the water temperature can affect the fermentation rate. Warmer water speeds up the process, while cooler water slows it down.
- Salt's Role: Salt regulates yeast activity, strengthens gluten, and enhances flavor.
- Bulk Fermentation Time: The time of bulk fermentation depends on ambient temperature, the strength of your starter, and desired sourness.
- Proofing Time: Adjust the proofing time (cold or room temperature) to control the development of flavor and texture.
Section 3: The Art of Scoring: Crafting the Crust
Scoring is more than just aesthetics; it plays a critical role in the bread's final form.
3.1 Scoring Techniques: Creating a Beautiful Crust
- Purpose of Scoring: Scoring controls the expansion of the dough during baking, preventing the bread from bursting unpredictably. It allows for a beautiful rise and defines the shape of the loaf.
- Tools for the Job: A sharp lame (a curved blade specifically for scoring) or a very sharp knife is essential.
- Common Scoring Patterns:
- The "X": A classic look that allows for even expansion.
- The "Slash": A single, bold slash.
- The "Scored Circle": Multiple curved slashes in a circular pattern.
- The "Ear": Scoring at a slight angle, one stroke, which creates the characteristic "ear."
- Tips for Success: Score quickly and confidently. The depth of the score depends on the oven's spring of the dough (about 1/2 - 1 inch)
**Section 4
