wifi not working on laptop windows 10 asus

Title: How to Fix WIFI not Connecting Not Showing in Windows 10 Asus Laptops
Channel: FIXsage
How to Fix WIFI not Connecting Not Showing in Windows 10 Asus Laptops by FIXsage
**ASUS WiFi Nightmare on Windows 10? FIX IT NOW!**
ASUS WiFi Woes on Windows 10: Your Ultimate Troubleshooting Guide
Let's be honest, a frustrating Wi-Fi connection can ruin your day. Especially when your ASUS router is the culprit, and your Windows 10 machine is the victim. Don’t worry; keep reading. We’ll dive into the potential fixes so you can regain your online sanity.
The Initial Frustration: Recognizing the Problem
Perhaps your downloads crawl at a snail's pace. Maybe your Zoom calls are cut short. Or perhaps, you're just seeing the dreaded "limited connectivity" icon. These are clear indicators that something is amiss with your ASUS router and Windows 10 setup. First, you need to identify the problem. Is it the router, your PC, or something in between?
Diagnosing the Culprit: Pinpointing the Source
Before you start tearing your hair out, we need to do some detective work. First, let’s analyze the situation. Try connecting other devices to your Wi-Fi. Does your phone or tablet have the same issues? If so, the problem likely lies with your ASUS router or your internet service provider. However, if other devices work fine, then your Windows 10 PC is probably the issue. Now, let's explore some solutions.
Restart and Reconnect: The First Line of Defense
It sounds simple, but it works surprisingly often. The first step is to restart your router. Unplug it from the power outlet, wait about 30 seconds, and then plug it back in. Next, restart your Windows 10 computer. After your PC boots back up, attempt to reconnect to your Wi-Fi network. Thus, you need to test the water before diving deeper.
Driver Dilemmas: Updating Your Wireless Network Adapter
Outdated or corrupted network drivers can wreak havoc on your Wi-Fi connection. Consequently, you should update your network adapter driver. Here's how:
- Right-click the Start button and select "Device Manager."
- Expand "Network adapters."
- Right-click your Wi-Fi adapter (it might be labeled as "ASUS Wireless Network Adapter" or something similar) and select "Update driver."
- Choose "Search automatically for drivers."
- Follow the on-screen instructions.
Also, you can download the latest drivers directly from the ASUS website if the automatic update doesn't work. That is to say, always verify driver versions to avoid compatibility issues.
Network Troubleshooting: Leverage Windows' Built-in Tools
Windows 10 has built-in troubleshooting tools that can often resolve common network problems. You should use this. Here’s how:
- Right-click the Wi-Fi icon in your system tray and select "Troubleshoot problems."
- Windows will then attempt to diagnose and fix any detected issues.
- Follow any on-screen recommendations. To sum up, this is a quick and easy solution.
IP Address Conflicts: Resolving Network Clashes
Sometimes, IP address conflicts can cause connectivity issues. This commonly happens when multiple devices have the same IP address. To avoid this, try the following:
- Open the Command Prompt (search for "cmd" in the Start menu).
- Type
ipconfig /releaseand press Enter. - Type
ipconfig /renewand press Enter. - Close the Command Prompt and try connecting to your Wi-Fi again. Hence, you are refreshing your IP address.
Router Settings: Fine-Tuning Your Wireless Configuration
Occasionally, the problem might be with your router’s settings. Therefore, you need to check them. Access your ASUS router's configuration page. If you have a specific ASUS router, consult the manual. Generally, you access it by typing your router's IP address (usually 192.168.1.1 or 192.168.0.1) into your web browser. After that, you'll need to log in with your username and password.
- Channel Selection: Try changing the Wi-Fi channel to a less congested one.
- Wireless Mode: Ensure your router is using a compatible wireless mode (e.g., 802.11n or 802.11ac) and also, that your Windows 10 PC supports it.
- Firmware Updates: Keep your router's firmware up to date.
Security Software: Possible Firewall Interference
Your security software, such as a firewall, could be blocking your Wi-Fi connection. Furthermore, check its settings. Temporarily disable your firewall and test your Wi-Fi connection. If it works, then you need to adjust your firewall rules to allow access for your network adapter. So, add exceptions for your network.
Factory Reset: A Last Resort Solution
If everything else fails, then consider resetting your ASUS router to its factory settings. First, locate the reset button. Usually, it’s a small button on the back of the router. Secondly, use a paperclip or a similar object to press and hold this button for about 10-15 seconds. After that, your router will return to its original settings. You’ll need to reconfigure your Wi-Fi network. Subsequently, try connecting again.
Seeking Professional Help: When to Call in the Experts
If you've tried all these steps and are still experiencing issues, it may be time to contact your internet service provider or a qualified IT professional. In this case, they can offer further assistance and diagnose more complex problems. Therefore, you can get technical support.
Final Thoughts: Reclaiming Your Online Experience
Dealing with Wi-Fi problems can be incredibly frustrating. However, with these troubleshooting steps, you can usually resolve most ASUS router connection issues on your Windows 10 device. Moreover, remember to be patient and methodical. Finally, you can get back to enjoying a smooth, uninterrupted online experience.
Laptop WiFi Nightmare? This ONE Trick Fixes It FAST!ASUS WiFi Nightmare on Windows 10? FIX IT NOW!
Hey tech-savvy friends, have you ever been in the middle of an important video call, perhaps showcasing your latest masterpiece to the world, only to have your ASUS laptop decide it's a fantastic time to lose its WiFi connection? Or maybe you're trying to download a massive game and are watching the progress bar crawl slower than a snail in molasses. We've all been there, and if you're rocking an ASUS machine with Windows 10, you might be experiencing the dreaded “ASUS WiFi Nightmare.” But hey, don't throw your laptop out the window (yet!). We're here to help you wrestle control back from those frustrating WiFi gremlins and get you back online faster than you can say "router reset."
1. The ASUS WiFi Woes: What's the Deal?
First things first, let's get real. You're not alone. ASUS laptops, particularly those running Windows 10, have a reputation for occasional WiFi hiccups. It's a bit like having a moody friend – sometimes they're super reliable; other times, they just… flake out. But what causes this frustrating behavior? The issues can stem from several sources: outdated or corrupted drivers, conflicts with other software, or even problems with your router settings. It is a cocktail of tech troubles.
2. Is It Really Just Your ASUS? Or the House?
Before we start tearing things apart, let's do a quick sanity check. Is the problem definitely your ASUS laptop, or could the issue lie elsewhere? Let's rule out a few common suspects:
- Check Your Router: Have other devices in your home got WiFi access? If everyone is suddenly offline, the problem is likely with your router or your internet service provider. A quick reset of your router (unplug it, wait 30 seconds, plug it back in) often works wonders.
- The Neighborhood: Are you in an area that could experience internet outages? Checking with neighbors can provide insights.
- Speed Test: Run a speed test on another device when your ASUS is having problems. This will show if the internet speed is slow or if it is your computer only.
3. Driver Dilemmas: The Usual Suspects
Okay, so we've established that the problem seems to be with your ASUS. The most common culprit behind WiFi woes on Windows 10 is outdated or corrupted network drivers. Think of drivers like the language your computer uses to talk to its hardware. If the driver is outdated or speaking gibberish, you get… well, you get frustrated WiFi.
4. Hunting Down Those Driver Updates
Here's how to update your network drivers, which is usually the first (and easiest) fix:
- Open Device Manager: Right-click the Start button and select "Device Manager." Alternatively, type "Device Manager" in the Windows search bar and hit enter.
- Network Adapters: Expand the “Network adapters” section. You should see a list of network adapters, including your ASUS WiFi adapter (it might be labeled something like “Intel Wireless-AC 9560” or similar).
- Update Driver: Right-click on your WiFi adapter and select "Update driver." Choose "Search automatically for drivers." Windows will attempt to locate and install the latest drivers.
- Manual Install: If that doesn't work, you can try manually downloading drivers from the ASUS website. Visit the ASUS support site, enter your specific laptop model, and download the latest WiFi driver package. Then, in Device Manager, choose “Browse my computer for drivers” and point it to the downloaded file.
- Reboot: After installing (or updating) your drivers, always restart your computer.
5. Rolling Back to Simpler Times (Driver Rollback)
Sometimes, the newest driver is the problem. If you recently updated your drivers and the WiFi issues started afterward, try rolling back to the previous version:
- Device Manager Again: Go back to Device Manager and locate your WiFi adapter.
- Properties: Right-click on the adapter and select "Properties."
- Driver Tab: Click on the "Driver" tab.
- Roll Back: If the "Roll Back Driver" button is active, click it. This will revert to the previously installed driver.
- Reboot: Restart your computer.
6. Power Management Pitfalls: Saving Energy, Losing WiFi
Windows 10, in its quest to save battery life, sometimes gets a little too enthusiastic about turning off your WiFi adapter. This can lead to dropped connections.
7. Taming Power Management
Here's how to prevent Windows from messing with your WiFi:
- Device Manager Again (you're getting the hang of this, right?): Find your WiFi adapter.
- Properties, Power Management Tab: Right-click, then select "Properties." Go to the "Power Management" tab.
- Uncheck the Box: Uncheck the box that says "Allow the computer to turn off this device to save power."
- Apply and OK: Click "Apply" and then "OK."
8. Network Troubleshooter: Your Built-In Detective
Windows 10 has a built-in network troubleshooter that can often diagnose and fix common WiFi problems automatically.
9. Running the Troubleshooter
- Settings: Click the Start button and go to "Settings" (the gear icon).
- Network & Internet: Click on "Network & Internet."
- Status, Troubleshoot: Click on “Status” on the left-hand side and then 'Troubleshoot'
- Follow the Prompts: Let it run and follow the prompts. It might offer solutions like resetting your network adapter or diagnosing DNS problems.
10. Firewall Follies: Blocking the WiFi Gods
Sometimes, your Windows Firewall or third-party security software can block your WiFi connection.
11. Checking Your Firewall
- Windows Security: Type "Windows Security" in the Windows search bar and open it.
- Firewall & Network Protection: Click on "Firewall & network protection."
- Allow an App Through Firewall: Click "Allow an app through firewall.”
- Find Your App: Scroll through the list and make sure your WiFi adapter software is allowed. If not, click "Change settings" and then "Allow another app…" to add it.
12. Router Rumble Strips: Checking Your Router's Settings
Sometimes, the problem isn't your laptop—it's your router. Here's a quick check of some common router settings:
- Channel Interference: Your router might be using a WiFi channel that's crowded. Try changing the channel in your router's settings (usually accessed by typing your router’s IP address into your web browser).
- Firmware Update: Make sure your router's firmware is up-to-date.
- Distance: Ensure your laptop isn’t too far from the router. Walls and obstructions can also significantly diminish WiFi.
13. Resetting Network Settings: A Nuclear Option
If nothing else works, you can try resetting your network settings to their default state. Be warned: this will erase your saved WiFi passwords, so make sure you know them before you do this!
14. Resetting Your Network
- Settings: Go to "Settings" > "Network & Internet."
- Status, Network Reset: Scroll down and click "Network reset."
- Reset Now: Click "Reset now" and follow the prompts.
- Reboot and Reconnect: Your computer will restart. You'll need to reconnect to your WiFi network and enter your password.
15. When All Else Fails: The Hardware Hustle
If you’ve tried everything and your ASUS WiFi is still misbehaving, it might be a hardware problem. Contact ASUS support or take your laptop to a qualified technician. Sometimes the WiFi card itself needs replacing.
Conclusion: Breathe Easy, WiFi Worries Be Gone!
So, there you have it. We’ve covered a range of solutions for the ASUS WiFi nightmare on your Windows 10 machine. From driver updates and power settings to troubleshooting and network resets, we've equipped you with the tools to conquer those frustrating connectivity issues. Remember, troubleshooting is often a process of elimination. Be patient, work through the steps, and you'll eventually find the culprit. And hey, if you're still struggling, don't be a stranger! The internet is full of forums and tech communities happy to lend a hand. Now go forth and enjoy a lag-free, connected world!
FAQs
1. My WiFi was working fine, and then suddenly it stopped. What happened?
That's incredibly frustrating! It could be a driver update that went bad, a Windows update that triggered a conflict, or a router issue. Try rolling back your drivers (as described above) or restarting your router. If that does not work, it might be a Windows update that triggered a conflict. You can try uninstalling the recent updates to inspect if that solves the issue.
2. Why is my WiFi so slow on my ASUS laptop?
Slow WiFi can
Laptop KILLING Your WiFi? (Shocking Reason Why!)Cara atasi WiFi tidak bisa connect di laptop not connected

By ijal tutorial Cara atasi WiFi tidak bisa connect di laptop not connected by ijal tutorial
Fix Asus Wi-Fi Not Working in Windows 1087 2025

By TechFixIT Fix Asus Wi-Fi Not Working in Windows 1087 2025 by TechFixIT
Asus X450C Series Laptop Wifi Ethernet Internet Not Working Problemmacniteshkeyboardtricks2025

By Mac Nitesh Asus X450C Series Laptop Wifi Ethernet Internet Not Working Problemmacniteshkeyboardtricks2025 by Mac Nitesh
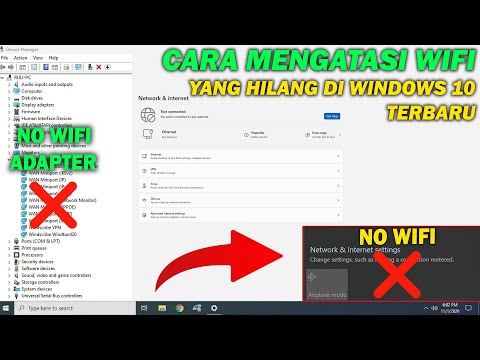
Title: Cara Mengatasi WiFi Hilang di Windows 10 Terbaru 100 Work
Channel: WINTECH id
Cara Mengatasi WiFi Hilang di Windows 10 Terbaru 100 Work by WINTECH id
Laptop Wifi Connect
Here's the title for your article: The Ultimate Guide to Baking the Perfect Sourdough Loaf at Home
Let's get baking!
Unveiling the Magic: The Art of Baking Sourdough
For centuries, the allure of sourdough has captivated palates and ignited culinary passions. More than just bread, a perfect sourdough loaf represents a marriage of science, patience, and artistry. It's a testament to the transformative power of fermentation, yielding a crusty exterior, a chewy crumb, and a complex, tangy flavor profile that elevates every bite. This comprehensive guide isn't just a recipe; it's an invitation to become a sourdough artisan, to understand the nuances of the process, and to master the techniques needed to create a truly exceptional loaf, time and time again.
Understanding Your Starter: The Heart of Your Sourdough
The cornerstone of any exceptional sourdough bread is a vibrant, healthy starter. Often affectionately called a "mother," your starter is a living culture of wild yeasts and beneficial bacteria. Think of your starter as a pet you need to nurture and feed, providing it with the essential elements for sustained vitality.
Creating Your Starter: A Journey of Patience
Building a starter from scratch is a rewarding experience. It requires minimal ingredients—flour and water—and a generous dose of patience. The process typically unfolds over 7-14 days, as wild yeasts from the air colonize the mixture and fermentation begins.
- Day 1: Combine equal parts of whole wheat flour (or a blend) and non-chlorinated water in a clean jar. Mix well, ensure there are no dry pockets of flour, and cover loosely.
- Days 2-7: Observe your starter daily. Initially, you might see little activity, but over the next few days, bubbles will begin to form. Discard half of the starter and feed it with equal parts of flour and water. The discarding process is crucial; it ensures you're only feeding the most active yeast and bacteria.
- Days 7-14: As your starter matures, the bubbling activity will increase, and it will rise significantly after feeding. It should exhibit a pleasant, slightly sour aroma. Once it consistently doubles in size within 4-8 hours after feeding, your starter is ready for baking.
Feeding Your Starter: Sustaining the Life Within
Maintaining a robust starter is an ongoing commitment. The frequency of feeding depends on your baking schedule and the storage method.
- Storage: For frequent bakers, store your starter at room temperature (around 70-75°F) and feed it daily or twice daily. For less frequent use, store it in the refrigerator, where its activity slows, and feed it once a week.
- Feeding Ratio: The standard feeding ratio is typically 1:1:1 – one part mature starter, one part flour, and one part water (by weight). For example, feed 50 grams of starter with 50 grams of flour and 50 grams of water. Adjust the amounts based on your needs, ensuring you always have enough starter for your next bake.
- Signs of a Healthy Starter: A vibrant starter will exhibit a puffy, airy appearance after feeding, with numerous bubbles throughout. It should have a pleasant, slightly sour smell reminiscent of yogurt or apples. Avoid using starters with mold, off-putting odors, or no activity.
The Sourdough Recipe: A Step-by-Step Guide
With a thriving starter in hand, you are ready to embark on the journey of baking your first loaf. This recipe provides a solid foundation, but don’t hesitate to experiment with hydration levels, flours, and techniques to find what works best for you.
Ingredients:
- 100 grams active sourdough starter (fed and bubbly)
- 400 grams bread flour (or a blend of bread flour and whole wheat/rye)
- 320 grams lukewarm water (about 80-85°F)
- 10 grams salt
Instructions:
- Autolyse: In a large bowl, combine the flour and water. Mix until just combined, ensuring that all the flour is hydrated. Cover the bowl and let it rest for 30-60 minutes. This process, called autolyse, allows the gluten in the flour to develop, which creates a better structure.
- Mix in the Starter and Salt: Add the active sourdough starter and salt to the dough. Mix well, incorporating everything until it is fully combined. The dough will initially be shaggy and slightly sticky.
- Bulk Fermentation: The First Rise: Cover the bowl and let the dough rise at room temperature (70-75°F) for 4-6 hours. During this time, perform a series of "stretch and folds" every 30-60 minutes for the first 2-3 hours. This step strengthens the gluten structure, contributing to the bread's oven spring. To perform a stretch and fold, gently stretch one side of the dough upwards and fold it over itself. Rotate the bowl and repeat this process, folding all four sides.
- Shaping the Dough: After bulk fermentation, gently turn the dough out onto a lightly floured surface. Shape it into a round (boule) or an oval (batard) loaf.
- Boule: Gently flatten the dough into a round. Fold the edges of the dough towards the center, like a package. Flip the dough seam-side down and gently round it into a ball by pulling it across the counter, using the friction to create surface tension.
- Batard: Flatten the dough into a rectangle. Fold the top third of the dough down towards the center, and then fold the bottom third upwards to meet it. Gently press to seal. Flip the log over and gently roll, and seal the seam.
- Proofing: The Second Rise: Place the shaped dough in a banneton basket lined with flour (rice flour is preferred). Cover the basket with a damp kitchen towel (or place inside a plastic bag) and refrigerate for 12-24 hours. This slow, cold proofing enhances the flavor and improves the bread's texture.
- Baking: Preheat your oven to 450°F (232°C) with a Dutch oven inside. Carefully remove the hot Dutch oven from the oven. Gently place the proofed dough into the Dutch oven. Score the top of the loaf with a sharp knife or lame. This allows the bread to expand during baking and creates a visually appealing crust. Cover the Dutch oven and bake for 20 minutes.
- Remove the Lid and Finish Baking: Remove the lid from the Dutch oven and continue baking for another 25-30 minutes, or until the crust is deeply golden brown and the internal temperature reaches 200-210°F (93-99°C).
- Cooling: Remove the loaf from the Dutch oven and place it on a wire rack. Let it cool completely (at least 2-3 hours) before slicing. This allows the crumb structure to set, preventing a gummy texture.
Troubleshooting Common Sourdough Challenges
Baking sourdough can sometimes present challenges. Here are some common issues and their solutions.
- Dense Loaf: This can be caused by a variety of factors, including a weak starter, under-proofing, or insufficient gluten development. Ensure your starter is active and doubling in size within 4-8 hours after feeding. Proof the dough sufficiently, and use the stretch and fold technique.
- Flat Loaf: Often related to over-proofing or a weak gluten structure. Reduce proofing time, and ensure your starter has sufficient activity.
- Sour Taste Too Strong: This can indicate over-fermentation or the use of an overly sour starter. Reduce fermentation times, and you may need to feed your starter more frequently to prevent it from becoming too sour. Experiment with shorter proofing times or using a more vigorous starter.
- Uneven Crumb: Can result from uneven shaping or over-proofing. Ensure the loaf is shaped consistently to ensure even baking.
- Crust Burning: Lower the oven temperature or reduce the baking time. Adding a baking sheet below the Dutch oven will help to prevent the bottom crust from burning as well.
Mastering the Variables: Hydration, Flour, and Beyond
Once you've mastered the basic recipe, you can begin to experiment and refine your sourdough baking. The perfect loaf is a personal journey.
- Hydration: The hydration percentage (the ratio of water to flour) significantly impacts the final texture. Higher hydration levels (75% or higher) result in an open crumb, while lower hydration levels produce a tighter crumb. Experiment with the water amount to achieve your desired result.
- Flour: Different flours yield different results. Bread flour provides a strong gluten structure, whole wheat flour adds complexity and flavor, and rye flour contributes to a distinctive tangy flavor. Experiment with different flour blends to find your favorites.
- Additions: Once your basic recipe is honed, you can add seeds, herbs, nuts, or dried fruits to your dough to create exciting variations.
The Journey of the Sourdough Baker: Continuous Learning
Baking sourdough is an ongoing process of learning, experimentation, and adaptation. Embrace the journey, and view each loaf as a step towards greater mastery. The pleasure of creating a beautiful, delicious loaf is an experience worth savoring.
**The Sourdough Community
