how do i increase the wifi range of my laptop

Title: How to Improve Wi-Fi Signals in Windows Laptop Speedup Wi-Fi
Channel: MJ Tube
How to Improve Wi-Fi Signals in Windows Laptop Speedup Wi-Fi by MJ Tube
how to increase the wifi range of my laptop, how can i improve the wifi signal on my laptop, how to increase wifi range in laptop windows 10
Laptop WiFi Range SUCKS? This Trick TRIPLES It!
Boost Your Wi-Fi: Finally, a Laptop Range Solution That Actually Works!
Let’s face it. That feeling when your laptop’s Wi-Fi struggles? It’s infuriating, isn’t it? You’re trying to stream a movie, join a video call, or even just browse the web, and the connection is slower than molasses in January. But the frustration ends now. I'm going to share a trick that can drastically improve your laptop’s Wi-Fi range. This isn't some complicated technical mumbo jumbo. It’s a straightforward solution.
The Annoying Truth About Laptop Wi-Fi
Laptops are designed for portability, correct? That sleek design often compromises key functionalities. One of those is, unfortunately, Wi-Fi performance. The antennas inside laptops are often small. They’re tucked away, struggling against the metal chassis. Consequently, they have limited range. The signal weakens quickly as you move away from your router. Moreover, walls, furniture, and other appliances interfere. This interference further diminishes your signal strength. As a result, your Wi-Fi experience suffers. It's time to fight back.
The Secret Weapon: A Simple Hardware Hack
So, what’s the magic bullet? It’s probably not what you think. It doesn’t require expensive equipment. Nor do you need to be a tech wizard. In fact, it's surprisingly simple. You'll need an external Wi-Fi antenna. These are readily available online, and they're inexpensive. You can find them on Amazon or at your local electronics store. These antennas typically connect via USB.
Picking the Right Antenna: A Quick Guide
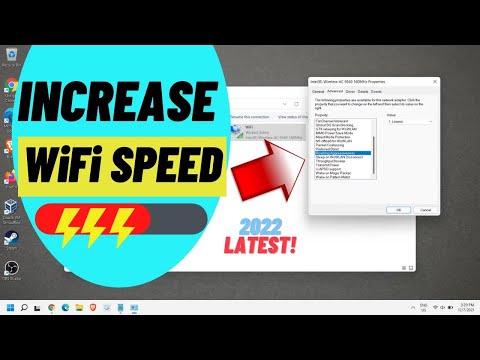
Now, choosing the right antenna is crucial. Not all external antennas are created equal. You'll need to consider a few things. First, look for an antenna that supports dual-band Wi-Fi (2.4 GHz and 5 GHz). This ensures compatibility. Therefore, it supports modern Wi-Fi standards. Second, check the antenna's gain. Gain indicates how much the antenna amplifies the signal. A higher gain equals a stronger signal. However, a very high gain can sometimes be overkill. You might not need the most powerful one. Finally, examine the reviews. Read what other users have to say. This gives you a better idea of its real-world performance.
Setting Up Your Wi-Fi Booster: Easy Steps
The setup process is generally very simple. First, unplug your laptop from the power source. Next, plug the external antenna into a USB port. Ensure the antenna is positioned where it can receive the best signal. You will want to place your antenna in a spot that optimizes your signal. Ideally, place it in an elevated, open spot. Thus, it can avoid obstructions. Your operating system should automatically recognize the antenna. However, you might need to install drivers. Those drivers will most likely be provided with the antenna. Finally, configure your laptop to use the new antenna. You can usually do this through your network settings.
Troubleshooting Tips: Making Sure It Works
Sometimes, things don’t go perfectly according to plan. So, let’s troubleshoot. If you’re not seeing a significant improvement, let's start with the basics. Make sure the antenna is securely connected. Check your router. Make sure it's working correctly and broadcasting a strong signal of its own. Try moving the antenna. Experiment with different positions. Therefore, find the spot that gives you the best results. Are you still having problems? Then, check your drivers. Ensure they're up to date. Lastly, if all else fails, consult the antenna's manual.
Beyond the Antenna: Other Helpful Hints
Installing that antenna significantly helps. But, you can do even more. For example, upgrade your router, especially if it's outdated. Consider replacing your old one. Newer routers use the latest Wi-Fi standards. They offer better range and performance. Secondly, reduce interference. Keep your router away from other electronic devices. These devices can cause interference. Finally, regularly clear out all your cache. This helps to keep your internet speed blazing.
The Amazing Results: What to Expect
Once you implement this simple trick, prepare to be amazed. You should experience a noticeably stronger Wi-Fi signal. This means faster download speeds. More stable video streaming. And fewer dropped connections. In fact, you should be able to move further away from your router. You’ll still maintain a solid connection. Say goodbye to Wi-Fi dead zones. So long to frustration.
Final Thoughts: Embrace the Wi-Fi Revolution
Don't let a weak Wi-Fi signal hold you back. Take action right now. Invest in an external Wi-Fi antenna. Follow the setup instructions. Enjoy lag-free browsing. Stream your favorite shows without buffering. Work from anywhere in your home. Start experiencing the power of a truly reliable Wi-Fi connection. Because you deserve it.
Laptop to Free WiFi: The Secret Hack You NEED!Laptop WiFi Range SUCKS? This Trick TRIPLES It!
Let's be honest, dealing with a weak Wi-Fi signal is like having a perpetually grumpy housemate. You're constantly battling buffering, dropped connections, and the agonizing crawl of webpages loading at the speed of a snail in molasses. Sound familiar? Trust me, we’ve all been there. I remember trying to stream a movie in my bedroom during a particularly crucial work-from-home day, only to be taunted by the spinning wheel of death. My laptop's Wi-Fi range felt like it was limited to a tiny bubble around the router. Thankfully, after some serious digging (and a few muttered curses), I stumbled upon a game-changing trick. It’s simple, surprisingly effective, and, best of all, it doesn't involve buying a new, expensive router. Ready to say goodbye to Wi-Fi woes and hello to blazing-fast internet? Let's dive in!
1. The Frustration is REAL: Why Your Laptop WiFi Sucks
First things first, let’s commiserate. We need to acknowledge the shared suffering. Why does your laptop's Wi-Fi seem to be the weakest link in your digital chain? Blame it on a combination of factors. Your laptop's internal antenna is often puny, a technological compromise made to keep your device sleek and slim. Think of it like a tiny megaphone whispering into a vast stadium – it's just not designed to broadcast a strong signal over long distances or through thick walls. Add to that the interference from microwaves, Bluetooth devices, and your neighbor's Wi-Fi, and you've got a recipe for digital disaster. It's like trying to have a conversation at a rave! That's why we're here; we're ready to fix this!
2. Decoding the Mystery: Understanding WiFi Range and Its Enemies
Before we unveil the secret weapon, let's get geeky for a second. Wi-Fi signals are basically radio waves. These waves travel from your router to your laptop, carrying all that precious internet data. The strength of this signal is influenced by distance, obstacles (walls, furniture, even water – yes, it absorbs signals!), and interference, as mentioned. Understanding these enemies is crucial. For example, a concrete wall is like a brick wall to your message; it won't go through, while plasterboard is more like a thin note you will be able to read. Think of your router like a lighthouse. The further you are from the lighthouse, the weaker the beam appears.
3. The Superhero Tool: Introducing the WiFi Antenna Booster
The secret weapon? A simple, yet ingenious, trick involving a homemade Wi-Fi antenna booster. No, we are not talking about some complicated tech setup. We're talking about something you can make with items you probably already have lying around the house. Remember that old aluminum pie pan gathering dust in your kitchen cupboard? Or the cardboard box destined for recycling? Those, my friends, are about to become your allies. This is a low-tech solution that acts like a reflector, focusing your router's signal and directing it towards your laptop. It's like giving your lighthouse a mirror!
4. DIY Time: Building Your WiFi Range Booster (It's Easier Than You Think!)
Ready to become a Wi-Fi wizard? Here's how to craft your antenna booster.
- The Pie Pan Method: This is the simplest. Take your aluminum pie pan and cut a slot in the center that's large enough for the base of your router antenna to fit through. Then, position the pan so it acts like a reflector, directing the signal towards your laptop. Experiment with angling the pan to find the sweet spot.
- The Cardboard Reflector: If you don't have a pie pan, a cardboard box works wonders. Cut a large curved shape (like a quarter-circle) from cardboard, ensuring the base of the arc is wide enough to house the top of your router. Cover the inside with aluminum foil (the shiny side facing outwards, of course!). Secure the curved shape behind your router antenna, again experimenting with angles.
- The Important Stuff: Make sure your router is properly secured, whether it's a pie pan or cardboard. Also, ensure the antenna is straight and aligned with the reflector.
5. Placement is Key: Optimizing Your Router's Location
While the booster works wonders, it is still not the end-all-be-all. Where you place your router inside your house could drastically impact its reach. Now that we have a super tool, we need to optimize its usage. The most important factor is the position. Think of it as a loudspeaker: where do you put it to best reach the audience? A central location is ideal, away from obstacles. Try to avoid placing your router:
- Near walls (especially those made of brick or concrete).
- Near sources of interference (microwaves, Bluetooth devices).
- Inside cabinets or enclosed spaces.
6. Channel Surfing: Finding the Least Congested WiFi Channel
This is a somewhat more technical, yet very important step, but do not let it scare you. Your Wi-Fi router broadcasts on a specific channel. Since everyone is streaming and browsing the net, a lot of other routers use the same channels. This causes congestion, which slows down your internet speed and reduces Wi-Fi range. Fortunately, this is something we can fix.
- Use a Wi-Fi Analyzer App: Download a Wi-Fi analyzer app (there are many free ones available for both Android and iOS) on your smartphone. This app scans your network and identifies the Wi-Fi channels being used by other routers in your area.
- Switch Channels: Most routers allow you to change the Wi-Fi channel in their settings (usually accessible through your web browser). Choose a less crowded channel (ideally 1, 6, or 11 – these channels don’t overlap).
7. Updating Your Router's Firmware: The Digital Tune-Up
Just like your phone or laptop, your router's firmware needs updates from time to time. These updates often include performance improvements, bug fixes, and security patches that can boost your Wi-Fi range and speed.
- Check your Router's Manual: Consult your router's manual or the manufacturer's website for instructions on how to update the firmware.
- Follow Instructions Carefully: The process usually involves accessing your router's settings, finding the firmware update section, and following the prompts.
8. Dual-Band Routers: A Speed Boost, if Your Laptop Supports Them
If your laptop and router both support it, consider using a dual-band router (one that broadcasts on both 2.4 GHz and 5 GHz frequencies). The 2.4 GHz frequency offers a broader range, while the 5 GHz frequency provides faster speeds (but a shorter range).
9. Restarting the Router: A Simple but Powerful Solution
Before you do anything else, try the old "turn it off and on again" trick. Seriously, a simple reboot can often resolve temporary glitches that are affecting your Wi-Fi performance. This is a must-do step!
10. Eliminating Interference: Squelching the Noise
We've already touched upon interference, but it is such a crucial factor that it's worth restating. Metal objects (like filing cabinets), appliances (microwaves), and certain electronics can all disrupt your Wi-Fi signal.
- Keep your router away from potential interference sources.
- If possible, move any devices that could be causing interference.
11. Software Solutions: Adjusting Your Laptop's Settings
Sometimes, the problem is with your laptop's settings, not the router itself.
- Update your Wi-Fi adapter drivers: Outdated drivers can cause performance issues. Go to Device Manager on your computer, under "Network Adapters", and check for updates.
- Disable power-saving mode: Your laptop might be throttling your Wi-Fi to conserve battery. This is easily fixed.
12. When All Else Fails: Considering a WiFi Extender
It is very rare that the above steps do not work, but if nothing else works, or if your house is super huge, consider a Wi-Fi extender or mesh network system. These devices are designed to extend the reach of your Wi-Fi network by relaying the signal.
13. Test and Tweak: Fine-Tuning Your Setup
Once you've implemented these tips, test your Wi-Fi range and speed in different areas of your home. Use a speed test website or app to measure the performance. This will let you know how effective your setup has been.
14. The Joy of Strong WiFi: Experiencing Faster Speeds
Imagine downloading your favorite music albums in seconds, streaming 4K movies without buffering, and participating in online gaming with minimal lag. With your new Wi-Fi superpowers, these things will become a reality!
15. The Ultimate Victory: Your Laptop Now Has Super WiFi!
We have armed you with a repertoire of tools and strategies to fix your wifi. Whether it is an antenna, finding new channels, or a myriad of things, we have got you covered. Remember, the best solution is often a combination of techniques, so experiment and find what works best for your specific situation. You have now become a Wi-Fi master!
And finally:
We have covered a lot of ground, from the basics of Wi-Fi signals to troubleshooting techniques and DIY
HP Laptop WiFi Nightmare? This ONE Trick Fixes It!How To Increase WiFi Speed On Windows 11 - Full Guide

By GuideRealm How To Increase WiFi Speed On Windows 11 - Full Guide by GuideRealm
Make Your Laptop's Wifi Signal Faster On Windows 1087 Tutorial

By MDTechVideos Make Your Laptop's Wifi Signal Faster On Windows 1087 Tutorial by MDTechVideos
Best Way To Improve Wi-Fi Connection On PCLaptop 2022
By EasyTechGeek Best Way To Improve Wi-Fi Connection On PCLaptop 2022 by EasyTechGeek

Title: Make Your Laptop's WiFi Signal Faster On Windows 111087
Channel: EasyTechGeek
Make Your Laptop's WiFi Signal Faster On Windows 111087 by EasyTechGeek
Laptop Wifi Connect
Laptop WiFi Range SUCKS? This Trick TRIPLES It!
Are you tired of battling the digital wilderness, your laptop's Wi-Fi signal a perpetually weak and flickering flame? Do dead zones plague your home, turning your otherwise cozy abode into a frustrating landscape of buffering videos and dropped video calls? We understand your plight. The promise of wireless freedom should be a reality, not a distant dream. Fortunately, you are in the right place. We're about to unveil a surprisingly simple yet dramatically effective technique that can revolutionize your laptop's Wi-Fi performance, potentially tripling its effective range. Prepare to bid farewell to those infuriating connectivity issues and say hello to a new era of seamless, everywhere-you-go Wi-Fi.
The Culprit: Understanding Your Laptop's Antenna Limitations
Before we unleash the solution, let's briefly examine the problem. Most laptops, striving for sleek designs and portable convenience, often compromise on antenna performance. Internal antennas, neatly tucked away within the chassis, are inherently limited by size and placement constraints. Think of them as tiny ears trying to catch a whisper in a crowded stadium. These antennas are simply not designed for optimal signal reception, especially in homes filled with interference from walls, appliances, and neighboring Wi-Fi networks. This is particularly evident in laptops with metal casings, which can further impede signal propagation. The result? Weak signals, dropped connections, and a frustrating digital experience.
The Game Changer: The External Antenna Solution
The key to significantly boosting your laptop's Wi-Fi range lies in bypassing the internal antenna limitations. The most reliable and cost-effective way to do this involves utilizing an external antenna. This is not some complex, tech-heavy project. It's a surprisingly straightforward modification that can yield extraordinary results. While there are various external antenna solutions, the most universally accessible and effective approach involves a simple adapter.
Introducing the USB WiFi Adapter Revolution
Your journey to amplified Wi-Fi bliss begins with a powerful, external Wi-Fi adapter that connects to your laptop via a USB port. Forget the old days of finicky drivers and unreliable connections. Modern USB Wi-Fi adapters offer plug-and-play convenience, making setup a breeze. Choose an adapter with an external antenna; this is the critical component. These antennas are often larger and more strategically designed than those inside your laptop, allowing them to capture and transmit signals with significantly greater efficiency. Look for adapters supporting the latest Wi-Fi standards (802.11ac or, ideally, 802.11ax) to ensure optimal performance and future-proofing.
Selecting the Right External Antenna: A Deep Dive
Not all external antennas are created equal. When choosing a USB Wi-Fi adapter, pay careful attention to the antenna specifications. A higher dBi (decibel isotropic) rating indicates a more powerful antenna with a greater range. While a higher dBi generally translates to better performance, remember that other factors, such as antenna design and the environment, also play a role. Consider these factors:
- Antenna Type: Directional antennas focus their signal in a specific direction, offering impressive range in that direction, but potentially weaker performance elsewhere. Omnidirectional antennas broadcast the signal in all directions, making them suitable for broader coverage within a home or office. Choose the type that best suits your needs.
- Antenna Gain: Measured in dBi, antenna gain directly influences signal strength. Opt for adapters with antennas boasting higher dBi ratings – generally 5dBi or higher is a good starting point.
- Removable Antennas: Some adapters feature removable antennas, allowing you to upgrade to more powerful or specialized antennas in the future.
The Installation Process: A Step-by-Step Guide
The installation is incredibly simple:
- Plug and Play: Insert the USB Wi-Fi adapter into an available USB port on your laptop.
- Driver Installation (if required): Your operating system should automatically install the necessary drivers. If not, the adapter should come with a driver disk , or they may be available for download from the manufacturer's website.
- Configure Wi-Fi Settings: Once the adapter is installed, your laptop’s Wi-Fi settings should recognize the new connection. You'll likely disable your laptop's built-in Wi-Fi and connect to the network using the new adapter. Double-check your network settings to ensure the correct network is selected.
- Optimal Antenna Placement: This is where the magic truly happens. Experiment with antenna placement to maximize signal strength.
Optimizing Antenna Placement for Peak Performance
Antenna placement is crucial. Experimentation is key. Here are some proven strategies:
- Height Matters: Elevate your antenna. Placing it higher, away from obstructions like furniture and walls, helps to improve signal propagation.
- Strategic Positioning: Position your antenna towards your router. A direct line of sight is ideal, but even minor adjustments can significantly improve performance.
- Obstacle Avoidance: Minimize obstructions between the antenna and the router. Walls, metal objects, and appliances can all interfere with the signal.
- Rotating Antennas: If your adapter features a rotating antenna, experiment with different angles to find thesweet spot for optimal signal reception.
- Experimentation is Key: Each environment is unique. Don't be afraid to relocate your laptop and the antenna to discover the optimal setup.
Troubleshooting Common Wi-Fi Issues
Despite your best efforts, you might still encounter some Wi-Fi hiccups. Here's how to troubleshoot them:
- Driver Issues: Ensure your USB Wi-Fi adapter drivers are up-to-date. Visit the manufacturer's website for the latest drivers.
- Router Interference: Overlapping Wi-Fi channels can cause interference. Access your router's settings and switch to a less congested channel. (Use Wi-Fi analyzer apps on your smartphone to determine the least crowded channel)
- Distance and Obstacles: Remember that distance and obstacles significantly impact signal strength. Try moving closer to your router or removing objects that might be blocking the signal path.
- Router Firmware: Make sure your router's firmware is also up-to-date to optimize performance.
- Restarting: Sometimes, a simple restart of your laptop, router, and adapter can resolve temporary connectivity issues.
Beyond the Adapter: Additional Tips for Enhanced Wi-Fi Performance
While the USB Wi-Fi adapter is the core of this range-boosting technique, here are a few additional tips to further enhance your Wi-Fi experience:
- Upgrade Your Router: If your router is outdated, consider upgrading to a newer model that supports the latest Wi-Fi standards (802.11ac or 802.11ax). A powerful router provides a strong baseline signal for your adapter to work with.
- Bandwidth Prioritization (QoS): Many routers offer Quality of Service (QoS) settings, allowing you to prioritize bandwidth for specific devices or applications. Prioritize your laptop's connection for a smoother experience.
- Reduce Interference: Identify and address potential sources of interference, such as microwave ovens, cordless phones, and Bluetooth devices.
- Consider a Wi-Fi Extender (in certain situations): If your primary goal is to expand Wi-Fi coverage beyond your home's footprint, a Wi-Fi extender may be useful in tandem with your USB Wi-Fi adapter. However, a well-placed adapter often mitigates the need for an extender.
The Benefits: Experience the Difference
By implementing this straightforward technique, you can expect to see significant improvements:
- Extended Range: Say goodbye to Wi-Fi dead zones. Your laptop will be able to connect reliably from a much greater distance.
- Faster Speeds: A stronger signal translates to faster download and upload speeds and snappier browsing.
- Improved Stability: Enjoy fewer dropped connections and a more reliable Wi-Fi experience.
- Reduced Frustration: Reclaim your time and productivity by eliminating Wi-Fi-related headaches.
In Conclusion: Take Control of Your Wi-Fi Future
Don't let a weak Wi-Fi signal limit your digital freedom. With this easy-to-implement solution, you can transform your laptop’s Wi-Fi performance and experience a seamless, reliable, and far-reaching wireless connection. Embrace the power of the external antenna and say hello to a world of uninterrupted streaming, lag-free gaming, and effortless browsing. You deserve a Wi-Fi experience that matches your expectations. Start today, and unlock the full potential of your laptop.
