use laptop as wifi hotspot windows 7

Title: Cara Mengaktifkan Hotspot Wifi Laptop Windows 7
Channel: LAPTOP TUTORIAL
Cara Mengaktifkan Hotspot Wifi Laptop Windows 7 by LAPTOP TUTORIAL
Unlock Blazing-Fast WiFi Anywhere: Turn Your Windows 7 Laptop into a Hotspot!
Become a WiFi Wizard: Transforming Your Windows 7 Laptop into a Mobile Hotspot
Ever found yourself in a connectivity conundrum? You know, that frustrating moment when you desperately need the internet, but public WiFi is nonexistent or agonizingly slow? We've all been there. Thankfully, there's a clever solution that's probably already sitting right under your nose: your trusty Windows 7 laptop. You can instantly create your own personal hotspot. Prepare to be amazed! We'll show you how to unlock blazing-fast WiFi anywhere.
Crafting Your Wireless Fortress: A Step-by-Step Guide
First, ensure your Windows 7 laptop has a working network adapter. This adaptor should be wireless-enabled. Next, confirm you have an active internet connection. This could be a wired Ethernet connection or a mobile broadband connection. Because without an internet source, this whole process is pointless, so you'll need that base. Ready? Let's get started.
Opening the Command Center: Accessing the Command Prompt
Now, we will need to delve into the command prompt. It is your gateway to making this transformation happen. Click on the "Start" button. Then, type "cmd" into the search bar. Right-click on "cmd.exe" from the results. We now chose, "Run as administrator" for optimal access. This is important to ensure you have the necessary permissions. The command prompt window will then appear.
The Secret Code: Entering the Magic Commands
Within the Command Prompt window, type the following command. Ensure there is no typos. You'll want to enter: netsh wlan set hostednetwork mode=allow ssid="YourHotspotName" key="YourPassword". Replace "YourHotspotName" with your desired hotspot name. Pick a name that is memorable and easy to type. Also, substitute "YourPassword" with a secure password. The password should be at least eight characters long. This will protect your network from uninvited guests. After entering it, hit "Enter." Next, we start the hotspot. To do that, enter: netsh wlan start hostednetwork. Again, press "Enter." This activates your newly configured hotspot.
Sharing the Love: Enabling Internet Connection Sharing
The next piece of the puzzle is sharing your internet connection. Go to "Network and Sharing Center." You can typically find this by right-clicking the network icon in your system tray. Click "Change adapter settings". You will now be seeing all the network connections. Locate your active internet connection (e.g., Ethernet, or Mobile Broadband). Right-click on it. Select "Properties." Navigate to the "Sharing" tab. Check the box that reads, "Allow other network users to connect through this computer's Internet connection." A dropdown menu will then appear. Select the virtual network adapter you created (typically, it's named "Microsoft Hosted Network Virtual Adapter"). Click "OK." And with that, you are ready!
Testing the Waters: Verifying Your Hotspot's Functionality
At this point, your laptop should now be acting as a WiFi hotspot. Take your smartphone or another device. Search for available WiFi networks. Your hotspot name should appear on the list. Connect to your hotspot using the password you created. Did it work? Check if you can access the internet. If everything works, congratulations! You've successfully created a mobile hotspot.
Troubleshooting Troubles: Common Issues and Solutions
Sometimes, things don't go exactly as planned. That's okay! Here are some common issues. And most importantly, their solutions:
- Hotspot Not Showing Up: Double-check the hotspot name. Verify the steps in the command prompt were correctly followed. Ensure your wireless network adapter is enabled.
- No Internet Access: Confirm your internet connection is active on your laptop. Check your internet connection sharing settings. Restart your laptop.
- Connection Drops: This could be due to a weak signal. Try moving closer to your laptop. Ensure your laptop is not overheating.
The Benefits Beyond Measure: Why This Is Worth It
Why do all of this? Because you'll be able to work from anywhere. Imagine working from a coffee shop, even without the slow, unreliable WiFi. You can share your internet with friends. Think about streaming movies or shows on your tablet in the car. Your laptop gives you that convenience. You are in complete control. You are no longer dependent on external WiFi access points. So, to make sure you are always connected, consider this method.
Staying Connected: The Power in Your Hands
Creating a WiFi hotspot from your Windows 7 laptop is remarkably simple. Now, you are armed with the knowledge. You can create your own personal WiFi network. Enjoy the freedom of internet access wherever you go. Embrace the power that lies within your laptop. And go on the adventure of connecting and exploring!
Lenovo WiFi OFF: The Easiest Trick Ever!Unlock Blazing-Fast WiFi Anywhere: Turn Your Windows 7 Laptop into a Hotspot!
Hey there, tech adventurers! Ever found yourself staring at the dreaded "No internet connection" message while desperately needing to hop online? Maybe you're at a hotel with ridiculously slow Wi-Fi, or perhaps your mobile data is sputtering like a dying firefly. Well, guess what? We've all been there, and believe me, the frustration is real. But what if I told you there’s a secret weapon – a simple trick to turn your trusty Windows 7 laptop into a personal Wi-Fi hotspot? That's right! Prepare to become the hero of connectivity, the beacon of bandwidth! This isn't just about surviving; it's about thriving in a world that demands constant connection. We’re talking about unleashing the power of your laptop to share its internet connection with other devices, like your phone, tablet, or even another laptop. Sounds amazing, right? Let's dive in, shall we?
1. Why Bother? The Case for a Portable WiFi Oasis
Think of your laptop as a digital Swiss Army knife. It's already packed with incredible processing power, storage, and now, with a few simple tweaks, it can become a mobile router. The benefits? Well, they're numerous:
- Sharing is Caring (and Data-Saving): You can share your laptop's internet connection (via Ethernet or even a USB tether from your phone) with multiple devices. This is incredibly useful if you have a single internet source but multiple gadgets needing access.
- Bypassing Bad Wi-Fi: Stuck with slow, unreliable Wi-Fi at a hotel or cafe? Your laptop can become your knight in shining armor, providing a faster, more stable connection.
- Emergency Backup: Lost internet at home? Your laptop can use your phone's mobile data (with a tether) to get you back online. It’s like having a backup generator for your internet connection!
- Cost Savings: Instead of paying for separate internet access for each device, you can often save money by sharing a single connection.
It's like creating your own miniature Wi-Fi paradise, wherever you go. Pretty cool, right?
2. The Techy Terrain: What You'll Need to Embark on This Adventure
Before we leap into action, let's gather our supplies. Thankfully, the process is surprisingly straightforward. You'll need:
- A Windows 7 Laptop: This is, after all, the star of the show!
- An Internet Connection: Your laptop needs to already be connected to the internet. This can be through an Ethernet cable (the best option for speed and stability), or a USB tether from your smartphone, or even a Wi-Fi connection.
- A Little Patience (and a Sense of Adventure): We'll walk you through each step, but a little bit of tech curiosity goes a long way.
3. The Command Center: Accessing the Magic with the Command Prompt
Alright, tech wizards, time to open up our secret spell book: the Command Prompt. This seemingly simple window is the key to unlocking your laptop's hotspot potential. Here's how:
Open the Command Prompt: Click the Start button, type "cmd" in the search bar, and press Enter. This will open the Command Prompt window. Alternatively, you can right-click on the Start button and select "Command Prompt."
Run as Administrator: This is important! Right-click on "Command Prompt" (either in the search results or in the Start menu) and select "Run as administrator." This grants the necessary permissions to make changes.
4. The Secret Code: Creating Your Virtual Network with Command Line Magic
Now for the fun part! We're going to enter a few commands to create a virtual network adapter, the cornerstone of our hotspot. Don't worry; it's easier than it sounds! Paste (or type meticulously – typos are the enemy here!) this command into the Command Prompt and press Enter:
netsh wlan set hostednetwork mode=allow ssid=YourHotspotName key=YourPassword
Let's break this down:
netsh wlan: This is the command that allows us to interact with the wireless LAN (WLAN) settings. Essentially, we're talking directly to your laptop's Wi-Fi capabilities.set hostednetwork mode=allow: This tells Windows 7 to allow the creation of a hosted network (our soon-to-be hotspot).ssid=YourHotspotName: ReplaceYourHotspotNamewith the name you want for your Wi-Fi hotspot. Choose something memorable and descriptive (like "MyLaptopHotspot" or "AwesomeWiFi"). Don't use spaces!key=YourPassword: ReplaceYourPasswordwith a strong password to secure your hotspot. This is super important to prevent unauthorized access. Make sure it's at least 8 characters long and includes a mix of letters, numbers, and symbols.
5. Launching the Launchpad: Starting Your Virtual Network
Now that we've created the virtual network, it’s time to kick it into gear! In the Command Prompt, enter this command and press Enter:
netsh wlan start hostednetwork
This command starts the hosted network, effectively activating your hotspot! You should see a confirmation message indicating that the hosted network has started. Success!
6. Network Sharing: Bridging the Gap Between Worlds
Your hotspot is now running, but it's not yet sharing the internet connection. This is where network sharing comes into play. You need to tell Windows 7 to "share" the existing internet connection over this new virtual network. Here's how:
Open Network and Sharing Center: Click the Start button, then click "Control Panel." Then, select "Network and Internet" and then "Network and Sharing Center."
Change Adapter Settings: In the left-hand pane, click "Change adapter settings." This will open a window showing all your network connections.
Identify Your Internet Connection: Find the network adapter that's currently connected to the internet. This might be your Ethernet connection (if you're using a cable) or your Wi-Fi connection.
Open Properties: Right-click on the adapter connected to the internet and select "Properties."
Sharing Tab: In the Properties window, click the "Sharing" tab.
Enable Sharing: Check the box that says "Allow other network users to connect through this computer's Internet connection."
Choose Your Network: Under "Home networking connection," select the name of your virtual network adapter. This will likely be something with "Microsoft Hosted Network Virtual Adapter" or a similar name.
Click "OK": Close all the windows.
7. Connecting Your Devices: Joining the WiFi Party
Now for the moment of truth! Grab your phone, tablet, or another laptop and scan for Wi-Fi networks. You should see the "SSID" (the name) of your new hotspot (the name you chose back in step 4). Enter the password you set, and voila! Your device should connect to your laptop's internet connection.
8. Troubleshooting: When Things Go Bump in the Night
Sometimes, things don't work perfectly the first time. Don't worry; it's all part of the adventure! Here are a few common issues and solutions:
"The hosted network couldn't be started.”: This usually indicates a problem with the network adapter drivers. Make sure your drivers are up to date. You can check for driver updates through the Device Manager (search for "Device Manager" in the Start menu).
No Internet Access on Connected Devices: Double-check that you've correctly enabled internet connection sharing in the Network and Sharing Center (Step 6). Also, make sure you're connected to the internet on your laptop to begin with.
Slow Speeds: Wi-Fi speeds can vary depending on factors like distance, obstructions, and the strength of your laptop's Wi-Fi adapter. Try moving closer to your laptop, or, if possible use an Ethernet cable for your laptop's internet connection for faster speeds.
Connection Drops: If the connection drops from time to time, try rebooting your laptop and restarting the hotspot. Ensure that no other device is interfering with your wireless transmission.
Hidden Networks: If you can't find your network, make sure you have the network broadcast feature enabled.
9. Stopping the WiFi: Turning Off Your Hostpot
When you no longer need your hotspot (or when your laptop's battery is running low), you can easily stop it. Go back to the Command Prompt (run as administrator) and enter this command:
netsh wlan stop hostednetwork
10. Command Line Options: Customizing Your Network Further
While the basic setup gets you up and running, you can customize your hotspot further using the Command Prompt. For example:
Changing the SSID or Password: Simply repeat Step 4 with your new desired hotspot name and password. Then, restart the hosted network with
netsh wlan start hostednetwork. Note, the hostspot must be stopped before these changes.Viewing Hosted Network Status: You can see the status of your hosted network (including the number of connected
Cara Membuat Hotspot WiFi dengan Windows 7

By 1stepatatime Cara Membuat Hotspot WiFi dengan Windows 7 by 1stepatatime
Ubah Laptop Windows 7 Anda menjadi Hotspot WiFi 2
By AvoidErrors Ubah Laptop Windows 7 Anda menjadi Hotspot WiFi 2 by AvoidErrors
Cara mengatasi Wifi adapter hilang windows 7,8,10
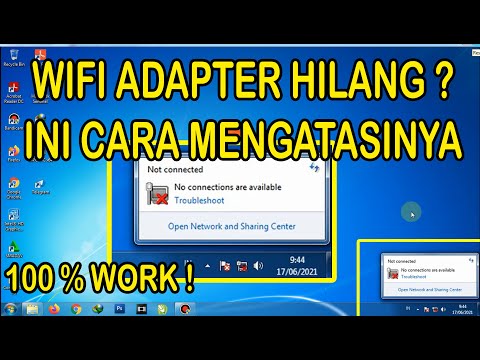
By Ani Saja Cara mengatasi Wifi adapter hilang windows 7,8,10 by Ani Saja

Title: Cara Membuat Hotspot di KomputerLaptop tanpa Software Windows 7, 8 dan 10
Channel: Tech Coffee
Cara Membuat Hotspot di KomputerLaptop tanpa Software Windows 7, 8 dan 10 by Tech Coffee
Wifi Not Found
Unlock Blazing-Fast WiFi Anywhere: Turn Your Windows 7 Laptop into a Hotspot!
We live in a world perpetually connected, a landscape where the digital thread weaves through every facet of our lives. From the bustling coffee shop to the quiet corner of a library, access to reliable internet has become less a luxury and more a necessity. Yet, circumstances often conspire to disconnect us – precarious public Wi-Fi, travel limitations, or dead zones within our own homes. Fortunately, a powerful solution lies dormant within your familiar Windows 7 laptop: its inherent ability to transform into a fully functioning Wi-Fi hotspot. This capability allows us to broadcast a wireless network, granting internet access to other devices, such as smartphones, tablets, or even other computers, regardless of our proximity to a traditional router.
Crafting Your Portable WiFi Oasis: The Essentials
Before we embark on this technological transformation, it's crucial to ensure we have the right ingredients. The core requirement, of course, is a Windows 7 laptop. Beyond that, our laptop must possess a functional Wi-Fi adapter. This is the internal hardware responsible for both receiving and transmitting wireless signals. Most laptops manufactured in the last decade are equipped with an integrated Wi-Fi adapter. Also, you'll need an active internet connection. This could come from a wired Ethernet connection to a modem, a mobile broadband connection via a USB dongle, or even another existing Wi-Fi network.
Step-by-Step Guide: Turning Your Laptop into a Wireless Beacon
The process is surprisingly straightforward and requires no specialized software downloads. We will harness the built-in capabilities of Windows 7. Let us begin:
Accessing the Command Prompt with Elevated Privileges: Click the "Start" button at the lower-left corner of our screen. In the search bar, type “cmd.” Right-click on "cmd.exe" (Command Prompt) in the search results and select "Run as administrator". This is critical, as it provides the elevated permissions needed to configure network settings.
The Magic Command: Setting Up the Hosted Network: Within the Command Prompt window, type the following command exactly, and press "Enter":
netsh wlan set hostednetwork mode=allow ssid="YourHotspotName" key="YourPassword"Replace
"YourHotspotName"with your desired network name (e.g., "MyLaptopHotspot", "WiFiOnTheGo"). This is the name that will appear when other devices scan for available Wi-Fi networks. Also, replace"YourPassword"with a secure password (at least eight characters long). This is the password that users will need to enter to connect to your hotspot.Important Note: Ensure that you choose a strong password to protect your network from unauthorized access. Avoid easily guessable words or sequences such as birthdays or common passwords (e.g., "password123"). Consider using a mix of upper and lowercase letters, numbers, and symbols.
Upon execution of this command, Windows 7 will configure a virtual wireless adapter, preparing your laptop to act as a hotspot.
Activating the Hosted Network (Enabling WiFi): We use the following command to start the hosted network:
netsh wlan start hostednetworkType this command into the Command Prompt window and press "Enter." Windows will now attempt to start the wireless hotspot. It may take a few moments to initiate.
Sharing Your Internet Connection: This step is pivotal for ensuring that other devices connected to your hotspot can actually access the internet.
Open the "Network and Sharing Center" by clicking the network icon in your system tray (usually found in the lower-right corner of the screen), and then selecting “Open Network and Sharing Center.” Or, press the Windows key, type "Network and Sharing Center," and press "Enter."
In the Network and Sharing Center, click on “Change adapter settings” in the left-hand navigation pane. This opens the “Network Connections” window, displaying all of your network adapters.
Identify the network connection that provides your internet access (e.g., Ethernet, Wi-Fi). Right-click on this connection and select "Properties."
In the Properties window, click on the "Sharing" tab.
Check the box that says "Allow other network users to connect through this computer's Internet connection."
From the "Home network connection" dropdown box, select the name of the "Microsoft Virtual WiFi Miniport Adapter" or the network adapter associated with your hosted network. This is typically easily identifiable as the adapter Windows created for the hotspot.
Click "OK" to save the changes. Your internet connection is now shared.
Deactivating the Hotspot (When No Longer Needed): When you are finished using the hotspot, it is essential to deactivate it to conserve battery life and prevent unintended access.
Return to the Command Prompt window (running as administrator).
Type the following command and press "Enter":
netsh wlan stop hostednetwork
This command stops the hosted network, effectively disabling your Wi-Fi hotspot.
Troubleshooting Common Issues: Navigating the Technical Landscape
Even in the most streamlined processes, hiccups can occur. Here's how to address some frequent problems:
"The hosted network couldn't be started.": The most frequent cause is a driver-related issue. Ensure your Wi-Fi adapter drivers are up-to-date. Visit the manufacturer's website for your laptop model or Wi-Fi adapter and download the latest drivers, following the installation instructions.
"Cannot share the internet connection." The steps for internet sharing may be slightly different depending on your network setup. Verify the correct network adapter for internet sharing has been selected in the network properties. Also, ensure that Windows Firewall is not blocking network traffic. Occasionally, the firewall might restrict access. Open Windows Firewall with Advanced Security (search "Windows Firewall" in the Start menu). Check the outbound rules to ensure there are no restrictive rules that apply to your shared network connection.
Connection issues for other devices: Double-check the password. Ensure the password matches the one entered in Step 2. Consider temporarily disabling any firewalls on the connecting devices to rule out software-related issues. Verify that the connecting device's Wi-Fi adapter is functioning correctly.
Slow speeds: The performance of your hotspot will be directly reliant on the speed of your original internet connection. If your internet connection is slow, your hotspot's speed will also be slow. Close any bandwidth-intensive applications on the host laptop, such as video streaming or large file downloads, to optimize performance for connected devices. The distance between the host laptop and the connecting devices can also impact speed. Keep the connected devices relatively close to the host laptop for optimal signal strength.
Enhancing and Personalizing Your Hotspot Experience
While the basic setup is perfectly functional, several adjustments can improve your experience:
Customizing Network Settings: While the Command Prompt is the primary method, some aspects can be adjusted through the Windows interface. In the Network and Sharing Center, click "Manage wireless networks." Then, highlight your hotspot's name and click "Properties." You can view and, importantly, modify the security key (password) here.
Monitoring Connected Devices: While Windows 7 doesn't offer a convenient built-in interface to view connected devices, you can often find this information through your router's web interface if you're sharing your internet from a wired connection. Alternatively, third-party network monitoring tools can provide detailed information in real time about the connected devices, their IP addresses, and data transfer rates.
Security Considerations: Protecting Your Digital Perimeter
Creating a hotspot introduces potential security vulnerabilities if not managed responsibly.
Strong Passwords are Essential: It cannot be stressed enough. Use a strong, unique password, as previously outlined. Avoid using any publicly accessible information in the password.
Regularly Review Connected Devices: Review and periodically change the security key to ensure that only authorized users can access your hotspot.
Keep Your Laptop Secure: Ensure your laptop is protected with updated antivirus software and a firewall. Any security threats that affect your laptop can indirectly impact your connected devices.
Consider Using a VPN: For enhanced privacy and security, particularly when using public Wi-Fi networks, consider using a Virtual Private Network (VPN) on your laptop before sharing your internet connection. A VPN encrypts your internet traffic, protecting your data from prying eyes.
Embracing the Freedom of Portable WiFi: The Final Word
Transforming your Windows 7 laptop into a Wi-Fi hotspot provides a simple, yet powerful, solution to connectivity challenges. With the steps outlined above, we have the ability to create a personal wireless network, allowing us to remain connected wherever we go. Whether needing to work remotely, streaming movies during travel, or simply sharing an internet connection with friends and family, the ability to create a hotspot adds a layer of convenience and flexibility to our digital lives. So go forth, unleash the power within your Windows 7 laptop, and experience the freedom of always-available Wi-Fi.
