how to change wifi dns on laptop

Title: How to Change DNS Settings on Windows 11 PC Easy Guide
Channel: Chad Reddings
How to Change DNS Settings on Windows 11 PC Easy Guide by Chad Reddings
how to change wifi dns on laptop, how to change wifi dns, how to change wifi dns windows 10, how to change dns on laptop
Unlock Blazing-Fast WiFi: Secret DNS Trick for Your Laptop!
Supercharge Your Laptop's WiFi: The DNS Whisperer's Guide!
Ever felt your WiFi connection crawl? It's like wading through molasses! You're trying to stream a movie, and it buffers every few seconds. Downloading files feels slower than dial-up! Frustration mounts quickly. But what if I told you there's a secret weapon? It could significantly boost your laptop's WiFi speed. Well, there is; it is known as DNS.
Decoding the DNS Mystery: Your Internet's Address Book
Think of the internet as a massive city. Websites are buildings. Your laptop is a visitor. To find a specific building, you need an address. DNS, or Domain Name System, is the address book of the internet. It translates those user-friendly website names (like google.com) into the numerical IP addresses your computer understands. In essence, it’s the behind-the-scenes magician. It makes the internet work.
Why Default DNS Can Be a Drag: The Bottleneck Effect
Your internet service provider (ISP) usually provides your DNS servers. But, these default servers aren’t necessarily the fastest. In fact, they can be slow! They may be overloaded, or located far from your location. Consequently, this situation causes delays in resolving website addresses. This delay ultimately slows down your browsing and download speeds. Think of it as a traffic jam on the information superhighway.
Unleashing the Speed Demon: Switching to a Faster DNS
Fortunately, you have control. You can change your DNS servers. This is a simple tweak. It is also incredibly powerful. By switching to a faster, more efficient DNS server, you can potentially experience a noticeable speed boost. You may wonder, how do you do this? I'll guide you through it!
Choosing Your Speed Boosters: Popular DNS Alternatives
Several excellent, public DNS providers are available. Each offers different benefits. Here are a few of the most popular options to consider:
- Google Public DNS: Known for its speed and reliability. Google's DNS servers are easily accessible. They are also consistently updated.
- Cloudflare DNS: Boasting impressive speed scores and strong security features. Cloudflare is a popular choice, especially for security-conscious users.
- Quad9: Prioritizes security with built-in threat protection. It is an excellent alternative.
The Laptop DNS Makeover: Step-by-Step Instructions
Ready to overhaul your laptop's WiFi speed? Follow these steps, and you'll be sailing through the internet in no time. The process is straightforward and works on most laptops.
- Access Network Settings: First, locate your network icon. It's usually in your system tray, down by the clock. Right-click it. Then, select "Open Network & Internet settings."
- Change Adapter Options: Next, click "Change adapter options." This should open a new window.
- Find Your Connection: You should see your active network connection. This is either "Wi-Fi" or "Ethernet," depending on your connection type. Right-click your connection. Then, select "Properties."
- Locate TCP/IP Settings: In the new window, scroll down. Then, find "Internet Protocol Version 4 (TCP/IPv4)." Double-click it. Or, select it and click "Properties."
- Manual DNS Configuration: Now, select "Use the following DNS server addresses." This is where the magic happens.
- Enter Your New DNS: Enter your chosen DNS server addresses. For example, for Google Public DNS, enter 8.8.8.8 as your Preferred DNS server. Then, enter 8.8.4.4 as your Alternate DNS server. For Cloudflare, use 1.1.1.1 and 1.0.0.1.
- Save and Restart: Finally, click "OK" on all the windows. Close them. You'll likely need to restart your computer. In fact, you might just need to restart your browser.
Troubleshooting Tips: Smooth Sailing Ahead
Sometimes, the change isn't instant. There might be a few bumps along the road. Here are some quick troubleshooting tips:
- Flush Your DNS Cache: Your computer stores DNS information to speed things up. However, sometimes this information needs to be refreshed. To do this, open the command prompt. Then, run the command "ipconfig /flushdns."
- Double-Check for Typos: Carefully review your DNS entries. A single incorrect number can cause problems.
- Restart Your Router: Occasionally, your router might need a reboot to adopt the new settings.
Beyond Speed: The Added Benefits of Custom DNS
Faster browsing is the most obvious benefit. However, there are other advantages to using a custom DNS:
- Enhanced Security: Some DNS providers offer built-in security features. They block malicious websites.
- Improved Privacy: Certain DNS providers don't log your browsing activity. This enhances your privacy.
- Bypass Geo-Restrictions: Some DNS servers can help you access content. Then, you can unlock content that’s blocked in your region.
Wrapping Up: Your WiFi Transformation Awaits!
So, are you ready to unlock blazing-fast WiFi? Changing your DNS settings is a simple, yet powerful, trick. I encourage you to try it. In the end, it's a quick win that can significantly improve your online experience. You can be enjoying faster browsing, quicker downloads, and a more responsive internet. If you are unhappy with your current speeds, give it a shot. You might be surprised by the results! Remember, a little tweaking can go a long way. Now, go forth and experience the internet at warp speed!
Laptop WiFi MIA? This SHOCKING Trick Fixes It INSTANTLY!Unlock Blazing-Fast WiFi: Secret DNS Trick for Your Laptop!
Alright, fellow internet adventurers! Ever felt like your WiFi was moving at the speed of a snail in molasses? You're trying to stream your favorite show, download that crucial file for work, or even just browse the web, and… buffering. We've all been there. It’s enough to make you want to throw your laptop out the window (don't do that!). But before you resort to such drastic measures, we've got a secret weapon in our arsenal: a simple yet powerful DNS trick that can unlock blazing-fast WiFi speeds for your laptop. Think of it as a performance boost for your internet connection, like giving your car a turbocharger!
1. The WiFi Woes: Why Is My Internet So Slow?
Let's be honest, slow internet is a modern-day plague. We rely on the internet for practically everything, from connecting with loved ones to running our businesses. So, when our WiFi lags, it's incredibly frustrating. But why does this happen? Several factors can contribute to slow internet speeds, including:
- Network congestion: Think of it like rush hour traffic. When too many devices are using the same network, speeds inevitably slow down.
- Distance from your router: The further you are from your router, the weaker the signal.
- Obstacles: Walls, furniture, and other objects can interfere with your WiFi signal.
- Your Internet Service Provider (ISP): Sometimes, the problem isn't you; your ISP might be the bottleneck.
- And, of course, DNS issues, which we’ll dive into shortly!
2. Decoding DNS: The Secret Language of the Internet
Before we get to the juicy details of our DNS trick, let's understand what DNS is. Think of DNS (Domain Name System) as the internet's phonebook. When you type a website address (like www.google.com) into your browser, your computer needs to find the "phone number" (the IP address) of that website. DNS servers act as the directories, translating human-readable domain names into machine-readable IP addresses. The faster your DNS server, the quicker your laptop can access websites. A slow DNS is akin to having a phonebook that's full of outdated numbers – it takes forever to find what you're looking for.
3. Enter the Game Changer: Why Custom DNS Matters
Your internet service provider (ISP) usually provides you with a default DNS server. However, these default servers can sometimes be slow or unreliable. They might also be geographically far from you, adding to the delay. That's where custom DNS servers come in. By switching to a different, potentially faster and more reliable DNS server, we can significantly improve your browsing speed. It is like picking a more efficient and faster delivery service for your online traffic.
4. Choosing Your Champions: Top DNS Servers to Consider
Now, let's talk about the heroes of our story: the top DNS servers. There are several excellent options available, but here are a couple of popular and reliable choices:
- Google Public DNS (8.8.8.8 and 8.8.4.4): Google's public DNS servers are known for their speed and reliability. They’re like the Usain Bolts of the DNS world.
- Cloudflare DNS (1.1.1.1 and 1.0.0.1): Cloudflare offers fast and secure DNS servers, often praised for their performance and privacy features. Think of them as the encrypted, secure delivery services.
- OpenDNS: Another well-established option with a solid reputation.
5. The Secret Weapon: Changing Your DNS Settings on Your Laptop (Windows)
Alright, here’s the moment we've all been waiting for. Let's get down to the nitty-gritty and change your DNS settings on your Windows laptop. Don't worry; it's easier than assembling IKEA furniture!
- Open Network Connections: Type "Network Connections" in the Windows search bar and open the "View network connections" settings.
- Find Your Network: Identify your active WiFi connection (usually labeled "Wi-Fi"). Right-click on it and select "Properties."
- Select TCP/IP v4: In the Properties window, find "Internet Protocol Version 4 (TCP/IPv4)" and double-click it or click "Properties."
- Enter the magic numbers: Select "Use the following DNS server addresses." Then, enter your chosen DNS servers. For example, for Google Public DNS, you'd enter 8.8.8.8 (Preferred DNS server) and 8.8.4.4 (Alternate DNS server).
- Click "OK": Click "OK" on both windows to save your changes.
- Restart your browser: Close and reopen your web browser to apply the changes.
6. The Secret Weapon: Changing Your DNS Settings on Your Laptop (macOS)
Mac users, don't feel left out! The process is also quite straightforward on macOS.
- Open System Preferences: Click the Apple menu and then "System Preferences."
- Go to Network: Click on "Network."
- Select Your Connection: Select your active Wi-Fi connection from the list on the left.
- Advanced Settings: Click "Advanced."
- DNS Tab: Go to the “DNS” tab.
- Add DNS Servers: Click the "+" button under "DNS Servers" and enter your preferred DNS server addresses (e.g., 8.8.8.8 and 8.8.4.4 for Google Public DNS).
- Apply Settings: Click "OK" and then "Apply."
- Restart your browser: Close and reopen your web browser to apply the changes.
7. Testing the Waters: Checking Your Speed After the Switch
After making the DNS change, we need to check if our efforts were successful. How do we do that? The most straightforward approach is to perform a speed test using a website like Speedtest.net. Run the test before and after the change to see the difference. Was it worth it?
8. Common Pitfalls: Troubleshooting DNS Issues
Sometimes, things don't go as planned. Here are some common issues and how to resolve them:
- Incorrect DNS server addresses: Double-check that you've entered the correct numbers (8.8.8.8, etc.).
- Cache conflicts: Try clearing your browser's cache and cookies.
- Network connectivity issues: Ensure your laptop is connected to the internet.
- Router problems: Sometimes, a simple router restart can do the trick.
9. Boosting Performance with a Fast DNS: What You Can Expect
So, what kind of improvements can you expect after changing your DNS? You might notice:
- Faster website loading times: Websites should appear on your screen more quickly.
- Improved streaming quality: Less buffering when watching videos.
- Snappier online gaming: Reduced lag and a smoother gaming experience.
- Overall faster internet experience: A noticeable increase in responsiveness while browsing.
10. Is it Safe? The Security Aspects of Choosing a DNS Server
You might be wondering: is this safe? Changing your DNS settings is generally safe, but it's essential to choose a reputable DNS provider. Google and Cloudflare, for example, have strong security measures in place. You should also make sure that you're changing the DNS settings on your laptop, rather than your router's settings, to minimize any potential risks.
11. Beyond the Basics: Exploring Advanced DNS Configuration
For those who are tech-savvy, there are advanced DNS configurations. For example, some DNS servers offer features like DNS-over-HTTPS (DoH) or DNS-over-TLS (DoT) for added privacy. This will make your internet even safer!
12. Privacy Matters: Choosing a DNS Provider That Respects Your Data
Your DNS server can potentially see the websites you visit. Therefore, it's crucial to choose a provider with a strong privacy policy. Some DNS providers, like Cloudflare, are committed to not selling your browsing data.
13. The Long Game: Maintaining Optimal WiFi Speed Over Time
Once you've set up your custom DNS, remember that it’s not a "set it and forget it" kind of thing. Over time, the performance of your DNS server can fluctuate. Here’s how to keep things optimal:
- Monitor Your Speed: Regularly run speed tests to check your internet performance.
- Consider Other Factors: Recognize that other factors, like network congestion, can also influence speed.
- Update Your Router: Ensure your router's firmware is up to date.
14. Beyond Faster WiFi: The Ripple Effect of DNS Optimization
The benefits of a fast DNS extend beyond faster WiFi speeds. They can also contribute to a smoother overall online experience, from quicker downloads to enhanced online gaming. It’s like leveling up your internet experience.
15. The Final Verdict: Ready to Unleash Lightning-Fast WiFi?
We’ve covered the why, the how, and everything in between. Changing your DNS is a simple yet effective way to unlock faster WiFi speeds on your laptop. It’s a small tweak that
HP Laptop WiFi Nightmare? This One Trick Instantly Fixes It!the DNS settings for all wifi networks have been set the settings below cannot be used

By Hello Device the DNS settings for all wifi networks have been set the settings below cannot be used by Hello Device
Windows 11 Change DNS settings 2025

By Pureinfotech Windows 11 Change DNS settings 2025 by Pureinfotech
How To Reset DNS Settings in Windows 10

By The Geek Page How To Reset DNS Settings in Windows 10 by The Geek Page
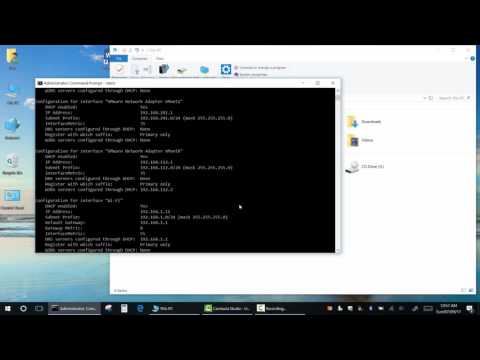
Title: How to Change DNS, IP Address & Gateway Using Command Prompt Windows CMD Guide
Channel: Electronics&Computers
How to Change DNS, IP Address & Gateway Using Command Prompt Windows CMD Guide by Electronics&Computers
Laptop Working
Unlock Blazing-Fast WiFi: Secret DNS Trick for Your Laptop!
Welcome, fellow travelers of the digital realm! Are you tired of the glacial pace of your laptop’s WiFi? Do you find yourself staring at loading screens, yearning for the swiftness your internet connection should be providing? Well, you’ve arrived at the right destination. We're about to embark on a journey, not to find a magical fix, but to discover a powerful, often-overlooked tool that can dramatically enhance your laptop’s wireless performance: the Domain Name System (DNS). Prepare to witness a transformation – a leap from sluggish streaming and frustrating downloads to a smooth, seamless online experience.
Understanding the Bottleneck: Why Your WiFi Feels Slow
Before we dive into the solution, let's unravel the mystery of why your WiFi might be underperforming. Most of us assume the issue lies with the WiFi signal itself – the router, the distance, the walls – but the reality is often more nuanced. Think of your internet connection like a postal service. You, the user, request information (a website, a video, an email). Your router, the postal worker, needs to find the address (the website's location on the internet) before delivering the "package" of data. This is where DNS servers come in.
Your laptop currently uses a DNS server. Think of this server as the postal service's directory. It translates human-readable website addresses (like "example.com") into the numerical IP addresses that computers use to communicate. The speed of your DNS server, the speed at which it looks up these addresses, can significantly impact your browsing experience. If your current DNS server is slow or overloaded, your online requests will be delayed, leading to sluggish loading times and buffering. This is the bottleneck we're going to address. We're going to swap out the sluggish, default DNS server for something far more efficient.
Unveiling the Secret Weapon: The Power of Custom DNS Servers
The secret to unlocking blazing-fast WiFi lies in choosing a better DNS server. Thankfully, you have a multitude of options readily available, far superior to the often-default offerings provided by your Internet Service Provider (ISP). By switching to a faster, more reliable DNS server, you're effectively optimizing the "address lookup" process, allowing your laptop to retrieve website information more quickly. This translates to snappier browsing, faster downloads, and a more responsive overall online experience.
Choosing Your Champions: Top-Tier DNS Server Providers
The internet offers a plethora of DNS server options, but some stand out from the crowd. We'll focus on a few industry leaders known for their speed, reliability, and security. Selecting the right one for you will depend on your location and individual needs. Consider exploring these options:
Cloudflare (1.1.1.1 and 1.0.0.1): Cloudflare is renowned for its incredibly fast and secure DNS service. They prioritize speed and privacy, making them a top choice for many. They also boast robust network infrastructure, ensuring minimal latency. Their 1.1.1.1 service is specifically designed to be user-friendly and prioritize privacy.
Google Public DNS (8.8.8.8 and 8.8.4.4): Google's public DNS servers are another popular and reliable option. They offer excellent speed and are known for their wide reach and availability. While Google's privacy practices are often debated, their DNS servers are undeniably fast.
Quad9 (9.9.9.9): Quad9 is a privacy-focused DNS server that blocks malicious websites. It offers an extra layer of security by filtering out threats proactively, making your browsing experience safer. If your security is a priority, Quad9 is worthy of consideration.
OpenDNS (208.67.222.222 and 208.67.220.220): OpenDNS has been a long-standing player in the DNS game. Their services include filtering options that can be customized to suit your needs, making them a good choice for families.
The best choice for you depends on your individual needs. Experiment with the different DNS options and see which one offers the fastest and most stable experience on your laptop.
The Simple Setup: Changing Your DNS Settings in Windows
Now for the exciting part: Implementing this secret weapon on your laptop. The process is straightforward and takes only a few minutes, let's walk through the steps on a Windows laptop:
Open Network Connections: Right-click on the WiFi icon in your system tray (usually in the bottom-right corner of your screen) and select "Open Network & Internet settings."
Access Adapter Settings: In the Network & Internet settings window, click on "Change adapter options." This will open a new window displaying all your network connections.
Select Your WiFi Connection: Right-click on your active WiFi connection (look for the one labeled "WiFi" or your network name) and select "Properties."
Locate and Select IPv4: In the Properties window, scroll down the list and select "Internet Protocol Version 4 (TCP/IPv4)" then click the "Properties" button.
Enter Your Chosen DNS Servers: In the IPv4 Properties window, select the option "Use the following DNS server addresses." This is the key to the whole process. In the "Preferred DNS server" field, enter the primary DNS server address (e.g., 1.1.1.1 for Cloudflare, 8.8.8.8 for Google). In the "Alternate DNS server" field, enter the secondary DNS server address (e.g., 1.0.0.1 for Cloudflare, 8.8.4.4 for Google). The secondary DNS server acts as a backup if the primary server is unavailable.
Apply and Restart: Click "OK" on both windows to save your settings. You may need to restart your laptop or simply disconnect and reconnect to your WiFi network for the changes to take effect.
The Simple Setup: Changing Your DNS Settings on a macOS Laptop
The process is equally simple on a macOS laptop. Here's how to do it:
- Open System Preferences: Click the Apple icon in the top-left corner of your screen and select "System Preferences."
- Select Network: In System Preferences, click on the "Network" icon.
- Choose Your WiFi Connection: In the Network window, select your active WiFi connection from the list on the left. It should be labeled with your network name.
- Access DNS Settings: Click the "Advanced…" button in the lower-right corner. In the Advanced window, click on the "DNS" tab.
- Add the DNS Servers: Click the "+" button under the "DNS Servers" list to add a new server. Enter the primary DNS server address (e.g., 1.1.1.1 for Cloudflare, 8.8.8.8 for Google). Click the "+" button again to add the secondary DNS server address (e.g., 1.0.0.1 for Cloudflare, 8.8.4.4 for Google).
- Apply and Restart: Click "OK" in the Advanced window, then click "Apply" in the Network window. You may need to restart your laptop or reconnect to your WiFi network for the changes to take effect.
Verifying the Transformation: Testing Your Speeds
Once you've configured your new DNS settings, it's time to witness the magic. How can you be sure you've improved your WiFi speed?
Speed Tests: Run a speed test before and after changing your DNS settings. Websites like Speedtest.net or Fast.com can measure your download and upload speeds. You might not observe a dramatic change in raw speed because DNS primarily affects latency and the time it takes for pages to load.
Website Loading Times: Open several websites you frequently visit. Pay attention to how quickly they load. Are pages rendering instantly, or do you still notice a lag?
Streaming and Downloads: Test your streaming services (Netflix, YouTube, etc.) and download files. Are videos buffering less? Are downloads completing faster?
The difference is often subtle but noticeable. You’ll feel the overall online experience is much smoother.
Troubleshooting Tips: Addressing Potential Issues
While the benefits of a custom DNS server are usually immediate, you might encounter minor issues. Here's how to troubleshoot:
Incorrect Addresses: Double-check that you entered the DNS server addresses correctly. Typos are a common culprit.
Restart Your Laptop: A simple restart can often clear any temporary glitches.
Clear Your Browser Cache: Your browser stores cached data, which can sometimes interfere with the new DNS settings. Clear your browser cache and cookies to ensure you're getting fresh data.
Revert to Default: If problems persist, you can always revert to your ISP's default DNS settings in the same way you changed them.
Try Different DNS Servers: Different DNS servers can perform differently depending on your location and the network topology. Experiment with different providers to find the best fit.
Beyond the Basics: Advanced Considerations
For those who want to take control, there are a few advanced considerations:
- Privacy and Security: Some DNS servers, like Cloudflare and Quad9, prioritize privacy by not logging your DNS queries. This can add an extra
