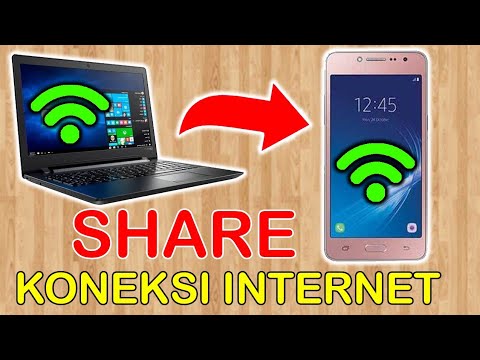
cara share koneksi wifi dari laptop

Title: CARA BERBAGI WIFI DARI LAPTOP KE HP TERBARU Pintu Tutorial
Channel: NDL TUTORIAL
CARA BERBAGI WIFI DARI LAPTOP KE HP TERBARU Pintu Tutorial by NDL TUTORIAL
cara share koneksi wifi dari laptop ke hp
Unlock Your Laptop's WiFi: The Secret Sharing Trick!
Crack the Code: Unleashing Your Laptop's Hidden WiFi Power
Have you ever been in a WiFi predicament, a digital desert of dropped signals and slow loading pages? We’ve all been there. It's frustrating, isn’t it? But what if I told you there’s a hidden key, a secret sharing trick, that can unlock your laptop's full WiFi potential and solve these woes?
The WiFi Whisperer: A Story of Connectivity
Imagine this: you're in a bustling cafe, the aroma of coffee swirling around you. Your laptop sits expectantly, awaiting a connection. Unfortunately, the public WiFi is about as reliable as a politician’s promise. Then, a friend, a WiFi wizard, leans over. With a few simple steps, they transform your digital landscape. They bring forth a stream of uninterrupted access. It's like magic. That, my friend, is the power of the secret sharing trick. But how does it work?
Digging into the Digital Depths: Unveiling the Secret
Forget complicated jargon. The principle is straightforward. Think of your laptop as a conduit, a portal. It can share a WiFi connection it already has. Moreover, it can transform into a mobile hotspot. This is especially useful when traveling or in areas with limited public networks. It's also a great option if you are running low on data on your phone.
Sharing is Caring (and Connecting!): The Step-by-Step Guide
Ready to become a WiFi sharer? Great! Let's delve into the simple steps. The exact method depends on your operating system, but the core principles remain the same.
Windows Wonders: First, navigate to your network settings. You’ll find it in your system tray or control panel. Second, find the "Mobile Hotspot" option. Turn it "on". Select the network connection you want to share. Finally, set a network name and password. It's simple. It's effective.
Mac Magic: On MacOS, head to "System Preferences". Then, select "Sharing." Choose "Internet Sharing." Now, select your connection to share from the "Share your connection from" menu. Next, select "WiFi" and configure your network name, and password. Check the boxes. And voilà! Your hotspot is active.
Navigating the Nuances: Troubleshooting & Tips
Sometimes, things don't go as planned. However, don't panic. Troubleshooting usually involves a few simple checks.
- Password Problems: Ensure the password is correct. Double-check capitalization and special characters.
- Connection Conundrums: Make sure the primary connection is stable and functioning. Restart your router.
- Firewall Fumbles: Occasionally, a firewall may block the sharing functionality. Therefore, allow the feature through your firewall settings.
- Hardware Hurdles: Ensure your laptop's WiFi adapter is enabled and working correctly.
Beyond the Basics: Elevating Your WiFi Game
Now, let's go beyond the basics. Consider these advanced tips.
- Bandwidth Boost: If possible, choose a 5 GHz band for better speeds.
- Security Savvy: Always use a strong password to protect your hotspot.
- Monitor Consumption: Keep an eye on your data usage, particularly if you have a limited plan.
- Optimize Placement: Position your laptop strategically for optimal signal range.
The Ripple Effect: Benefits Beyond Belief
The benefits of mastering this WiFi-sharing trick extend far beyond instant connectivity. For instance, it empowers you. You become the solution. Moreover, you become a digital hero for your friends. Imagine the collective sigh of relief when you share your connection. In addition, you can seamlessly share your internet with multiple devices. Finally, you provide yourself a backup for unexpected situations.
The Digital Frontier: Why This Matters Today
In the age of remote work, digital nomads, and endless streaming, reliable WiFi is paramount. Furthermore, this simple sharing trick is more relevant than ever. Therefore, embrace the power within your laptop. Become a WiFi whisperer.
Conclusion: Your WiFi Adventure Begins Now
So, there you have it. You now possess the secret. You can share your WiFi. Consequently, go forth and conquer the digital world. Embrace the freedom. Empower yourself. Remember, connectivity is key. Now, go forth and share!
School WiFi Rejecting Your Laptop? This FIX Works Every Time!Unlock Your Laptop's WiFi: The Secret Sharing Trick!
Hey there, tech adventurers! Ever found yourself in a WiFi desert, desperately craving that sweet, sweet internet connection? We’ve all been there. Stuck on a train, in a park, or maybe even just in that dead zone in your own house. Today, we're diving headfirst into a little-known secret, a sharing trick that can turn your laptop into a WiFi lifeline. Think of it as your personal WiFi guardian angel, ready to swoop in and save the day. Let’s unlock your laptop’s WiFi and make sharing a breeze!
1. The WiFi Sharing Conundrum: Why Bother?
But first, why should you even care about sharing your laptop’s WiFi? Well, think about it. We live in a hyper-connected world. Your phone needs it. Your tablet needs it. Your friend’s device, your smart watch, even your toaster (okay, maybe not the toaster, yet!) needs it! Sharing your laptop's WiFi is like offering a helping hand, like sharing your last slice of pizza (though, perhaps with slightly less immediate gratification). It’s about being resourceful, being prepared, and having that digital safety net when you need it most.
2. The Hidden Power: Your Laptop as a WiFi Hotspot
Did you know your laptop, that sleek workhorse, is hiding a secret? It’s a hotspot powerhouse! Think of it as a mini-router, capable of broadcasting a WiFi signal for other devices to connect to. This is the core of the sharing trick. It’s like turning your laptop into a digital island of connectivity in a sea of disconnectedness. And the best part? It's usually easier than you think!
3. Windows Wisdom: Creating a WiFi Hotspot on Your Laptop
Let's start with Windows, the operating system that powers a huge chunk of laptops out there. Here's the secret sharing trick in a nutshell for Windows users:
- Step 1: The Settings Shuffle: Hit that Windows key and then click the Settings icon (it looks like a cogwheel).
- Step 2: Network & Internet Nirvana: Click on "Network & Internet."
- Step 3: Mobile Hotspot Magic: Navigate to "Mobile hotspot." You'll find this under the "Network & Internet" settings.
- Step 4: The Sharing Switch: Turn on the “Share my internet connection” switch. This is where the magic happens!
- Step 5: Network Name & Password Power-Up: Here, you can change the network name (SSID) and set a strong password. Think of this like choosing a secret handshake for your WiFi. Keep it secure!
And just like that, your Windows laptop is broadcasting a WiFi signal, ready to connect your other devices. It’s like magic, but with a little bit of tech savvy.
4. macOS Mavericks: Unleashing the Hotspot on Your Mac
Apple users, fear not! The secret sharing trick is just as accessible on your Mac. It's a slightly different dance, but the rhythm is just as sweet:
- Step 1: System Preferences: Click the Apple icon (usually in the top left corner of your screen) and select "System Preferences."
- Step 2: Sharing Sanctuary: Click on "Sharing."
- Step 3: Internet Sharing Ignition: In the list on the left, check the box next to "Internet Sharing."
- Step 4: Source of Sharing: Choose the internet connection you want to share (e.g., Wi-Fi, Ethernet).
- Step 5: Sharing To Where?: Select "Wi-Fi" from the "Share your connection from" dropdown menu.
- Step 6: Wi-Fi Options: Click "Wi-Fi Options…" to set your network name and password, mirroring the Windows process for securing your network.
- Step 7: Start the Sharing: Check the "Internet Sharing" box.
Your Mac is now a WiFi sharing champion! You’ve got this.
5. Connecting with Confidence: The Device Dance
Once your hotspot is active, connecting other devices is easy. Simply:
- * Scan for Networks: On your phone, tablet, or other device, go to your WiFi settings.
- * Select Your Network: Look for the network name you created (the SSID) and select it.
- * Enter the Password: Type in the password you set.
- * Connect and Conquer: Voila! Your device is connected and surfing the web like a pro.
It's like a digital conga line, with your laptop leading the way!
6. Security Savvy: Protecting Your Digital Domain
Sharing your WiFi is fantastic, but remember to be vigilant about security. Think of your network like your digital home:
- Strong Passwords are Key: Never use simple or easily guessable passwords. Go for a mix of upper and lowercase letters, numbers, and symbols.
- WPA2/WPA3 Encryption: Ensure your hotspot uses WPA2 or WPA3 encryption. These are the modern standards and provide stronger protection.
- Limit Connected Devices: If you're worried about bandwidth or security, limit the number of devices that can connect.
- Keep Your Software Updated: Regularly update your operating system and any security software to patch vulnerabilities.
A secure network is a happy network.
7. Bandwidth Breakdown: What to Expect
Sharing your internet connection will impact your speed. Think of it like splitting a pizza: the more slices you give away, the less you have for yourself. The more devices connected, the slower the overall experience will be. If you're already starting with slow internet, sharing will only exacerbate the issue. Be mindful of this, and consider upgrading your internet plan if you share frequently.
8. Troubleshooting Troubles: When Things Go Wrong
Sometimes, things don't go smoothly. Don't panic! Here are a few common issues and how to solve them:
- Can't See the Network: Double-check that the hotspot is actually turned on. Reboot your laptop and the connecting device.
- Incorrect Password: Make sure you're entering the correct password (case-sensitive!).
- Connection Issues: Ensure you have a stable internet connection on your laptop. Try disabling and re-enabling the WiFi hotspot or restarting your router.
- Too Many Connected Devices: Disconnect some devices to alleviate congestion or limit the max number of connected devices.
9. The "Why Not?" Factor: When Sharing is a Bad Idea
While sharing is usually a great option, there are some situations where it's best avoided:
- Public WiFi (Sensitive Data): Avoid creating a hotspot with your laptop connected to a public WiFi network, especially if you’re dealing with sensitive information. Public networks can be less secure, and you don't want to expose your data.
- High Bandwidth Usage: If you're on a limited data plan, sharing your connection can quickly eat up your allowance.
- Battery Drain: Hotspot functionality can drain your laptop’s battery faster, especially when used for an extended period. Be mindful of power and the need for an outlet.
- Security Concerns: If you don’t trust the people who have access to your network, it would be best not to share it.
10. Alternatives to the Secret Sharing Trick
While the laptop hotspot is a fantastic tool, it's not the only solution:
- Mobile Hotspot Device: If you frequently need a hotspot and have a great cell phone signal, consider a dedicated mobile hotspot device.
- Public WiFi: Utilize free public WiFi networks when available.
- Tethering (via Phone): Many smartphones allow tethering (sharing your phone's data connection).
- USB Tethering: Connect your phone to your laptop via USB cable and share your phone's internet.
11. Mobile Hotspot Mastery?
If all else fails, learn how to share your phone's connection through the 'mobile hotspot' feature. Both iPhones and Android devices include the same features. Just look under settings.
12. The Power of Practice: Experiment and Excel
The best way to master the secret sharing trick is through practice. Experiment with the settings on both Windows and macOS. Connect different devices and observe the impact on speed and performance. The more you practice, the more comfortable you'll become, and the better prepared you'll be in those internet emergencies.
13. WiFi Sharing Ethics: Being a Good Digital Citizen
Sharing WiFi isn't just about the tech; it’s about being a good digital citizen. Here are some essential ethical considerations:
- Respecting Bandwidth Limits: Be mindful of the amount of data you're using, especially if you’re sharing with others, and make sure to advise others if you have limited data.
- Avoiding Illegal Activities: Don't use your shared internet connection for illegal activities, such as downloading copyrighted material or engaging in cybercrime.
- Seeking Consent: Ask permission before sharing someone else's WiFi, especially if you’re using their internet connection.
- Protecting their privacy: Explain the importance of protecting your network password and security of your sharing.
14. The Future of WiFi Sharing: What's Next?
HP Laptop WiFi Nightmare? FIX Your Signal NOW!Cara Membagikan Koneksi Internet Dari Laptop Ke HP Cara Menjadikan Laptop Sebagai Wifi

By Pelita Media Cara Membagikan Koneksi Internet Dari Laptop Ke HP Cara Menjadikan Laptop Sebagai Wifi by Pelita Media
CARA MEMBAGI JARINGAN WIFI DARI LEPTOPPC KE HP DENGAN MUDAH

By hari yudiman CARA MEMBAGI JARINGAN WIFI DARI LEPTOPPC KE HP DENGAN MUDAH by hari yudiman
SHARING FOLDERFILEDATA ANTAR LAPTOP DENGAN WIFI - Share Files Between Two Computers Using WiFi

By Farhan Habib17 SHARING FOLDERFILEDATA ANTAR LAPTOP DENGAN WIFI - Share Files Between Two Computers Using WiFi by Farhan Habib17
Title: Mudah Cara Membagikan Koneksi Internet dari Laptop ke Hp tanpa SoftwareAplikasi
Channel: MCARYANGGAMVP
Mudah Cara Membagikan Koneksi Internet dari Laptop ke Hp tanpa SoftwareAplikasi by MCARYANGGAMVP
Laptop Wifi Connect
Unlock Your Laptop's WiFi: The Secret Sharing Trick!
In today’s interconnected world, seamless WiFi access is no longer a luxury; it’s a necessity. From streaming your favorite shows to attending vital online meetings, a stable and readily available internet connection fuels our daily lives. Yet, situations arise when sharing your laptop’s WiFi becomes crucial. Perhaps you're co-working with a colleague whose device has connection issues, or maybe you’re helping a family member troubleshoot a network problem. Whatever the reason, knowing how to effortlessly share your laptop's WiFi can transform a frustrating situation into a simple solution. We're here to unveil a series of expertly crafted methods that will not only allow you to share your WiFi but will also illuminate the underlying processes, empowering you with a deeper understanding of network configurations. This knowledge will transform you from a passive user to a confident network administrator, ready to tackle even the trickiest WiFi sharing scenarios.
Understanding the Fundamentals: How WiFi Sharing Works
Before diving into the 'how-to' steps, let's grasp the fundamental principles of sharing your laptop's WiFi. Essentially, your laptop becomes a temporary WiFi hotspot, acting as a router. It receives the internet connection from your existing WiFi network (or a wired Ethernet connection) and then rebroadcasts that signal, allowing other devices to connect. This process utilizes a technology known as "Internet Connection Sharing" (ICS) or, more modernly, "Mobile Hotspot" functionality, depending on your operating system. When you initiate WiFi sharing, your laptop dynamically assigns IP addresses to connecting devices, manages network traffic, and facilitates data transfer. Mastering the various methods of WiFi sharing involves understanding these fundamental concepts and then implementing the specific configurations necessary for your particular operating system.
Method 1: Leveraging Windows' Built-in Mobile Hotspot
Windows, a ubiquitous operating system, provides a user-friendly built-in feature: the Mobile Hotspot. This method is straightforward and ideal for quickly sharing your WiFi with other devices. Let’s explore the precise steps:
- Accessing Hotspot Settings: Navigate to your Windows Settings. You can do this quickly by pressing the Windows key + I. Alternatively, click the Start button and then select the gear icon (Settings).
- Network & Internet: Within Settings, find and click on "Network & Internet".
- Mobile Hotspot: On the left-hand side, select "Mobile Hotspot."
- Activate Sharing: Toggle the "Share my Internet connection with other devices" option to "On."
- Choose Your Internet Connection: In the "Share my internet connection from" dropdown, select the WiFi network you are currently connected to. This ensures your laptop shares the internet it's receiving.
- Edit the Hotspot Credentials: Click "Edit" to customize your hotspot's name (SSID) and password. Choose a unique and secure password for your network. Ensure that all connected devices adhere to your standards.
- Connect Your Devices: Now, on other devices, search for available WiFi networks. Your laptop's hotspot (identified by the SSID you created) should be visible. Select it, enter the password you configured, and connect.
This method is generally the easiest and most direct way to share your WiFi on a Windows laptop. The mobile hotspot feature is a testament to Windows' adaptability and responsiveness to user requirements. It simplifies what was once considered an intricate task.
Method 2: Utilizing the Command Prompt for Advanced Sharing (Windows)
For those comfortable with a command-line interface, the Command Prompt offers more control and granular configuration options for sharing your WiFi. This advanced method, while slightly more complex, provides a deeper understanding of the underlying network processes. It is a great option for setting up a persistent hotspot that can be easily managed. Here are the steps:
- Open the Command Prompt as Administrator: Press the Windows key, type "cmd," right-click "Command Prompt," and select "Run as administrator." This elevation grants the necessary permissions to configure network settings.
- Set Up Hosted Network (if required): This is only necessary if you previously used the hosted network feature and it's disabled. Type the following command and press Enter:
netsh wlan set hostednetwork mode=allow ssid="Your Network Name" key="YourStrongPassword"Replace "Your Network Name" with your desired network name (SSID) and "YourStrongPassword" with a robust password. - Start the Hosted Network: Type the following command and press Enter:
netsh wlan start hostednetwork - Share Your Internet Connection:
- Open the Network Connections window. You can do this by searching for "View network connections" in the Windows search bar.
- Right-click on your primary network connection (the one with internet access) and select "Properties."
- Go to the "Sharing" tab.
- Check the box that says "Allow other network users to connect through this computer's Internet connection."
- From the dropdown, select the hosted network adapter that was created (it will often be labeled "Microsoft Hosted Network Virtual Adapter").
- Click "OK." Your hosted network should now be sharing your internet connection.
- Connect Your Devices: On other devices, search for the WiFi network with the SSID you configured. Enter the password you set to establish the connection.
This command-line method empowers you with precise control over your network configuration. It showcases the power of the Command Prompt and its ability to manipulate network settings. This process is especially useful when troubleshooting connection problems or when the GUI-based Mobile Hotspot isn't functioning optimally.
Method 3: Sharing WiFi via Ethernet (Windows and macOS - Universal)
If your laptop has an Ethernet port, or if you have an external Ethernet adapter, you can share your WiFi connection via a wired connection. This method often offers a more stable and reliable connection. The steps are remarkably similar on both Windows and macOS:
- Connect via Ethernet: Connect an Ethernet cable from your laptop to the other device (or to a switch or router connected to other devices).
- Access Network Settings: Navigate to your network settings on your laptop (Settings app on Windows, System Preferences on macOS).
- Find Network Adapters: Identify your Ethernet adapter and your active WiFi adapters.
- Enable Internet Connection Sharing:
- Windows: Follow the steps in Method 2 (Command Prompt or GUI), focusing on using the Ethernet adapter instead of the Mobile Hotspot adapter.
- macOS: Open System Preferences > Sharing. Select "Internet Sharing" from the left-hand sidebar. In the "Share your connection from:" dropdown, select your active WiFi connection. In the "To computers using:" section, check the box next to "Ethernet." Click "Start" to enable internet sharing.
- Configure Static IP (Optional, but Recommended): To ensure a stable connection, it's often beneficial to configure a static IP address on the device receiving the shared connection. Go to your network settings on the device that is receiving the internet. Locate the Ethernet network adapter. Choose manual IP configuration and set a static IP address in the same subnet as your laptop's IP address (e.g., if your laptop has an IP address of 192.168.1.100, set the device's IP to 192.168.1.101). Set the subnet mask to 255.255.255.0 and the gateway and DNS server to your laptop's IP address.
This method is the preferred option when high-bandwidth or a guaranteed connection is crucial. It eliminates the inherent environmental interference risks of WiFi, offering a more stable connection.
Method 4: Using Third-Party Software Solutions
Numerous third-party software solutions are crafted to simplify WiFi sharing and offer advanced features. These applications often present a user-friendly interface and additional functionality, such as bandwidth monitoring, connection limits, and advanced security features. Some notable examples include:
- Connectify Hotspot: A popular choice, Connectify simplifies the process of creating a WiFi hotspot from your laptop. It includes features such as ad blocking and the ability to share internet from both WiFi and Ethernet connections.
- Virtual Router: Another option, Virtual Router is a free and open-source software that allows you to create a virtual WiFi hotspot, mirroring the functions of the Windows Mobile Hotspot.
While these applications can simplify the process, always download software from reputable sources to avoid potential security risks. Before installing third-party software, read reviews and understand the software’s permissions.
Troubleshooting Common WiFi Sharing Issues
Regardless of the method used, you may encounter occasional issues. Here are troubleshooting tips:
- Check the Basics: Ensure your laptop is connected to the internet and other devices are within range. Make sure the WiFi adapter is turned on and working.
- Restart Your Devices: Sometimes, simply restarting your laptop and the connecting devices can resolve connectivity issues.
- Firewall Interference: Your firewall might be blocking the connection. Temporarily disable your firewall (or add exceptions for the shared connection) to see if this resolves the issue. Be cautious when disabling firewalls, and re-enable them as soon as possible.
- Driver Issues: Outdated or corrupted network drivers can cause problems. Update your network adapter drivers through Device Manager (Windows) or the System Information utility (macOS).
- Incorrect Password: Double-check the password you entered
