how to disable wifi on lenovo laptop

Title: How to Fix Wi-Fi is Not Connecting to Lenovo Laptops Problem in Windows 1087 2025
Channel: FIXsage
How to Fix Wi-Fi is Not Connecting to Lenovo Laptops Problem in Windows 1087 2025 by FIXsage
how to disable wifi on lenovo laptop, how to enable wifi on lenovo laptop, how to turn off wifi on lenovo laptop, how to turn off internet on lenovo laptop, how to enable wifi direct on lenovo laptop, how to enable 5ghz wifi on lenovo laptop, how to turn off wifi on lenovo thinkpad, how to enable wifi on lenovo ideapad s10 3, how to enable wifi on lenovo ideapad, how to enable wifi in lenovo laptop windows 10
Lenovo WiFi OFF: The Easiest Trick Ever!
Lenovo WiFi Woes? Silence Them with This Simple Secret!
Have you ever been utterly engrossed in a task, only to have your Lenovo laptop start pulling at your attention with incessant WiFi notifications? It is frustrating, right? I totally get it. But, what if there was a ridiculously easy way to shut it down? Well, there is! And believe me, this isn't some tech-head secret. Instead, consider it akin to a well-kept, yet ultimately shareable, nugget of brilliance. This article will divulge the most streamlined method for taming your Lenovo’s WiFi, ensuring your focus stays sharp. So, let’s dive in!
The Uncomplicated Conquest: Disabling WiFi on your Lenovo
Forget wading through complicated system settings. Above all, this method is surprisingly simple. It is so uncomplicated, in fact, that you’ll be shocked at how quickly you can silence those disruptive wireless signals. Consequently, you will achieve a distraction-free environment. You will soon become the master of your digital domain! Ready to explore this simple trick?
Method 1: The Airplane Mode Advantage
The Airplane Mode is your first and most straightforward solution to silencing your Lenovo’s WiFi. To begin, locate the Airplane Mode option. Typically, it will be found in one of two main locations. You can find it in your system tray, that little area on the bottom right part of your screen, filled with icons. Usually, it looks like a tiny airplane. Alternatively, you can access it by swiping from the right edge of your screen (if you have a touchscreen) or by clicking on the Action Center icon in the lower right corner. This will open the Action Center.
Once you've found the Action Center, click on the 'Airplane Mode' tile to activate it. Immediately, your Lenovo will shut down all wireless functions. This encompasses both WiFi and Bluetooth. Now, if you only need to disable WiFi, but still need Bluetooth, there's a workaround.
Furthermore, consider this: Activating Airplane Mode is the quickest way to cut off both WiFi and Bluetooth. It's instant and reliable.
Method 2: Precision Control: Disabling WiFi via Settings
Perhaps you need to keep Bluetooth active. Therefore, the Settings app offers a more customizable approach. To start, click the Windows icon (usually in the bottom left corner of your screen) and select the Settings gear icon. It looks like a cogwheel. Then, in the Settings window, click on 'Network & Internet'. Next, select 'Wi-Fi' from the left-hand side menu.
You'll see a simple toggle switch for 'Wi-Fi.' Turning this switch to the 'Off' position immediately deactivates your WiFi connection. Moreover, it is that effortless to control your connectivity. At this point, your Lenovo will no longer search for or connect to WiFi networks.
Method 3: The Function Key Fiesta
Lenovo laptops frequently have a dedicated function key combination to manage WiFi. Look closely at your keyboard. You are looking for a key with a WiFi symbol on it. It often resembles a small, arched signal bar. Check the function keys, typically F1 through F12. Often, you'll need to press the 'Fn' key (usually located near the bottom left corner of the keyboard) in conjunction with the function key bearing the WiFi symbol. Precisely, this combination will toggle your WiFi on or off. This is typically the fastest way to do it for many users.
Troubleshooting WiFi Troubles: Quick Fixes
Sometimes, despite your best efforts, WiFi might persist, refusing to cooperate. If you’re facing this issue, don't despair! Here are some quick troubleshooting tips:
- Restart your Lenovo: Frequently, simply restarting your laptop can resolve minor software glitches interfering with WiFi functionality.
- Update your network drivers: Outdated drivers can cause problems. Go to the Device Manager (search for it in the Windows search bar), expand 'Network adapters', right-click your WiFi adapter, and select 'Update driver'.
- Check the physical switch: Some Lenovo models have a physical switch that controls WiFi. Ensure it is in the 'On' position.
- Run the Network Troubleshooter: Windows has a built-in troubleshooter. Access it via Settings -> Network & Internet -> Status and click 'Network troubleshooter'.
Beyond the Basics: Maximizing Your Lenovo Experience
Now you know how to seamlessly manage your Lenovo's WiFi! You are well on your way to a more focused and productive computing experience. But the journey hardly ends here. However, keep exploring your Lenovo. I encourage you to explore its features. Consider researching other handy tips and tricks. Learn how to optimize its performance. Discover how to personalize the settings. Ultimately, you can customize it to fit your unique needs.
Conclusion: Reclaim Your Focus
Disabling WiFi on your Lenovo shouldn't require excessive effort. Therefore, use these simple methods, and you'll be able to reclaim your focus. You can eliminate distractions. From Airplane Mode to settings adjustments, you now have multiple ways to regain control. This isn't just about turning off WiFi; it's about regaining control of your digital life. So, go forth and use your Lenovo with renewed focus and efficiency.
**Turn Your Windows 7 Laptop into a WiFi Hotspot: The SHOCKINGLY Easy Trick!**Lenovo WiFi OFF: The Easiest Trick Ever!
Ever felt like your Lenovo laptop is a runaway train, constantly blasting out Wi-Fi signals when you desperately need it to stay connected only to your local network, or maybe even use it offline for a bit of focused work? We've all been there! It's like trying to herd cats; the Wi-Fi just keeps on, well, going. But fear not, fellow digital nomads and laptop warriors, because we're about to unveil the simplest, most effective trick in the book to silence that insistent Wi-Fi beast on your Lenovo. Forget wrestling with complicated settings or fiddling with deep system dives; this is about as straightforward as making a cup of coffee (which, by the way, is also sometimes a necessity before tackling these tech puzzles!).
1. The Wi-Fi Woes: Why Turning It Off Matters
Before we dive into the "how," let's briefly touch upon the "why." Why bother turning off your Wi-Fi in the first place? Well, there are several compelling reasons. Firstly, it's a battery saver! Constantly searching for Wi-Fi drains your precious battery life like a vampire drains blood. It's a silent drain, a slow creep that can leave you stranded with a dead laptop when you need it most. Think of it as a leaky faucet – a small drip that, over time, wastes water. Secondly, turning off your Wi-Fi can be a security measure. When your Wi-Fi is on, your laptop is constantly broadcasting its presence, potentially vulnerable to unwelcome attention. It's like leaving your front door unlocked. Lastly, it can boost your focus. No more distracting notifications, no more temptation to browse the internet when you should be concentrating. It's like having a personal digital detox button.
2. The Anatomy of a Lenovo: Identifying the Key
Okay, let's get acquainted with the star of our show: your Lenovo. We need to pinpoint the key to unlocking this Wi-Fi shutdown secret. Typically, Lenovo laptops have a physical switch or a function key combination dedicated to controlling Wi-Fi. It's like having the power at your fingertips! Identifying this key is like finding the right key to your car – once you know where it is, you're ready to go.
3. The Physical Switch: The Old-School Charm
Some older Lenovo models (and some newer ones, too!) boast a physical Wi-Fi switch. This switch is usually located on the side or front edge of the laptop, often near the power button or on the front edge. It's a tangible, tactile experience – a simple flick of the switch. This is the easiest method of all. Think of it as physical proof that you're in charge! Just slide the switch to the “off” position, and boom — Wi-Fi, gone.
4. The Function Key Combination: The Modern Approach
The most common method for controlling Wi-Fi on Lenovo laptops is the function key combination. This typically involves pressing the "Fn" key (usually located near the Ctrl key) and another key labeled with a Wi-Fi symbol (often a curved signal icon, like a sideways "U"). The specific key varies depending on your model, but it's usually one of the F1-F12 keys. It's like a secret handshake between you and your laptop. Experiment with the F keys (F1, F2, F3, etc.) while holding down the Fn key, and you’ll eventually hit the right one. Look for the Wi-Fi symbol.
5. Finding Your Specific Key: The Lenovo Model Mystery
Now, here’s where things get a tad model-specific. Since Lenovo produces a wide range of laptops, the exact combination of keys can vary. The best way to find the correct keys is to:
- Check Your Keyboard: Examine your keyboard closely, paying attention to the top row (the F1-F12 keys). Look for a key with a Wi-Fi symbol.
- Consult Your User Manual: Lenovo laptops come with user manuals (either physical or online). These manuals usually contain detailed information about your laptop’s features, including how to turn Wi-Fi on and off.
- Search Online: If you don’t have your manual, simply Google your Lenovo model number (usually found on the bottom of your laptop) along with the phrase "turn off Wi-Fi." You'll find plenty of helpful guides and videos.
6. The "Airplane Mode" Gamble: A Potential Alternative
Airplane mode is designed to disable all wireless connections—Wi-Fi, Bluetooth, and cellular data (if applicable). While it effectively disables Wi-Fi, it also disables other potentially useful connections. It's like taking a shortcut, which may or may not lead to the end you desire. You can usually access airplane mode through the action center (a small icon usually found on the bottom right corner of your screen) or in your settings menu.
7. Testing Your Shutdown: The Validation Phase
Once you've found your Wi-Fi kill switch (physical or function key), it's time to test it. Try connecting to a Wi-Fi network, then disable the Wi-Fi using your method. You should lose your connection immediately, confirmed by the lack of internet access. You'll know you did it right when your laptop's Wi-Fi icon changes (often showing an "X" or a disconnected symbol).
8. The Power of Persistence: Troubleshooting the Stubborn
Sometimes, things don't go as planned. Maybe the Wi-Fi refuses to cooperate, even after you've flipped the switch or hit the correct function key. Here are some troubleshooting steps:
- Restart Your Laptop: A simple restart can often resolve minor glitches.
- Check Your Drivers: Outdated or corrupted Wi-Fi drivers can cause problems. Go to Device Manager (search for it in the Windows search bar), expand "Network adapters," and check if your Wi-Fi adapter has any issues. If so, you might want to update its driver.
- Check Your BIOS Settings: In rare cases, Wi-Fi might be disabled in the BIOS settings. Access this by pressing a specific key (usually Del, F2, or F12) during startup. (Be careful here; incorrect BIOS settings can cause problems.)
- Contact Lenovo Support: If all else fails, don't hesitate to contact Lenovo support or get professional help. It’s always a good idea to take a break if a problem is difficult to resolve.
9. The Software Solution: Tweaking Through Windows Settings
Besides the physical and function key options, some Lenovo laptops let you disable your Wi-Fi through the Windows settings. Here’s how:
- Open Settings: Click on the Start menu and select the "Settings" icon (the gear symbol).
- Network & Internet: Click on "Network & Internet" in the Settings menu.
- Wi-Fi: Click on "Wi-Fi" on the left side.
- Toggle the Switch: You will see a switch to turn Wi-Fi on and off. Toggle off to disable it.
10. Why This Trick Works: Simplicity is Key
The success of this trick lies in its simplicity. We are directly interacting with the Wi-Fi adapter, either physically or through a direct instruction via the function key combination. This bypasses any complex software configurations and provides an immediate and effective solution. It's like a direct line to the Wi-Fi, cutting off the signal at the source.
11. Benefits Beyond Battery: Focus and Security
Beyond battery life, the benefits of turning off Wi-Fi extend to increased focus and improved security. No more tempting notifications, no more distractions that derail us from productivity. It is like removing the noise and allowing us to hear better. Security is also enhanced, as we limit our exposure to potential threats, protecting our laptop and our data.
12. The Hidden Costs of Always-On Wi-Fi
We often overlook the hidden costs of keeping our Wi-Fi constantly on. The constant search for networks uses battery life, and that has an impact on our productivity. Further, it increases the risk of unwanted attention and potential security vulnerabilities. It is like leaving the lights on in an empty room – wasting energy and attracting unwelcome visitors.
13. Wi-Fi Off: A Habit for the Tech Savvy User
Make turning off your Wi-Fi a habit. It's a simple yet effective practice that will improve your laptop experience. It is a simple process that benefits security, increases focus, and improves battery life.
14. The "Airplane Mode" Alternative: A Quick Recap
Airplane mode offers an all-in-one switch for disabling all wireless connections. While simple, it disables important functions like Bluetooth and cellular data. It is great for quick fixes.
15. Mastering the Lenovo Wi-Fi: Your Digital Liberation
Now that you've mastered the art of turning off Wi-Fi on your Lenovo, you are well on your way to digital liberation! You can now control your laptop's connectivity, conserve battery life, and enhance your focus. It’s like learning the code to unlock a whole new level of control. Congratulations!
The Sum Up
So, there you have it – the easiest trick ever to turn off Wi-Fi on your Lenovo laptop! Whether you have a physical switch or a function key combination, the process is straightforward and effective. By simply disabling your Wi-Fi, you can save battery life, improve
OMG! This Windows 7 WiFi Hack on Reddit ACTUALLY Works!Fix Lenovo Wi-Fi Not Working in Windows 1087 2025

By TechFixIT Fix Lenovo Wi-Fi Not Working in Windows 1087 2025 by TechFixIT
How to Fix Missing Network Adapters on Windows Enable WiFi Network Adapter from BIOS Settings
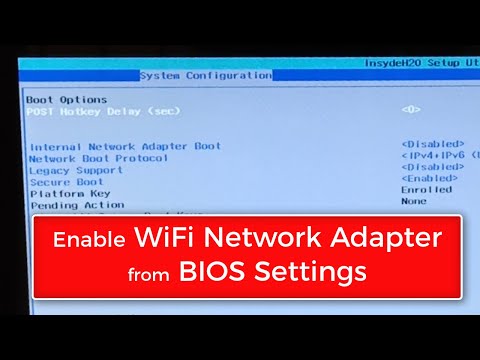
By WebbyFan How to Fix Missing Network Adapters on Windows Enable WiFi Network Adapter from BIOS Settings by WebbyFan
How to fix the Wi-Fi problem in Lenovo ThinkPad T430 laptop

By TechNTechie How to fix the Wi-Fi problem in Lenovo ThinkPad T430 laptop by TechNTechie

Title: How To Enable & Disable Wifi In Lenovo Legion Laptop
Channel: HardReset.Info
How To Enable & Disable Wifi In Lenovo Legion Laptop by HardReset.Info
Wifi On Laptop
Here's the title for your article: The Definitive Guide to Crafting a Perfect Espresso at Home
The Definitive Guide to Crafting a Perfect Espresso at Home
For the discerning coffee enthusiast, the allure of a perfectly pulled espresso is undeniable. The rich crema, the intense aroma, the complex flavor profile – these are the hallmarks of a truly exceptional coffee experience. While the rise of specialty coffee shops has made high-quality espresso more accessible, the satisfaction of mastering the art of brewing it at home is unparalleled. This guide serves as your comprehensive roadmap, equipping you with the knowledge and techniques necessary to consistently produce espresso comparable to, and even exceeding, that of your favorite barista. We'll delve into every facet of the process, from selecting the right equipment to mastering the nuances of extraction, ultimately empowering you to become your own espresso artisan.
I. Assembling Your Espresso Arsenal: The Essential Equipment
The journey to exceptional espresso begins with the right tools. While a professional setup can be a significant investment, several excellent options exist across various price points, offering a gateway to home-brewed perfection. The following equipment is considered the core of a successful espresso station:
Espresso Machine: This is, of course, the cornerstone. Options range from semi-automatic machines, which offer a balance of control and convenience, to fully automatic models that handle much of the process, to manual lever machines that give the user complete control. Consider your budget, experience level, and preferred level of involvement when choosing. Look for machines with a stable temperature control system (PID controllers are highly desirable) and a powerful pump (around 9 bars of pressure is typically ideal). Brands like La Marzocco, Rocket Espresso, and Breville offer a diverse range of machines suitable for home use.
Burr Grinder: A quality grinder is arguably as important as the espresso machine itself. Espresso requires a very fine, consistent grind, and a burr grinder is the only way to achieve this. Conical burr grinders are often preferred for their consistency and ability to produce a wide range of grind sizes, while flat burr grinders offer excellent particle distribution. Look for a grinder with adjustable grind settings and a doser or a single-dose hopper for optimal control. Brands such as Baratza, Eureka, and Mazzer offer a range of excellent grinders.
Tamper: A tamper is used to compress the ground coffee in the portafilter. It's crucial for ensuring even extraction. Choose a tamper with a flat, stainless steel base that fits your portafilter basket perfectly. The tamper should feel comfortable in your hand and have a substantial weight, allowing for consistent tamping pressure. A calibrated tamper can be particularly helpful for beginners.
Portafilter and Baskets: The portafilter is the handle that holds the ground coffee during extraction. Most espresso machines come with a portafilter and a few baskets. Consider investing in bottomless portafilters to visually assess your extractions and identify any channeling issues. Experiment with different size baskets for specific needs.
Scale: A digital scale is essential for precise measurements of coffee grounds and espresso yield. Accuracy is crucial for consistent results. Look for a scale that can measure in grams and has a resolution of 0.1 grams. A scale with a built-in timer is a valuable add-on.
Knock Box: A knock box provides a convenient and tidy way to dispose of used coffee grounds.
Milk Steaming Pitcher (If Applicable): If you plan to make milk-based drinks, a stainless steel milk steaming pitcher is necessary.
Accessories: Other helpful items include a distributor or WDT tool to help to evenly disperse the grounds in the portafilter, a cleaning brush for the group head, and a microfiber cloth for wiping down the machine.
II. The Bean's Journey: Selecting and Storing Your Coffee
The quality of your espresso relies heavily on the quality of the beans. Freshly roasted, high-quality coffee beans are absolutely critical. Here's what to look for:
- Roast Date over Expiration Date: Coffee reaches its peak flavor a few weeks after roasting. Always prioritize coffee with a roast date, and aim to use it within 2-4 weeks of that date.
- Whole Bean Only: Pre-ground coffee stales rapidly. Grind your beans immediately before brewing for optimal freshness.
- Origin and Roast Level: Experiment with different origins and roast levels to find your preferred flavor profile. Lighter roasts tend to have brighter acidity and more complex flavors, while darker roasts offer bolder, more chocolatey notes.
- Storage: Store your coffee beans in an airtight container, away from heat, light, and moisture. Consider using a vacuum-sealed container to extend freshness. Avoid storing beans in the refrigerator or freezer unless you plan to use them over an extended period. If freezing, portion the beans into single-dose amounts before freezing.
III. The Dance of Extraction: Mastering the Brewing Process
With your equipment assembled and your beans selected, it's time to brew. This is where the magic truly happens.
- Grinding & Dosing: Grind the beans just before brewing. The fineness of the grind is crucial; it dictates the extraction time and overall flavor. Start with a medium-fine grind and adjust as needed. Aim for a dose of 18-20 grams of coffee for a double shot (adjust based on your basket size). Distribute the grinds evenly in the portafilter basket using a WDT tool or by gently tapping its sides and then leveling the grounds using a distributor tool.
- Tamping: Place the portafilter on a stable surface, and tamp the grinds with consistent pressure (typically around 30 pounds). The goal is a level, even surface. Over-tamping can lead to bitter flavors and under-tamping can result in sour, weak shots. A calibrated tamper or a spring actuated tamper can aid with consistency.
- Pre-infusion (If Available): Many espresso machines offer pre-infusion, where the grounds are gently saturated with water before the full pressure is applied. This helps to ensure even extraction and can enhance the flavor profile.
- Extraction: Insert the portafilter into the group head. Start the pump and begin the extraction. The ideal extraction time is usually between 25 and 35 seconds for a double shot. The flow of espresso should start as a slow, syrupy drip. A perfect extraction will display a rich, golden crema. Observe the color of the stream, as it helps to diagnose issues.
- Yield: Aim for a yield of approximately two ounces (about 40-50 grams) of espresso for a double shot.
- Dialing In: Fine-tuning your grind size and dose is essential to achieve the perfect extraction. If your espresso flows too quickly (under-extracted), the grind is too coarse. If it flows too slowly (over-extracted), the grind is too fine. Adjust the grind setting on your grinder, and repeat the process until you achieve a balanced, flavorful espresso.
IV. Troubleshooting Common Espresso Challenges
Even with the right equipment and technique, challenges can arise. Here's how to troubleshoot common issues:
- Sour Espresso: Grinds are too coarse, extraction time is too short, or the water temperature is too low.
- Bitter Espresso: Grinds are too fine, extraction time is too long, or the water temperature is too high.
- Weak Espresso: Insufficient coffee dose or the grinds are too coarse.
- Channeling: Uneven tamping, poor distribution of the grinds, or a poorly designed portafilter.
- No Crema: Stale beans, incorrect tamping, or variations in grind size.
V. Cleaning and Maintenance for Espresso Longevity
Regular cleaning and maintenance are critical for keeping your espresso machine in top condition and prolonging its lifespan.
- Daily Cleaning: Backflush the group head with water after each use. Wipe down the portafilter, baskets, and other components. Empty and clean the drip tray and knock box.
- Weekly Cleaning: Backflush the group head with a cleaning solution designed for espresso machines. Clean the portafilter and baskets thoroughly.
- Monthly Cleaning: Descale your machine to remove mineral build-up, following the manufacturer's instructions.
- Regular Maintenance: Ensure the machine components are functioning properly by checking gaskets and seals.
VI. Beyond the Basics: Refining Your Espresso Skills
Once you've mastered the fundamentals, you can explore more advanced techniques:
- Profiling: Experiment with the pre-infusion process to adjust the flavor profile.
- Water Quality: Use filtered water for optimal extraction.
- Milk Steaming: If you enjoy milk-based drinks, practice steaming milk to create a velvety texture.
Crafting perfect espresso is a continuous learning process that evolves with practice and experimentation. By following this guide and dedicating yourself to the art of espresso, you'll be well on your way to brewing coffee that surpasses expectations from the comfort of your own home, one delicious shot at a time.
