how do i know my laptop wifi card

Title: How To Check Inbuild Wi-Fi Card Supports Monitor Mode With cmd In Windows 10
Channel: EtHaRay
How To Check Inbuild Wi-Fi Card Supports Monitor Mode With cmd In Windows 10 by EtHaRay
how do i know if my laptop wifi card is bad, how to know my laptop wifi card, how to check my laptop wifi card, how to tell if laptop wifi card is bad, how to know my laptop wifi adapter, how to check if laptop wifi card is working, how to check your laptop wifi card
Is Your Laptop's Wi-Fi REALLY Broken? (Secret Fix Inside!)
Is Your Laptop's Wi-Fi a Mirage? Unveiling the Truth (and a Secret Fix!)
Ever feel like your laptop’s Wi-Fi is playing tricks? One minute you’re surfing the web, the next, silence. You might suspect a complete breakdown. However, before you throw your laptop out the window, let's investigate. Many times, the issue is far less drastic than you think. We’ll explore the potential culprits and, yes, reveal that elusive secret fix.
The Phantom of the Airwaves: Pinpointing the Problem
Firstly, understand that Wi-Fi problems are annoyingly common. Consequently, they often stem from several sources. It is not usually a catastrophic hardware failure. Instead, it could be anything. Consider your surroundings. Is the signal strength weak? Are you experiencing intermittent disconnections? Therefore, let's consider some common possibilities. Has the router been rebooted recently? This simple action resolves many issues. Furthermore, check the distance from your laptop to the router. Walls and other obstructions weaken signals.
Decoding the Deception: Examining the Usual Suspects
- Router Roulette: Your router is the central nervous system of your Wi-Fi network. Therefore, errors there can definitely translate into laptop woes. Try rebooting it. Unplug it, wait a minute, and plug it back in. Moreover, its firmware may be outdated. Update it if possible. In addition, check its placement. Is it in a central location? Is it obstructed by anything?
- Driver Drama: Your laptop relies on drivers to communicate with its Wi-Fi adapter. Sometimes, these drivers get corrupted. Update them. You can find these through your operating system’s settings. Subsequently, check the manufacturer’s website for the latest versions.
- Interference Intrigue: Other devices might interfere with your Wi-Fi signal. For example, microwaves and cordless phones can be culprits. The 2.4 GHz band is especially susceptible. Consider switching your router to the 5 GHz band if possible. Besides, change your Wi-Fi channel. Experiment with different channels to find the one with the least interference.
The Secret Fix Revealed: A Breath of Fresh Wi-Fi Air
This is the moment you've been waiting for. The secret fix? This method is often overlooked. However, it is surprisingly effective—it's a network reset. Windows and macOS have built-in options to reset the network configuration. This resets your network settings to their defaults. So, why does this work? It often resolves a multitude of underlying issues. Firstly, it clears out corrupt configurations. Secondly, it can eliminate conflicts created by other apps. Therefore, here’s how to do it on both major operating systems:
- Windows: Go to Settings > Network & Internet > Network reset. Confirm the reset and restart your computer.
- macOS: Go to System Preferences > Network. Select your Wi-Fi connection. Click "Advanced." Then choose "Renew DHCP Lease". Click "OK," and restart your computer.
Afterward, reconnect to your Wi-Fi network. Then, enter your password again.
Beyond the Basics: Troubleshooting Tactics
If the secret fix doesn’t work, don’t despair. Instead, try these additional tactics:
- Run the Troubleshooter: Both Windows and macOS have built-in network troubleshooters. They can often automatically identify and fix the problem.
- Forget and Reconnect: On your laptop, "Forget" the Wi-Fi network. Then, reconnect it. Sometimes, this action will force a fresh connection.
- Consider a VPN: A VPN can bypass potential network issues. A VPN creates a more secure connection. This can sometimes resolve connection problems. Additionally, it can hide your IP address.
The Final Verdict: Taming the Wi-Fi Beast
More often than not, your laptop’s Wi-Fi isn't truly "broken." Instead, it’s experiencing a glitch. By systematically troubleshooting, you can usually find a solution. Remember the secret fix —the network reset—is often the most effective. Thus, don't panic. Try these steps. Then, return to your seamless browsing experience. Finally, remember patience is vital. Because Wi-Fi can be temperamental.
**Download Your Compaq Presario CQ42 WiFi Driver NOW! (Fix Internet Issues Today!)**Is Your Laptop's Wi-Fi REALLY Broken? (Secret Fix Inside!)
Ever felt that gut-wrenching pang of panic when your laptop's Wi-Fi icon throws a tantrum and refuses to connect? We've all been there. One minute you're cruising the internet, the next you're staring at a blank screen, certain your digital life is crumbling around you. But before you start crying over your lost streaming session or the upcoming deadline, let's take a deep breath. Because more often than not, that "broken" Wi-Fi isn't actually broken. It's more like a slightly grumpy gremlin that just needs a little nudge.
1. The Dreaded "No Internet" Symphony: Recognizing the Symptoms
Let's face it, diagnosing Wi-Fi woes can be a bit like detective work. First, you need to learn the telltale signs. Is your internet speed crawling like a snail trying to cross a busy highway? Do websites refuse to load, or do you get that dreaded "No Internet" message? Maybe your video conference keeps freezing, turning you into a pixelated statue mid-sentence. These are all red flags, but they don't automatically mean your Wi-Fi is kaput. It could be anything from a temporary glitch to a simple setting adjustment. Think of it like a car – a flat tire doesn't necessarily mean the engine's gone haywire.
2. First Things First: The Obvious Checks (We've All Been There!)
Okay, let's get the obvious out of the way. Because admitting you've checked the basics is the first step to admitting you might need a little help.
- Is Wi-Fi even on? Sounds silly, right? But sometimes, the Wi-Fi switch (either a physical one on your laptop or a button on your keyboard) gets bumped accidentally. Or, you know, you just forget. Happens to the best of us.
- Is the router plugged in and working? This is a classic. Check those blinking lights. Are they doing the happy dance, or are they giving you the silent treatment?
- Are other devices connected? If your phone, tablet, and smart toaster are all happily streaming, then the problem probably lies with your laptop, not your internet.
3. Reboot, Reset, Repeat: The Power of the Restart Ritual
The simplest solution is often the most effective. The humble restart is the digital equivalent of a good night's sleep. It clears out the cobwebs, refreshes the system, and often magically fixes things.
- Restart your laptop. A full reboot can work wonders. Close all your applications, save your work, and let it shut down completely before powering it back on.
- Restart your router. Unplug it from the power outlet, wait about 30 seconds, and plug it back in. This allows the router to reset and re-establish its connection. Think of it as a digital detox for your Wi-Fi.
4. The Device Manager Detective: Unveiling Hidden Problems
If the simple fixes don't work, it's time to delve a little deeper using your laptop’s Device Manager. This is where we play detective, sniffing out potential conflicts or problems.
- Accessing Device Manager: On Windows, you can usually find it by typing "Device Manager" into the search bar. On a Mac, you won't have a Device Manager, but the system diagnostics can provide useful information.
- Checking the Network Adapters: Expand the "Network adapters" section. Look for any yellow exclamation marks or red crosses. These indicate potential issues with your Wi-Fi adapter.
- Driver Troubles: Right-click on your Wi-Fi adapter and select "Update driver." Sometimes, outdated or corrupted drivers can cause connectivity problems.
5. The Secret Fix: Toggling the Wi-Fi Adapter
Okay, here's the secret I promised! One often overlooked but surprisingly effective tactic is simply disabling and then re-enabling your Wi-Fi adapter. It's like giving it a swift kick in the digital pants to get it going again.
- Disabling the Adapter: In Device Manager (or the equivalent on your system), right-click on your Wi-Fi adapter and select "Disable device."
- Waiting and Re-enabling: Wait a few seconds (think of it as giving the adapter a moment to reflect on its actions), and then right-click on the adapter again and select "Enable device."
- The Magic of Refresh: This forces the system to re-establish communication with the adapter and often resolves temporary glitches. It's like hitting the reset button, but just for the Wi-Fi.
6. Network Troubleshooter: Your Built-in Digital Doctor
Windows has a built-in network troubleshooter that can automatically diagnose and fix common Wi-Fi issues. It's like having a doctor on call, ready to run some tests.
- Accessing the Troubleshooter: Right-click on the Wi-Fi icon in your system tray (usually in the bottom right corner of the screen).
- Running the Diagnosis: Select "Troubleshoot problems." The troubleshooter will analyze your network connection and attempt to resolve any issues.
- Following the Prompts: It may ask you questions or suggest solutions. Just follow the on-screen instructions.
7. IP Address Conflicts: The Digital Identity Crisis
Sometimes, your laptop might be experiencing an IP address conflict, meaning there's another device on your network using the same digital address. It's like two people trying to use the same social security number – chaos ensues.
- Static vs. Dynamic IP: Routers typically assign dynamic IP addresses (DHCP). However, Sometimes the setting can be set to static.
- Renewing or Resetting: You can often resolve conflicts by releasing and renewing your IP address. Head to your network adapter settings.
8. The Router's Role: Is It the Culprit?
Your router is the gatekeeper of your internet connection. If it's acting up, your laptop is going to suffer.
- Router Firmware: Old firmware can cause problems. Check your router’s manufacturer website for updates.
- Channel Congestion: Wi-Fi channels can get crowded. Try switching your router to a less congested channel in the settings.
- Router Placement: Ensure your router is in an open space, away from walls and obstructions that are interfering with its function.
9. The Password Predicament: Double-Checking Your Credentials
It seems obvious, but we’ve all been there! Make sure you're entering the correct Wi-Fi password in capital letters too because it's case sensitive.
- Case Sensitivity: Passwords are case-sensitive. Double-check those caps lock keys!
- Hidden Characters: Sometimes, a hidden character (like an extra space) can throw off your connection. Retype your password.
10. Software Interference: Is Anti-Virus the Enemy?
Sometimes, software on your laptop, such as your antivirus program or VPN, can interfere with your Wi-Fi connection. They might be blocking the connection by mistake.
- Temporarily Disable: Try temporarily disabling your antivirus or VPN software to see if it resolves the issue. If it does, you can adjust the settings to allow connectivity.
11. Distance and Obstacles: The Wi-Fi's Weak Spots
Wi-Fi signals are like invisible radio waves, and they can be weakened by distance and obstacles.
- Move Closer: Try moving your laptop closer to the router.
- Reduce Obstructions: Avoid thick walls, metal objects, and other devices that can interfere with the signal.
12. Hardware Hiccups: A Failing Adapter?
Sometimes, the problem lies with your laptop's Wi-Fi adapter itself.
- Check the Hardware: If you've tried everything else, but no luck, there may be a hardware problem. You may need to consider a professional to repair your laptop.
13. External Adapters: A Wi-Fi Backup Plan
If your internal Wi-Fi adapter is giving you grief, an external USB Wi-Fi adapter can be a lifesaver.
- Plug and Play: They're easy to install and often provide a stronger signal.
- Cost-effective: They are relatively inexpensive and can give you a reliable work-around
14. When to Call in the Professionals: Knowing When to Seek Help
There comes a point when you've exhausted all your troubleshooting options. Don't feel bad about calling in the professionals.
- Laptop Repair Shops: These experts can diagnose and fix hardware issues.
- Internet Service Provider (ISP): They might be able to identify issues on your end, or even diagnose the problem or send a technician.
15. Prevention is Key: Maintaining a Healthy Wi-Fi Life
Now that you know how to fix your Wi-Fi, let's talk about preventing future problems.
- Keep Drivers Updated: Regularly update your Wi-Fi adapter drivers.
- Secure Your Network: Use a strong password and security protocols.
- Routine Router Check-Ups: Restart your router periodically and check for firmware updates.
Closing Thoughts:
So, the next time your laptop's Wi-Fi icon turns red, or goes into a blank state, don't
Unlock Your Laptop's Hidden Power: The Easiest Wifi Display Setup EVER!How to Know if My Desktop PC Is Equipped for Wireless Know Your Computer

By eHowTech How to Know if My Desktop PC Is Equipped for Wireless Know Your Computer by eHowTech
WiFI Card vs USB WiFi Adapter Check out this comparison

By ADVANTI WiFI Card vs USB WiFi Adapter Check out this comparison by ADVANTI
How to Fix Missing Network Adapters on Windows Enable WiFi Network Adapter from BIOS Settings
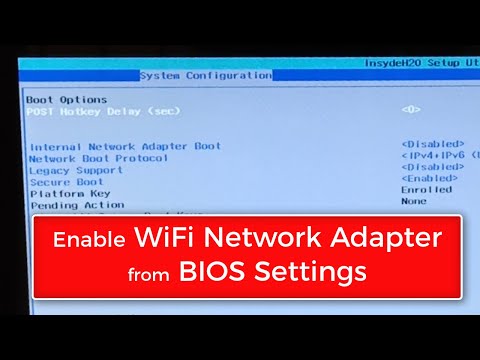
By WebbyFan How to Fix Missing Network Adapters on Windows Enable WiFi Network Adapter from BIOS Settings by WebbyFan

Title: Laptop Wi-Fi Not Working Solutions tips in hindi multitech institute
Channel: Rajkumar Kushwaha
Laptop Wi-Fi Not Working Solutions tips in hindi multitech institute by Rajkumar Kushwaha
Change Wifi Settings
The Definitive Guide to Mastering Sourdough Bread: From Starter to Slice
The intoxicating aroma of freshly baked sourdough, that crusty exterior yielding to a chewy, tangy interior, is a sensory experience like no other. For centuries, this ancient bread has graced tables around the world, offering not only unparalleled flavor but also a wealth of nutritional benefits. This comprehensive guide is your passport to the art of sourdough baking – regardless of your experience level. We will delve into the very essence of sourdough, exploring the intricacies of the levain, the science behind the rise, and the secrets to achieving that perfect loaf every single time. Prepare to embark on a journey that will transform your kitchen into a haven of culinary excellence.
Unveiling the Magic: The Foundation of a Stellar Sourdough Starter
The heart and soul of any exceptional sourdough loaf is undoubtedly the starter. It is a living ecosystem, a vibrant community of wild yeast and beneficial bacteria, working in harmony to leaven the dough and impart that signature tangy flavor. Creating your own starter is an act of patience and observation, a process that rewards those who pay attention and provide the proper environment for these microscopic organisms to thrive.
Cultivating Your Starter: The Initial Days of Fermentation
The initial phase of starter creation demands a careful balance of flour and water. At a minimum, you would need two cups of each. Use bottled, filtered water to minimize chlorine or mineral interference. The flour must be unbleached, and the type of flour would matter as well. For this article's sake, we would use whole wheat flour.
Day one involves combining one cup of whole wheat flour with one cup of the bottled, filtered water in a non-reactive container, such as a glass jar. Mix it well to form a thick slurry, ensuring no dry flour remains. Cover the jar loosely, allowing for air circulation, and let it rest at room temperature. A temperature between 70-75°F (21-24°C) is ideal for optimal fermentation.
Over the subsequent days, observe your starter closely. You will notice subtle changes: small bubbles may begin to form, and a slight sour aroma might emerge. On day two or three, discard half of the mixture and feed it with another half cup of flour and half cup of water. Continue this process daily, or twice daily. If your mixture is too thick, add some more water. If your mixture is too thin, add more flour.
Recognizing a Healthy and Active Starter
A healthy starter is a dynamic entity that exhibits several telltale signs of vitality. First and foremost, it should double in size within 4-8 hours after a feeding. It must be bubbly, with a texture resembling a sponge. A distinct, pleasant, slightly sour aroma is another hallmark of a healthy starter. A well-fed starter, ready to use, should have an aroma reminiscent of yogurt or green apples.
Maintaining Your Starter: Regular Feedings and Storage
Once your starter is established and consistently doubling, you can transition to a regular feeding schedule. The frequency of feedings will depend on your baking habits and the temperature of your environment. If you bake frequently (several times a week), you can maintain your starter at room temperature and feed it daily or twice daily, depending on its activity. If you bake less often, the starter can be stored in the refrigerator. When refrigerated, the starter’s activity slows down, and it needs to be fed less frequently. A good practice is to feed it once a week, or every two weeks.
To feed a refrigerated starter, bring it to room temperature, discard a portion, and feed it with equal parts flour and water. Allow it to sit at room temperature for 4-8 hours, or until it doubles in size, before baking.
Crafting the Perfect Sourdough Dough: A Symphony of Ingredients
With your starter ready and raring to go, the next step is to create the dough. This involves carefully blending the starter with flour, water, and salt – the cornerstone of sourdough bread.
Essential Ingredients: Flour, Water, Salt, and the Levain
High-quality ingredients will directly influence the quality of your final sourdough loaf.
- Flour: Bread flour, with its higher protein content, is typically preferred for its gluten network development. However, you can experiment with other types of flour - such as whole wheat, rye, or spelt – to add depth of flavor and texture. A combination of flours often yields the best results.
- Water: As mentioned, use filtered water that is free of chlorine and other additives. Water temperature is also important: use lukewarm water (around 80°F/27°C) to activate the yeast and initiate fermentation.
- Salt: Salt plays a crucial role in both the flavor and structure of the dough. It inhibits unwanted yeast growth, regulates fermentation, and strengthens the gluten network. Fine sea salt or kosher salt are good options.
- Levain (Starter): The heart of the operation, adding the starter to your dough is what starts the process of rising. Its activity will determine how swiftly your loaf comes to life.
The Autolyse: Unlocking Flour Power
Before adding the starter and salt, an autolyse is a crucial step. In this process, the flour and water are combined and allowed to rest, typically for 30-60 minutes. This allows the flour to fully hydrate, initiating gluten development and improving the dough's extensibility. The autolyse will result in a more extensible dough, which will rise better than a dough where the autolyse process has been skipped.
Mixing and Kneading: Building Strength and Structure
Once the autolyse is complete, add the starter and salt. Gently knead the dough to incorporate the ingredients. The kneading process develops the gluten network, which is essential for trapping the carbon dioxide produced by the yeast and creating the bread's structure. Overkneading, however, can make the dough tough.
After the autolyse, incorporate the starter and salt. Kneading can be done by hand or using a stand mixer. Regardless of the method, the goal is to develop a smooth, elastic dough.
For hand kneading, you can use the "slap and fold" method. For a stand mixer, start with a low speed to combine ingredients, then increase the speed to medium to develop gluten.
Bulk Fermentation: The First Rise
Bulk fermentation is the first rise, where the dough is allowed to ferment and develop flavor, typically for 4-5 hours at room temperature, though the time may vary depending on the activity of your starter. During this time, the yeast consumes sugars in the flour, producing carbon dioxide, which causes the dough to rise.
During bulk fermentation, perform a series of "folds" to develop strength. Gently stretch a portion of the dough and fold it over itself. Repeat this process several times, every 30-60 minutes. This process will helps to strengthen the gluten network and develop flavor.
Shaping and Proofing: Sculpting the Loaf and Preparing for the Oven
Once bulk fermentation is complete, it's time to shape the dough. Gently turn the dough out onto a lightly floured surface. Shape the dough into a round (boule) or an oblong (batard), depending on your preference.
After shaping, place the dough in a floured banneton basket or a bowl lined with a floured cloth. Cover the dough and refrigerate it for cold proofing. This final rise slows down fermentation and develops flavor. A cold proof of 12-24 hours, will provide the best result.
Baking to Perfection: Achieving That Golden Crust
Baking sourdough bread requires precision and a little bit of understanding of the process:
Preheating the Oven and Baking Tools
Preheat your oven to a high temperature, typically 450-500°F (232-260°C). Place a Dutch oven inside the oven while it heats. The Dutch oven provides a humid environment, essential for creating a crispy crust.
Scoring: The Art of the Slash
Before baking, score the loaf using a lame or a sharp knife. Scoring controls the expansion of the loaf and creates a beautiful, artistic pattern. Start with a clean, sharp blade and make a confident cut.
Baking with Steam: Creating the Crust
Carefully remove the hot Dutch oven from the oven. Gently place the scored dough inside the Dutch oven. Cover it and bake for 20 minutes to create steam. Remove the lid and continue baking for an additional 25-35 minutes, or until the crust is a deep golden brown and the internal temperature reaches 200-210°F (93-99°C).
Cooling: The Crucial Final Step
Once baked, transfer the loaf to a wire rack and let it cool completely before slicing. Resist the urge to cut into it too soon, as the internal structure is still setting. Cooling for at least an hour, preferably longer, will allow the crumb to develop fully, and prevent the bread from becoming gummy.
Troubleshooting Common Sourdough Challenges
Even experienced bakers encounter challenges. Here are solutions to some common problems:
Dense Loaf: Your starter may be inactive, your dough may be under-proofed, or you may not have developed enough gluten. Check your starter's activity, ensure proper proofing times, and focus on kneading techniques.
Flat Loaf: Similar to a dense loaf, a flat loaf may result from an inactive starter, over-fermentation, or weak gluten development.
Sour Taste: This is a
