download driver wifi laptop toshiba l40-a

Title: Instal driver WiFi dengan Mudah Cek type nya disini laptop internet
Channel: theWind Tricks
Instal driver WiFi dengan Mudah Cek type nya disini laptop internet by theWind Tricks
Download Toshiba L40-A WiFi Driver: Instant Fix for No Internet!
Unleash Your Toshiba L40-A's WiFi: The Ultimate Driver Guide
Have you ever felt completely disconnected? That feeling of digital isolation when your Toshiba L40-A laptop refuses to connect to the magical world of the internet? It's frustrating, isn't it? But don't despair! The solution often lies in a simple, yet powerful, fix: the WiFi driver. I'm here to guide you through the entire process.
The Unseen Culprit: Understanding the WiFi Driver
Think of your WiFi driver as the translator. It allows your Toshiba L40-A to understand and communicate with your wireless network. Without this vital element, your laptop remains a digital island. Consequently, you can't browse the web, stream videos, or even send emails. The driver is essential for seamless connectivity. Often, the problem isn't a faulty router or a weak signal. Instead, it's an outdated, corrupted, or missing driver.
Diagnosing the Problem: Is Your Driver the Issue?
Before you start downloading (because you will!), let's confirm the problem. First, check your WiFi icon in the system tray. Do you see an exclamation mark or a red X? This is a strong indication of a driver problem. Furthermore, try connecting to other WiFi networks, such as your smartphone's hotspot. If you still can't connect, the driver is a likely culprit. Then, open Device Manager to check for errors. You can usually find it via the Windows search bar. Look for "Network adapters." Any entries with a yellow triangle indicate a problem.
Finding the Right Driver: Your Toshiba L40-A's Specific Needs
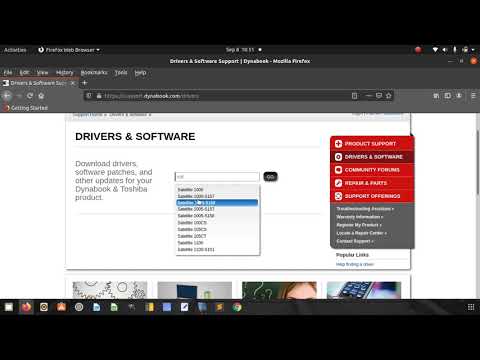
Finding the correct driver for your Toshiba L40-A is crucial. Specifically, you'll need the driver tailored to your laptop's model. To start, identify your specific model number located on a sticker, usually on the bottom of your laptop. After that, head to the official Toshiba support website. Then, search for the drivers section and input your specific model number. The website will provide you with a list of available drivers. So, download the WiFi driver relevant to your operating system.
The Download and Installation Process: Step-by-Step Guide
Downloading and installing the driver is surprisingly simple. First, download the driver from the Toshiba website. Also, ensure your internet connection is stable, preferably wired, during the download process. After the download completes, locate the downloaded file. It's generally in your "Downloads" folder. Then, double-click on the file to begin the installation process. The installation wizard will guide you through. Follow the on-screen prompts, accepting the terms and conditions. Finally, restart your laptop after installation. Often, this is essential for the changes to take effect.
Troubleshooting Common Issues: Battling the Errors
Sometimes, glitches can mess things up even after installation. If your WiFi still isn't working, here are some fixes. First, try restarting your router and modem. Also, ensure that your WiFi switch is turned on (often found on the side of your laptop). Furthermore, check your system's date and time; ensure they are accurate. If the driver isn't the issue, it might be. Then, go back to Device Manager and check for any driver conflicts. If all else fails, consider a system restore to a point before the problem began.
Beyond the Driver: Other Potential Solutions
While the driver is frequently the problem, other factors can affect WiFi connectivity. For example, consider your physical environment. Walls and obstructions can weaken the WiFi signal. Also, ensure your router is up-to-date. Consider updating its firmware. Moreover, consider interference from other devices, such as microwaves or Bluetooth devices. Finally, if you've tried everything, contact Toshiba support. They can offer additional assistance.
Staying Connected: Maintaining Your WiFi Driver
Once you've fixed the problem, learn how to prevent future issues. Regularly update your drivers. You can check for updates through Windows Update or the Toshiba support website. Also, consider creating a system restore point before installing any new drivers. That way, you can easily revert to a previous state if a problem occurs. Besides, back up your system regularly. This protects your files. Finally, keep your operating system updated. That helps boost performance and compatibility.
The Final Connection: Relishing Your WiFi Freedom
By following these steps, you should have your Toshiba L40-A connected to WiFi again. So, take a deep breath, and prepare to re-enter the digital world. You're ready to surf the web, stream videos, and stay connected. Moreover, remember to keep your drivers updated. Enjoy your newfound online freedom! You deserve it.
HP 15 Laptop WiFi Nightmare? FIX IT NOW!Download Toshiba L40-A WiFi Driver: Instant Fix for No Internet!
Hey there, fellow tech travelers! Ever stared at your Toshiba L40-A laptop, feeling the digital world slip away because your Wi-Fi decided to take a vacation? You’re not alone. We’ve all been there: that frustrating moment when you desperately need that online connection, only to be met with a big, fat "No Internet" error. But fear not, because today, we're diving headfirst into the solution: getting that Toshiba L40-A WiFi driver back in action and restoring your online peace of mind! This isn't some dry, technical manual; think of it as a friendly guide, a digital hand reaching out to help you reclaim your internet freedom.
Why Your Toshiba L40-A WiFi Driver Might Be Acting Up: A Detective's Guide
Let's play detective for a moment. Before we jump into the download, let's figure out why your WiFi is throwing a tantrum. Think of your driver as the translator between your laptop and your Wi-Fi network. When that translator stumbles, the connection goes kaput. Here's a breakdown of the usual suspects:
- Outdated Driver: This is the most common culprit. Your driver might be old, like a vintage vinyl record player in a high-tech world. It simply can't keep up with the latest Wi-Fi standards.
- Corrupted Driver: Sometimes, a tiny gremlin gets into the system and messes with your driver files. Think of it as a digital virus attacking your translator.
- Driver Conflicts: You might have other software that clashes with your WiFi driver, creating a digital traffic jam.
- Hardware Issues (Less Common): In rare cases, the Wi-Fi card itself might be the problem, but let's not panic yet! Let's start with the easy fixes first.
The Symptoms: How to Spot a WiFi Driver Emergency
Before we diagnose, let's define the symptoms. Recognizing them quickly will give you a head start.
- No Wi-Fi Networks Found: Your laptop searches, searches, searches, and comes up empty. Like looking for a specific coffee shop and finding nothing but empty streets.
- Limited Connectivity: You see the Wi-Fi icon, but it has a little yellow exclamation point next to it, or it says "Limited." Connection is there, but something is hindering you.
- Frequent Disconnections: Your connection drops repeatedly, like a glitchy video call on a bad day—the moment you make it, it cuts off.
- Slow Internet Speeds: Everything loads at a snail's pace. Your pages crawl, your downloads crawl, and you feel as if time itself is slowing down.
If any of these symptoms sound familiar, we are in the right place.
Preparing for the Rescue: Gathering Your Tools
Think of this as preparing for a digital surgery. Before we perform the operation (downloading and installing the driver), let’s gather our tools.
- An Internet Connection (Even a Tethered One): You'll need some way to access the internet. If your home Wi-Fi is down, try using your phone as a hotspot via USB, or your neighbor's network (with their permission, of course!).
- Your Toshiba L40-A Laptop: This is, of course, the patient of the hour.
- Your Serial Number (Optional, but Helpful): This helps you find the specific driver for your exact model. You can usually find this on a sticker on the bottom of your laptop, or in the BIOS.
Where to Find the Right Toshiba L40-A WiFi Driver: A Treasure Hunt!
Now, the quest for the perfect driver begins! Here are the best places to search:
- Toshiba's Official Website: This is the gold standard. Go to Toshiba's support website, find the "Downloads" or "Drivers" section, and enter your specific model number (L40-A). You will most likely be able to search to locate your specific Wi-Fi driver.
- Your Laptop's Device Manager: If you’re already sort of connected (even with limited access), you can attempt to find the driver through the Device Manager. However, please note that your internet won't work if your Wi-Fi card driver is missing, corrupt, or problematic.
- Third-Party Driver Websites (Use with Caution): Websites like driver pack solutions. Be cautious, as some of these sites might contain malware. Stick to reputable sites and scan any downloaded files before installing them.
Downloading the Driver: The Critical Step
Once you’ve found the driver, downloading it is usually straightforward. Just click the download button. The driver will most likely download as a “.exe” file.
Installing the Driver: Bringing Your WiFi Back to Life
This is where the magic happens. Double-click the downloaded file. This will launch the driver installation wizard.
- Follow the On-Screen Instructions: The wizard will guide you through the process, step by step. It’s usually a matter of clicking "Next," agreeing to the terms, and waiting for the installation to complete.
- Restart Your Laptop: This is crucial! Restarting allows the new driver to take effect, like rebooting your brain after a nap.
Troubleshooting After Installation: When Things Don’t Go as Planned
Sometimes, despite our best efforts, the WiFi still gives us the cold shoulder. Here’s what to do:
- Restart Again: This solves many issues.
- Roll Back the Driver: If the new driver caused more problems, go to the Device Manager, find the WiFi device, right-click it, and select “Properties.” Under the “Driver” tab, see if there’s an option to "Roll Back Driver." Yes, do it and revert to the previous working driver.
- Update the Driver: Go back to the Device Manager, right-click your WiFi device, select "Update Driver," and choose "Search automatically for drivers." (This downloads the driver from the net, so ensure the internet is available).
- Contact Toshiba Support: If nothing else works, it might be time to reach out to the experts. Their support channels are a wonderful resource.
Checking Your Connection: Victory Lap!
Once you've installed the driver and restarted, it’s time to celebrate (maybe with a celebratory cup of coffee, of course!). Click on your Wi-Fi icon in the system tray. Your networks should appear! Connect to your preferred network, and browse the internet. See if your internet is working.
Additional Tips and Optimizations: Boosting Your Wireless Performance
Beyond fixing the driver, there are a few things you can do to improve your WiFi:
- Move Closer to the Router: Sometimes, the simplest solution is the best. It might be a problem that has been fixed, and is not even something about your driver.
- Avoid Obstructions: Walls and other physical barriers can weaken your signal.
- Update Your Router Firmware: Just like your laptop, your router needs updates, too.
- Consider a Wi-Fi Extender: If you have a large house or a weak signal in certain areas, a Wi-Fi range extender can help expand your network's reach.
What if the Driver Installation Fails? Exploring Alternative Solutions
Sometimes, no matter how hard we try, the driver install won't cooperate. What then?
- System Restore: If the problem started recently, try using System Restore to revert your system to a point before the issue began.
- Network Reset: Windows has a network reset feature. This can sometimes solve stubborn connectivity problems.
- Hardware Check: In the end, there is a chance the Wi-Fi card itself is the issue. Consider having it checked professionally.
The Importance of Regularly Updating Drivers: Maintenance is Key
Think of your drivers like your car. You wouldn't drive a car without changing the oil and checking the tires, would you? Make it a habit to check for driver updates regularly via the Device Manager.
Wrapping It Up: Your Guide to WiFi Recovery!
And there you have it! We've navigated the often confusing world of Toshiba L40-A Wi-Fi drivers, armed with knowledge and a shared sense of accomplishment. I hope that guide empowers you to conquer the "No Internet" monster and reclaim your digital life. Always remember that technology, like life itself, is a journey, not a destination. Enjoy the ride, and don’t hesitate to explore, experiment, and learn along the way. Don’t be afraid to call in reinforcements if you need them.
FAQs: Your Burning Questions Answered!
Where can I find my Toshiba L40-A model number?
Usually, it's on a sticker on your laptop's bottom, or in the BIOS.
Is it safe to download drivers from unofficial websites?
It can be risky! Stick to the official Toshiba website whenever possible. If you must use other sites, be extra cautious. Scan the downloaded files for malware.
What if I can't find a driver specifically for my L40-A model?
Try searching for drivers for a similar Toshiba model. Your WiFi card is still most likely the same, such as the driver of your Wi-Fi card model.
**How often should I update my
Cara Download Driver Laptop Toshiba
By Ahmad Zurmilad Cara Download Driver Laptop Toshiba by Ahmad Zurmilad
Toshiba L40-A - Interface & Konektivitas Review by PC Media Teknoshot

By PC Media Teknoshot Toshiba L40-A - Interface & Konektivitas Review by PC Media Teknoshot by PC Media Teknoshot
Cara Download Driver Wifi Internet Windows 7 10 11

By logistech ID Cara Download Driver Wifi Internet Windows 7 10 11 by logistech ID

Title: Cara Install Driver Wifi Di Laptop dan PC dengan Mudah
Channel: WINTECH id
Cara Install Driver Wifi Di Laptop dan PC dengan Mudah by WINTECH id
Working With Laptop
The Art of Sourdough: A Comprehensive Guide to Baking Perfection
For centuries, sourdough bread has graced tables across the globe, a testament to the enduring power of simple ingredients and patient craftsmanship. Its tangy flavor, complex crumb structure, and enduring freshness set it apart from mass-produced loaves, making it a beloved staple for bakers of all skill levels. We, too, were once intimidated by the mystique surrounding sourdough. Now, after countless hours of practice, experimentation, and a deep dive into the science and art of breadmaking, we are excited to share a comprehensive guide to help you unlock the secrets to baking exceptional sourdough.
Understanding the Magic: The Science of the Sourdough Starter
The cornerstone of great sourdough is, without question, the starter. This living culture, a symbiotic community of wild yeasts and lactic acid bacteria, is what gives sourdough its characteristic tang and rise. Cultivating a robust starter is the first and arguably most crucial step in your sourdough journey.
Our starter, affectionately named "Eureka," began its life with a simple mixture of whole wheat flour and filtered water. The wild yeasts present in the flour, coupled with those circulating in the air, soon began to colonize the environment. Over the course of several days, discarding a portion of the mixture and feeding it with fresh flour and water allowed the desired organisms to proliferate, creating a bubbly, active culture.
The active yeasts produce carbon dioxide, responsible for the bread's rise. The lactic acid bacteria, on the other hand, contribute to the characteristic sour flavor and also help to preserve the bread, extending its shelf life. Maintaining a healthy starter involves regular feeding and careful observation. We feed Eureka with a 1:1:1 ratio of starter, flour, and water, typically using a mixture of whole wheat and all-purpose flour for balance. The frequency depends on the activity level of the starter and the ambient temperature. In warmer environments, feeding may be required more frequently, while cooler temperatures can slow the process. A well-fed starter will approximately double in size within 4-8 hours, exhibiting numerous bubbles throughout. A sour, pleasant aroma is another indicator of a thriving culture.
Selecting the Right Ingredients: Quality Matters
While the sourdough method is rather forgiving, the quality of ingredients can significantly impact the final product. We learned this from experience, and now we understand the importance.
Flour: The type of flour used greatly influences the bread's texture, flavor, and rise. We consistently use a blend of bread flour and whole wheat flour. Bread flour, with its higher protein content, contributes to a stronger gluten network, resulting in a more substantial loaf. Whole wheat flour adds a nutty flavor and contributes to the starter’s nourishment. Experimenting with different flours, such as rye or spelt, can unlock new dimensions of flavor and texture.
Water: Quality water is essential. We prefer filtered water, as chlorine and other additives can inhibit the yeast activity. Water temperature also plays a role, with warmer water helping to accelerate fermentation.
Salt: Salt is a pivotal ingredient in sourdough. It controls yeast activity and strengthens the gluten structure. We use fine sea salt, adding it towards the end of the bulk fermentation.
Bulk Fermentation: The Heart of Sourdough Development
Bulk fermentation, the period after the ingredients are mixed and before the shaping process, is where the magic of sourdough truly unfolds. During this stage, the flour, water, salt, and starter combine allowing the gluten to develop, and the flavors to intensify.
The Autolyse: Beginning your process with an autolyse (where the flour and water are mixed and rested for 30-60 minutes before adding the starter and salt) can greatly improve the dough's elasticity and strength. This pre-hydration allows the flour to fully absorb the water, helping to hydrate, which in turn strengthens the gluten network and simplifies the mixing process.
Mixing and Kneading: We prefer a gentle mixing approach. We initially combine all ingredients (flour, water, and starter) in a large bowl. After the ingredients are roughly incorporated, the mixture rests briefly (autolyse). The salt is then incorporated. The dough is often folded, rather than kneaded, during the bulk fermentation.
Stretch and Folds: Throughout the bulk fermentation, we perform a series of "stretch-and-fold" manipulations. This technique strengthens the dough by developing the gluten, building structure, and evenly distributing the yeast and bacteria. We perform these folds every 30-60 minutes during the first few hours of bulk fermentation. Gently stretching a portion of the dough and folding it over onto itself, rotating the bowl, and repeating the process until the entire dough is folded. This is a game-changer!
Temperature Control: The temperature of the dough is crucial for fermentation. The warmer the temperature, the faster the fermentation. We aim for a dough temperature of around 75-78°F (24-26°C). In cooler environments, we often use a proofing box or a warm spot on the oven.
Observing the Dough: The bulk fermentation process can range from 4-6 hours, depending on the temperature and the activity of the starter. We closely monitor the dough’s progress by observing its volume increase and the formation of bubbles. It should expand significantly at this stage. The dough should look airy and light, showing significant fermentation activity.
Shaping and Proofing: Crafting the Perfect Loaf
Once the bulk fermentation is complete, it is time to shape the dough. This stage determines the final appearance and structure of the loaf.
Pre-Shaping: We gently deflate the dough from the bowl and pre-shape it into a loose ball or square. This initial shaping helps to develop tension in the dough, making it easier to shape into a final form.
Final Shaping: The process relies on the chosen baking vessel. For a round loaf (boule), we start by gently stretching the dough into a round. We then fold the edges of a rectangle inward, forming a tight seam in the bottom. Gently rotating and shaping the dough, creating a tight surface tension. We utilize a floured banneton basket or a bowl lined with a floured cloth to hold the shaped loaf.
Proofing: Proofing is the final rise, during which the shaped loaf develops its final structure and flavor. We proof the shaped loaf in the refrigerator (cold proofing) for anywhere from 12-24 hours. This slows down the fermentation, developing more complex flavors.
Baking to Perfection: The Sourdough Finale
Baking sourdough bread requires a degree of precision. The process of baking is as crucial as prior stages.
Preheating: A baking stone or Dutch oven preheated to a high temperature (typically 450-500°F/232-260°C) is essential for achieving a good oven spring and crusty exterior.
Scoring: Scoring the loaf before baking is a crucial step. It controls the expansion of the dough during baking, creating beautiful patterns and preventing the loaf from cracking randomly. We use a lame or a sharp knife to make a single, deep score down the center of the top of the loaf. Other scoring patterns are achievable with practice.
Baking with Steam: Steam helps the crust to expand prior to setting. This results in a light, airy crumb and a crisp crust. Baking the loaf in a Dutch oven traps moisture, creating the necessary steam. Or, you can introduce steam by placing a pan of water in the bottom of your oven.
Baking Time: The first 20-25 minutes in a Dutch oven, lid on. Then, remove the lid and bake for 20-30 more minutes until the crust is deeply golden brown and the internal temperature reaches 205-210°F (96-99°C).
Cooling and Enjoying: Allow the bread to cool completely on a wire rack before slicing. The bread continues to develop flavor as it cools. Then, slice it and indulge. Enjoy the fruits of your labor!
Troubleshooting Common Sourdough Challenges
Even with the best practices, sourdough baking can occasionally present challenges. Here are some common issues and solutions:
Flat Loaves: This can be caused by a weak starter, under-proofed dough, or insufficient gluten development. Ensure your starter is active and that you are allowing enough time for proofing and bulk fermentation.
Dense Crumb: Under-proofing, over-mixing, or insufficient oven spring can result in a dense crumb. Ensure the dough is proofed properly, the oven is hot enough, and that you are scoring correctly.
Sour Taste: A more sour taste is typical. To control the sourness, adjust the bulk fermentation time. A longer fermentation time results in a more sour flavor.
Shaping Difficulties: Sticky dough can be difficult to shape. Ensure the dough has sufficient gluten development. Use a lightly floured surface and handle the dough gently.
Embracing the Art of Sourdough: A Lifelong Journey
Baking sourdough bread is a journey of discovery, a continuous process of learning and refinement. It is about patience, observation, and a deep appreciation for the simple ingredients and the transformative power of time. Embrace the challenges, learn from your mistakes, and enjoy the process. The rewards, both in terms of delicious bread and the satisfaction of creating something from scratch, are well worth the effort. Happy baking!
