how to connect wifi hotspot to laptop windows xp
Title: How to connect Windows XP to your wireless network
Channel: NetComm
How to connect Windows XP to your wireless network by NetComm
Windows XP WiFi Hotspot Trick: Connect INSTANTLY!
Unleash the Wireless Magic: Instant Hotspot Bliss on Your Windows XP Machine!
Remember those days? When the internet was a luxury, and Wi-Fi hotspots were still a novelty? Well, believe it or not, your trusty old Windows XP machine can still conjure up wireless connectivity. Indeed, you can create a hotspot and share your internet connection with other devices. Let's dive into how to achieve instant Wi-Fi nirvana.
Crafting Your Wireless Sanctuary: The Foundation
First things first, you’ll need a working internet connection on your Windows XP computer. Moreover, this can be via a wired Ethernet cable or another Wi-Fi network. Afterward, ensure your PC possesses a wireless network card. This is crucial; without it, you'll go nowhere. Furthermore, these cards are often built-in on laptops but might require a separate installation for desktops. So, verify this early on.
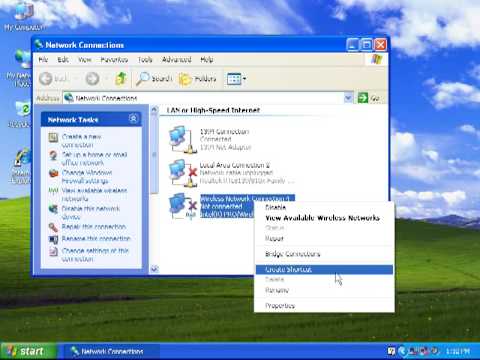
Next, access your network connections. Begin by right-clicking the network icon in your system tray (usually in the bottom right corner). Consequently, select "Open Network Connections". If you don't see this icon, your wireless card might not be enabled. Consequently, make sure it is.
The Bridge to Freedom: Embracing Internet Connection Sharing
Now, here’s where the magic happens. Select the internet connection that your Windows XP machine already uses to connect to the internet. Right-click and choose "Properties". Subsequently, navigate to the "Advanced" tab. Here, you’ll find "Internet Connection Sharing".
Check the box that says, "Allow other network users to connect through this computer's Internet connection". Then, select the network interface (usually your wireless card) from the “Home networking connection” dropdown. This step is paramount. Otherwise, you won't get the internet working as expected.
Configuration Crossroads: Addressing Network Settings
Sometimes, the settings aren't perfect right away. Therefore, it's wise to check a few things. Click “Settings” under the Internet Connection Sharing section. This opens a window to configure the services allowed through your shared internet connection. Generally, the default settings work well.
However, ensure that the services needed by devices connecting to your hotspot are enabled. For instance, enable things like HTTP, HTTPS, and other relevant protocols. Furthermore, this ensures smooth web browsing and application usage. In addition, remember to click "OK" on both the settings and the properties windows.
Wireless Security: Safeguarding Your Digital Realm
Don't forget security! Now that you're sharing your connection, you want to protect it. The next step involves setting up a secure wireless network. Open your wireless network connection properties again (right-click the wireless network card in Network Connections and select "Properties"). Next, go to the "Wireless Networks" tab.
Click “Add” to create a new wireless network profile. Give your hotspot a memorable name (SSID). Besides, choose a robust security type such as WPA2-PSK. Also, create a strong password. This is critical to prevent unauthorized access. You should never use an easily guessable password; that’s never a good idea! Subsequently, click "OK" and ensure the profile is set to "Automatically connect".
Testing the Waters: Confirming Your Connection
Now, test your newly created hotspot. Grab your phone, tablet, or another device with Wi-Fi capabilities. Search for available Wi-Fi networks. You should see the network name you created earlier. Select it and enter the password you set.
If all goes well, your secondary device will connect to the internet through your Windows XP machine. You should now be able to browse the internet. You should also be able to access any online services without interruption.
Troubleshooting Titans: Conquering Connectivity Challenges
Sometimes, things don't work perfectly the first time. So, be prepared to troubleshoot. If you can't see your hotspot, double-check that your wireless network card is enabled. Ensure the "Network Connection Sharing" is enabled correctly. Moreover, check your firewall settings on your Windows XP machine. Sometimes, the firewall can block network traffic.
Another aspect involves verifying your IP address settings. Make sure your devices are set to obtain an IP address automatically. In addition, try restarting your computer and the connecting devices. Usually, this will resolve the initial problem. Still facing issues? Check your wireless card drivers for updates. Moreover, an outdated driver could cause problems.
Beyond the Basics: Extra Tips and Considerations
Above all, keep your Windows XP machine secure. Make sure you have antivirus software installed and updated. Additionally, practice safe browsing habits. Furthermore, this reduces the risk of malware. Also, be mindful of bandwidth limitations. Sharing your internet connection will use some of your bandwidth.
Consequently, your internet speed on the host machine might be affected. In addition, consider the distance and obstructions. The signal strength of your wireless hotspot can be affected by distance and physical barriers. Finally, remember that Windows XP is outdated. Therefore, its security features are not as robust as modern operating systems.
Conclusion: Embracing Legacy Connectivity
There you have it! Creating a Wi-Fi hotspot on your Windows XP is achievable. It is a useful trick to know for many situations where you need internet access but can't find direct access. After all, a little patience and the right configuration can breathe new life into your old operating system. Now, go forth and share your internet connection with the world!
Unlock Your Laptop's Hidden Wi-Fi ID: The Secret IP Trick!Windows XP WiFi Hotspot Trick: Connect INSTANTLY!
Alright, fellow tech adventurers and nostalgic PC enthusiasts! Remember those days when a reliable internet connection felt like a rare treasure? Specifically, those times when you had your trusty Windows XP machine, and you needed to share its connection, perhaps with a shiny new smartphone or a tablet? If you just had a WiFi router, this would have been a simple. But, what if you didn't? What if you were stuck in a hotel room, or a friend's house with only a wired connection on your older PC? Fear not, because we're diving deep into a truly fantastic trick: turning your Windows XP machine into a WiFi hotspot, and doing it in a way that will have you connected instantly! Forget fumbling with complicated setups or feeling bewildered. We’re keeping it simple, just like those good old XP days.
1. The Retro Revelation: Why Bother with Windows XP Hotspots?
Let's be honest; Windows XP is a relic of the past. Yet, there are still many reasons to keep a copy of this OS around. Perhaps you have some legacy software that requires it to run, maybe you’re a retro gaming fanatic, or possibly you're just a bit of a history buff. Whatever the reason, if you’ve got a Windows XP machine and need to share its internet, this trick becomes a game-changer. Think of it like a secret weapon, a hidden ace up your sleeve for those moments where you need to stay connected. Remember the feeling when you first used a mouse (or even the internet)? It would be the same feeling as if you had a wireless hotspot.
2. Prerequisites: What You'll Need Before We Begin
Before we jump into the magic of creating a WiFi hotspot, we’ll need to get a few things ready. Much like how you'd grab the right tools before starting a DIY project, we'll get our ducks in a row.
- A Windows XP Computer: Obvious, right? It's the star of the show!
- An Ethernet Connection: This is how your XP machine will get internet access in the first place. A wired connection to a modem or a network port will do the trick.
- A Wireless Network Adapter: This is the crucial piece. You'll need a wireless adapter (either built-in or a USB adapter) compatible with Windows XP. These are still readily available online and are reasonably priced.
- Patience (and a Bit of Curiosity): We're going to follow steps. But, don't be afraid to experiment and see what works best for you!
3. Choosing Your Weapon: Software Options for a WiFi Hotspot
The beauty of XP’s hotspot ability is that we have a couple of options. We will need to look at some software that will allow us to accomplish this.
- Connectify (or Alternatives): Connectify is a user-friendly application specifically designed for creating hotspots. Simply download and install it, and follow the instructions. There are also some alternatives; just do a quick search for "WiFi hotspot software for Windows XP."
- The Ad-Hoc Network Method: This is where things get a bit more "old-school" but it relies on Windows XP's built-in capabilities. We'll explore this later on.
4. Unleashing the Power: Setting Up Your Hotspot with Connectify
Let's tackle this step-by-step. This is the easiest option and is perfect for those times when you want a no-fuss experience. So, first go through these steps:
- Download and Install Connectify: Find the software online, download it, and install it on your XP machine. The setup is fairly straightforward.
- Run Connectify: Once installed, open the program. You’ll be greeted with its user interface.
- Configure Your Hotspot: You will be asked to name your hotspot (the SSID) and create a password. Choose something secure, of course!
- Select Your Internet Connection: Tell Connectify where your internet is coming from (in this case, it's the Ethernet connection).
- Start the Hotspot: Click the "Start Hotspot" button, and voila! Your XP machine is now broadcasting a WiFi signal.
5. Diving Deeper: The Ad-Hoc Network Approach (For the Brave!)
If you're feeling adventurous and enjoy a bit of a challenge, the Ad-Hoc network method is a fun project. It is a bit trickier, but we can certainly do it:
- Open Network Connections: In Windows XP, navigate to the Network Connections panel (usually found in the Control Panel).
- Create a New Connection: Click "Create a new connection."
- Select "Set up an advanced connection."
- Choose "Set up a direct computer-to-computer connection."
- Name Your Network (SSID) and Select Security: Give your network a name (SSID) and choose the security settings. WEP is often the only option available.
- Configure the Connection: Set up the IP addresses manually. This part is essential. You'll need to assign an IP address to your XP machine (e.g., 192.168.0.1) and then configure your devices to obtain an IP address automatically.
- Share Your Internet Connection: Right-click on your Ethernet connection, go to "Properties," click the "Advanced" tab, and check the box that says "Allow other network users to connect through this computer's Internet connection."
- Enable Internet Connection Sharing: Ensure the "Home networking connection" points to your wireless network adapter.
6. Troubleshooting Common Problems: What to Do If Things Go Wrong
Even the best plans can run into issues. Don't panic if things don't work perfectly the first time. Here's a quick guide to common problems:
- Can't Connect: Double-check your password, make sure your wireless adapter is enabled, and troubleshoot any firewalls that might be blocking the connection.
- Slow Speeds: The speed of your hotspot will depend on the quality of your Ethernet connection. Try restarting your router.
- Security Concerns: WEP is not as secure as current WiFi protocols. If you can, try to ensure that the network is as secure as possible, or only use the hotspot for non-sensitive activities.
- Adapter Issues: An outdated or incompatible wireless adapter can cause a lot of headaches. Make sure your adapter is working correctly and supported by Windows XP.
- IP Address Conflicts: Ensure each device using the hotspot has a unique IP address.
7. Enhancing the Experience: Tips and Tricks for a Smooth Connection
Here are some extra tips to make your XP hotspot work even better:
- Update Your Wireless Adapter Drivers: Make sure your drivers are up-to-date for maximum compatibility and performance.
- Position Your XP Machine Strategically: Place your XP machine in a central location to provide the best signal coverage.
- Limit Connected Devices: The more devices connected, the slower the speed.
- Restart When Needed: Some minor issues can be fixed by a simple reboot.
- Consider a USB Wireless Adapter: A USB adapter can often provide better performance than a built-in one.
8. The Future is Now: Modern Alternatives and Advancements
Technology is always evolving, and while the XP hotspot is still handy, there are a few modern ways to create hotspots.
- Mobile Hotspot on Smartphones: Most smartphones have a built-in hotspot feature.
- Dedicated Mobile Hotspot Devices: These are small, portable routers that connect to mobile networks (4G, 5G) and create a WiFi hotspot.
- WiFi Router with Hotspot Capabilities: Many modern routers can be configured to create a guest network or a public hotspot.
9. Security Considerations: Staying Safe While Sharing
Let's not forget the importance of security. When setting up an XP hotspot, keep these things in mind:
- Use a Strong Password: This is the first line of defense against unwanted access.
- Keep Your XP Machine as Secure as Possible: Ensure your XP machine is secure with antivirus and anti-malware software.
- Be Cautious About What You Share: Avoid transmitting sensitive information over the hotspot.
- Consider WEP Security: WEP is the weakest security protocol. If possible, use the highest security setting available.
10. Beyond the Basics: Advanced Customization Options
If you want to take your hotspot to the next level, you can look at some advanced customization options:
- Configure IP Address Ranges: Control the number of devices.
- Filter MAC Addresses: Allow only specific devices to connect to the hotspot.
- Adjust Transmission Power: Increase or decrease the signal strength of the hotspot.
11. The Community Factor: Sharing Your XP Hotspot Experiences
We are one big community of tech enthusiasts; we can all share our stories. If you found this helpful, consider sharing your experience in the comments below.
- What challenges did you face?
- What was your favorite part?
- Do you have any other tips?
12. The Nostalgia Angle: Why We Still Love Windows XP
Dell Laptop WiFi Nightmare? Solved!How to Setup Wifi in Windows XP

By Etechlic How to Setup Wifi in Windows XP by Etechlic
How to connect internet LAN window xp

By Deen Emx How to connect internet LAN window xp by Deen Emx
Cara Internet di Win XP Menggunakan Theatering USB

By Abdurrahman Ishak Bois Cara Internet di Win XP Menggunakan Theatering USB by Abdurrahman Ishak Bois

Title: How To Fix Wifi Not Working In Windows XP Tutorial
Channel: MDTechVideos
How To Fix Wifi Not Working In Windows XP Tutorial by MDTechVideos
Laptop Wifi Hotspot
Here is the title for your article: How to Choose the Perfect Wedding Venue: A Comprehensive Guide
How to Choose the Perfect Wedding Venue: A Comprehensive Guide
The whisper of “yes,” the gleam in your eyes, the promise of forever – your wedding day is a tapestry woven with dreams. And at the heart of this exquisite fabric lies the venue, the stage upon which your love story will unfold. Choosing this pivotal location can feel overwhelming, a labyrinth of possibilities, pricing, and preferences. Fear not, future spouses. This comprehensive guide is meticulously crafted to illuminate the path, empowering you to select the perfect wedding venue, one that resonates with your vision and creates memories that will shimmer for a lifetime.
Defining Your Wedding Vision: The Foundation of Your Search
Before you even glance at a single brochure, it's crucial to clarify your wedding vision. This isn't just about aesthetics; it's about sculpting the essence of your celebration. Ask yourselves these critical questions:
- What is the overall atmosphere you desire? Do you imagine a romantic, candlelit affair, an exuberant outdoor celebration, or a modern, minimalist gathering? This will inform the architectural style, ambiance, and even the color palette you lean towards.
- What is your budget? Be realistic and establish a clear financial framework. This will significantly narrow your choices, preventing heartbreak and ensuring you stay within your means. Allocate specific percentages for the venue, catering, attire, and other expenses.
- How many guests will you be inviting? Your guest count is paramount. It dictates the size of the venue you require, impacting everything from seating arrangements to dance floor capacity. Consider a buffer for unexpected additions.
- What is the season and time of year you prefer? This influences the availability of venues, the type of activities you can incorporate, and the overall atmosphere. A summer wedding might lend itself to an outdoor ceremony, while a winter wedding might embrace a cozy, indoor setting.
- What are your personal preferences and values? Do you prioritize sustainability, historical significance, or accessibility? Identifying these values will help you find a venue that aligns with your priorities.
Once the answers to these questions are in place, you've crafted the bedrock upon which your venue search will be built.
Exploring Venue Types: Discovering the Diverse Landscape
The world of wedding venues is delightfully diverse. Understanding the different types available is the first step in finding the perfect fit. Here's a detailed overview:
- Ballrooms: A ballroom offers timeless elegance and is ideal for larger weddings. These spaces typically boast high ceilings, ample dance floors, and the flexibility to accommodate various décor styles. Consider the size of the ballroom in relation to your guest list; overcrowding can diminish the celebratory atmosphere.
- Hotels: Hotels provide comprehensive wedding packages, often including accommodation, catering, and event coordination. They offer convenience and a range of amenities, from luxurious suites for the wedding party to spa services.
- Barns and Farms: Rustic and charming, barns and farms are perfect for couples seeking a more relaxed, country-chic vibe. These venues often feature outdoor ceremony options, picturesque landscapes, and a warm, inviting atmosphere. Ensure the venue has adequate facilities for indoor events in case of inclement weather.
- Historical Buildings: Churches, museums, castles, and other historical buildings add an element of grandeur and history to your wedding. These venues often possess architectural splendor and unique character, creating a memorable backdrop for your ceremony and reception.
- Outdoor Venues: Gardens, parks, beaches, and vineyards offer breathtaking natural settings for your wedding day. Consider the weather conditions and the need for tents, especially if you are planning an outdoor ceremony or reception. Check regarding permits and any limitations on noise or decoration.
- Restaurants: Many restaurants offer private dining rooms or exclusive use of their entire space for weddings. This option is great for couples who value gourmet cuisine and a seamless dining experience.
- Unique Venues: Consider art galleries, theaters, yachts, or industrial spaces for a truly distinct celebration. These venues offer a blank canvas for creativity, allowing you to customize the event to your specific tastes. Be prepared to work with a more hands-on approach to décor and vendor selection.
Navigating the Venue Search: Practical Steps and Essential Questions
With your vision and understanding of venue types solidified, it's time to embark on the search itself. Here's a practical roadmap:
- Online Research: Utilize wedding directories, venue websites, and social media platforms to discover potential venues. Create a spreadsheet to track your findings, including contact information, pricing, and key features.
- Initial Contact: Reach out to venues that pique your interest. Inquire about availability for your desired date, pricing for different packages, and any restrictions on vendors or décor.
- Venue Visits: Schedule in-person tours of your top contenders. This is the most crucial step in determining the suitability of the venue. Bring a notebook and take detailed notes.
During your venue visits, ask these vital questions:
- What is the venue's capacity? Is it sufficient for your guest list?
- What services are included in the rental fee? Are tables, chairs, linens, and other essentials provided?
- What are the catering options? Can you choose your own caterer, or are you required to use an in-house service?
- What are the bar service options? Are there open bar, cash bar, or other options available?
- Is there a dedicated event coordinator? This person will be your point of contact leading up to and during the wedding.
- What are the cancellation policies? Understand the terms and conditions in case of unforeseen circumstances.
- What are the payment schedules? Be aware of the payment structure and deadlines.
- Are there any restrictions on décor, music, or other aspects of the event?
- What is the parking situation? Is there ample parking for your guests?
- What are the accessibility features? Are there provisions for guests with disabilities?
- What are the backup plans in case of inclement weather (for outdoor venues)?
- Can you see the space set up for a wedding or access photos of previous events?
- Is there a preferred vendor list, and are you obligated to use those vendors?
- What is the venue's policy on alcohol consumption and liability?
- Are there any hidden fees or extra charges?
Take photos and videos during your tours to help you remember the details.
Evaluating Amenities and Logistics: Ensuring a Smooth Celebration
Beyond the aesthetics, certain amenities and logistical considerations can significantly impact your wedding day experience:
- Catering and Bar Service: Assess the quality and flexibility of the catering options. Taste samples and review menus. Consider the bar service options, including the types of drinks offered and the cost.
- Parking and Transportation: Verify the availability of ample parking for your guests. If transportation is required, explore options such as shuttle services or valet parking.
- Restroom Facilities: Ensure that the venue has adequate and well-maintained restroom facilities.
- Accessibility: Verify that the venue meets the needs of all guests, including those with disabilities.
- Lighting and Sound: Examine the lighting and sound systems. Ensure that the lighting complements the desired ambiance, and that the sound system is adequate for the ceremony and reception.
- Accommodation: If the venue offers accommodation, evaluate the quality and availability of rooms for yourselves and your guests.
- Setup and Breakdown: Inquire about the venue's policy on setup and breakdown. Determine who is responsible for setting up and taking down decorations, and what time constraints apply.
- Vendor Coordination: Clarify the venue's policies regarding vendor coordination. Does the venue have a preferred vendor list, and how does it coordinate with outside vendors?
- Insurance: Make sure the venue has adequate liability insurance and confirm that you are covered if anything goes wrong.
Negotiating and Signing the Contract: Securing Your Venue
Once you have narrowed down your choices and selected your ideal venue, it's time to negotiate and sign the contract. Here are critical steps:
- Review the Contract Carefully: Read the contract thoroughly, paying close attention to all the details, including the rental fee, included services, cancellation policies, and payment schedules.
- Negotiate Terms: Do not hesitate to negotiate. You might be able to negotiate pricing, additional services, or flexible terms.
- Clarify All Questions: If you have any questions, ask the venue representative to clarify them before signing the contract.
- Get Everything in Writing: Ensure that all agreements and negotiated terms are documented in writing in the contract.
- Read the fine print: Be absolutely sure you understand all clauses, conditions, and exclusions within the agreement.
Conclusion: Creating a Lasting Legacy
Choosing the ideal wedding venue is a significant decision, one that shapes the essence of your celebration. By following this comprehensive guide, you'll have the knowledge and tools to navigate the process with confidence and ease. Remain true to your vision, prioritize your preferences, and embrace the journey. As you step into your chosen venue, surrounded by loved ones, you'll be creating a lasting legacy, a vivid memory that will be cherished for a lifetime. Each detail, from the setting to the service, will blend harmoniously to reflect your unique love story. Your perfect day awaits.
