dell laptop wifi adapter is not connected

Title: Fix Dell Laptop Wi-Fi is Not Working Problem in Windows 1087 2025
Channel: FIXsage
Fix Dell Laptop Wi-Fi is Not Working Problem in Windows 1087 2025 by FIXsage
dell laptop wifi adapter not working, dell inspiron wifi adapter not working, dell laptop wireless adapter not working, dell wifi adapter not working, dell inspiron wireless adapter not working
Dell Laptop WiFi Nightmare? Fix Your Connection NOW!
Here's a draft:
Dell Laptop WiFi Woes? Don't Sweat It – Get Connected!
Life with a Dell laptop should be smooth sailing. Unfortunately, the Wi-Fi can sometimes decide to play hard to get!. It’s a source of frustration, especially when you're in the middle of something important. But, take heart! Fixing your Dell's Wi-Fi issues is often easier than you think. So, let's dive into how to banish those connection demons.
Is Your Dell Really the Culprit? A Quick Reality Check
Before you start tearing your hair out, let’s eliminate other possibilities. First, check your internet's status. Is your router working correctly? Try another device to confirm. If other gadgets connect, then your Dell is the primary suspect. Moreover, it's essential to eliminate external factors. Sometimes the problem isn't your Dell at all. It's the signal, and you have to examine where you’re working.
Troubleshooting Your Dell's WiFi: The First Steps
Okay, your Dell is the problem child. What now? Begin with the basics. Reboot! Restarting your laptop often works wonders. Simultaneously restart your router and modem. Wait a few minutes, then power everything back up. After that, attempt to connect again. Is the Wi-Fi light on your laptop lit?. Is the wireless network visible in your list of available networks?
Driver Drama: Ensuring Your Dell Knows How to Speak WiFi
Drivers are essential. They enable your Dell to communicate with your Wi-Fi adapter. Outdated or corrupted drivers can cause connection issues. Therefore, it’s time to check and update them.
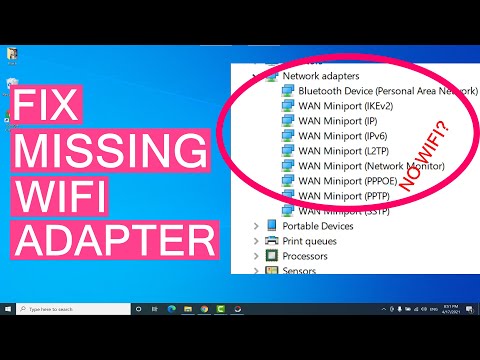
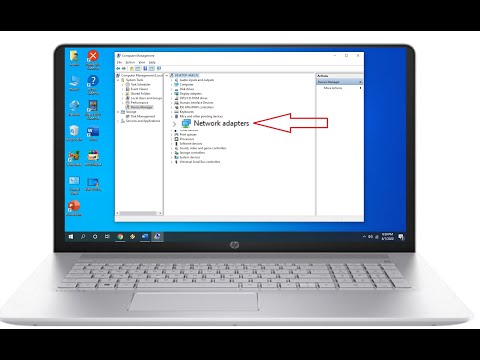
- How to Update Drivers: Go to the Device Manager. You can find it by searching in your Windows search bar. Locate "Network adapters." Expand this section. Then, right-click on your Wi-Fi adapter. Select "Update driver." Choose "Search automatically for drivers." Windows will search for the latest drivers. If it finds new ones, it'll install them. After that, restart your laptop. Test your connection again.
- Downloading Drivers Directly: Visit the Dell support website. Enter your Dell's service tag or model number. Navigate to the "Drivers & Downloads" section. Look for your Wi-Fi adapter drivers. Download and install the most recent versions. Subsequently, restart your system.
The Power of the Troubleshooter: Let Windows Lend a Hand
Windows has built-in troubleshooters. These are useful tools for diagnosing problems. In this case, try the Network troubleshooter. It'll guide you through the process of fixing Wi-Fi issues.
- Running the Troubleshooter: Access "Settings" on your Dell. Go to "Network & Internet". Select "Status". Find "Network troubleshooter" and click on it. Follow the on-screen prompts. The troubleshooter will scan for and address problems. After it's done, test your connection.
Network Settings: Are They Playing Nice?
Your network settings might be preventing a connection. Verify these settings:
- Forget and Reconnect: Sometimes, forgetting the network and reconnecting is the solution. Find your Wi-Fi network. Right-click on it and choose "Forget." Re-enter your password. Then, see if you can connect.
- Check IP Address: Ensure your Dell obtains its IP address automatically. Go to network settings. Then, find the network adapter settings. Confirm "Obtain an IP address automatically" is selected.
- DNS Server Issues: Your DNS server helps translate website names into IP addresses. Sometimes, changing your DNS server helps. Use a public DNS server like Google's (8.8.8.8 and 8.8.4.4). In that case, modify your network adapter settings.
Hardware Hurdles: When It's Time to Investigate Further
If software solutions fail, it's sensible to check the hardware.
- Physical Inspection: Is your Wi-Fi card properly seated? Open your laptop's access panel safely. Consult your Dell's manual for instructions. Verify the Wi-Fi card is securely connected. However, be extremely careful when handling internal components.
- Wireless Adapter Failure: In rare cases, the wireless adapter could be faulty. If you suspect this, contact Dell support. Ask about repair options. Consider the cost of replacement versus repair.
Security Software Shenanigans: Is Your Firewall the Villain?
Your security software might be interfering with your Wi-Fi. Firewalls can sometimes block legitimate network traffic. Temporarily disable your firewall. Then, try to connect. If this resolves the issue, adjust your firewall settings. Allow your Wi-Fi adapter to access the network.
The Final Resort: Contacting Dell Support
If all else fails, do not hesitate to seek professional help. Reach out to Dell's support team. They can provide specialized assistance. They can also guide you through advanced troubleshooting steps. Provide them with detailed information about the issues. Explain the steps you've already taken. That will help them diagnose the problem efficiently.
Conclusion: WiFi Freedom Awaits!
Don't let Wi-Fi problems ruin your day. These troubleshooting steps will help you get back online. Following these tips should restore your internet. Now, go forth and enjoy seamless Wi-Fi on your Dell! Remember, patience and persistence are key. You'll regain your connection soon.
Laptop WiFi Slow? (Other Devices Blazing Fast!) FIX NOW!Dell Laptop WiFi Nightmare? Fix Your Connection NOW!
Alright, let's be honest, folks. There's nothing quite as infuriating as a Dell laptop that decides to become a digital hermit. You're ready to dive into that online meeting, stream your favorite show, or just check your email, and BAM! The dreaded WiFi icon with the little "x" appears, mocking your connectivity dreams. Sound familiar? Trust me, we've all been there. It's like your laptop suddenly develops a bad case of internet amnesia. But fear not, because we're going to unravel this WiFi mystery and get you back online, pronto! Think of this as your comprehensive guide to escaping the Dell WiFi abyss.
1. The WiFi Woes: Why Is My Dell Being So Difficult?
Before we jump into solutions, let's understand why this happens. Like a grumpy teenager, your Dell laptop can have its moments. These WiFi gremlins could be caused by a multitude of factors. Think of it like a detective story – we need to uncover the clues. Maybe your drivers are outdated, like an old mixtape in a world of streaming. Perhaps the wireless antenna is on the fritz or perhaps the router is having a bad hair day and struggling to connect. Or maybe it’s simply a software glitch! We'll delve into the common culprits.
2. Checking the Obvious: The First Line of Defense
Okay, before we start tearing apart your laptop, let’s tackle the low-hanging fruit. It's amazing how often the simplest fixes solve the most complicated problems.
- Is WiFi even turned on? Sounds silly, right? But double-check that your WiFi switch (often a physical switch on the side or front of your laptop) is flipped to "on." Also, look in your system tray (bottom right corner of your screen) for the WiFi icon. Does it show connectivity?
- Airplane Mode: This sneaky little feature can be a real WiFi killer. Make sure Airplane Mode isn't activated. Click the WiFi icon in your system tray. Should be off!
- Restart Everything: Yes, the classic IT solution. Restart your laptop and your router. Think of it as giving everything a digital reboot. Works wonders!
3. Driver Drama: Are Your WiFi Drivers Up-to-Date?
Ah, drivers! They're the often-overlooked digital middle managers that translate instructions between your hardware and software. Outdated drivers can lead to all sorts of problems, including WiFi dropouts. Like having a rusty pipe in your house, old outdated drivers hinder the flow.
- How to Check: Go to Device Manager (Type "Device Manager" in the Windows search bar). Expand "Network adapters." You should see your WiFi adapter listed (e.g., "Intel Wireless-AC 9260"). Right-click it and select "Update driver." Windows will search for updated drivers.
- If That Doesn't Work: You can download the latest drivers from the Dell support website. Just enter your Service Tag or model number, and search the drivers section. Always install the drivers specifically for your Dell laptop model.
4. Router Rituals: Troubleshooting Your Home Network
Sometimes, the problem isn't your Dell, but your router. Think of the router as the gatekeeper of your internet connection. Are you being denied entry?
- Distance Matters: Are you too far away from the router? WiFi signals weaken over distance. Try moving closer. It's like trying to hear a whisper across a football field, getting closer helps.
- Router Reboot (Again!): Power cycle your router. Unplug it for 30 seconds, then plug it back in. It’s a quick and easy reset.
- Check the Router's Firmware: Outdated router firmware can cause connectivity problems. Check your router's manual or the manufacturer's website for instructions on how to update it.
5. Network Settings: Digging Deeper into Your Connections
Let's get a little more technical – just a little! Sometimes, there are hidden gremlins lurking within your network settings.
- Forget and Reconnect: Go to your WiFi settings and "forget" your network. Then, reconnect using your password. It's like hitting the reset button on a forgotten relationship with your Wifi.
- Troubleshoot in Windows: Windows has a built-in troubleshooter for network problems. Right-click the WiFi icon in the system tray and select "Troubleshoot problems." Let Windows work its magic.
6. The Power of Power Saving: A Hidden Culprit
Your Dell laptop might be trying to conserve battery life by throttling your WiFi. Sometimes, it's a bit too enthusiastic…
- Check Power Management Settings: In Device Manager (again!), right-click your WiFi adapter, select "Properties," then go to the "Power Management" tab. Uncheck "Allow the computer to turn off this device to save power." This ensures your WiFi adapter is always "on."
7. Firewall Follies: Is Your Firewall Blocking You?
Firewalls are your digital guardians, but sometimes they can be a bit overzealous.
- Check Firewall Settings: Make sure your firewall (Windows Firewall or a third-party firewall) isn't blocking your WiFi connection. This is generally found in your system settings.
- Temporarily Disable for Testing: As a test, you can temporarily disable your firewall to see if it resolves the issue. Be cautious while doing this, and turn it back on as soon as you're done.
8. Hardware Hurdles: Is the Antenna to Blame?
While less common, sometimes the problem lies in your Dell's hardware.
- Internal Antenna: Some laptops have an internal antenna. If your connection is consistently weak, there might be a hardware issue. Consult a professional technician if you suspect a hardware problem.
- External Antenna Options: Some Dell laptops have external antenna ports. If your model supports it, you could try connecting an external antenna for a stronger signal.
9. Malware Mayhem: A Digital Intruder?
Believe it or not, malware sometimes is the culprit by interfering with your connections.
- Run a Full Scan: Perform a comprehensive virus and malware scan using your preferred antivirus software.
- Clean Up Unwanted Programs: Get rid of anything you don't recognize or need.
10. Resetting Your Network Settings (Advanced)
This is a more drastic solution, but it can be effective.
- Network Reset in Windows: Go to Settings > Network & Internet > Advanced network settings > Network reset. This will reset all network adapters and settings to their default values. Be prepared to re-enter your WiFi passwords!
11. Check for Interference: The WiFi Wasteland
Your WiFi signal can be affected by others.
- Microwave Moments: Avoid getting close to things that interfere with WiFi (microwaves).
- Other Devices: Other devices such as Bluetooth gadgets, or even neighbors' WiFi signals, can cause issues.
12. Dell Support to the Rescue? When to Call for Help
If you've tried everything and your WiFi still won't cooperate, it's time to call in reinforcements.
- Dell's Support Website: Dell's support website has a wealth of resources, including troubleshooting guides, driver downloads, and contact information.
- Tech Support: Get professional help if you are still having issues.
13. The Final Frontier: Reinstalling Windows (Extreme!)
This is a last resort, but a fresh Windows installation can often resolve persistent issues.
- Back Up Your Data: Before reinstalling Windows, back up all your important files.
- Follow the Windows Reinstallation Guides: This procedure is done at your own risk.
14. Preventative Measures: Keeping Your WiFi Happy
Once you've fixed your WiFi, let's keep it that way!
- Regular Driver Updates: Stay on top of driver updates!
- Keep Your System Clean: Run regular scans for malware.
- Secure Your Network: Use a strong password and keep your router's firmware up to date.
15. Concluding the Connection Conundrum: Back Online!
So there you have it, your comprehensive guide to banishing the Dell WiFi blues. We've covered everything from the simple fixes to the more advanced troubleshooting tips. Remember, it's often a process of elimination. Don't give up!
Closing Notes
We hope the insights and advice detailed here have helped you resolve the WiFi issues on your Dell laptop. Remember, in most cases, the fix is within reach, and you can get back to streaming, working, and connecting with the world. We have designed a guide to have you back up and running. If all else fails, don't panic; reach out to Dell Support.
FAQs
1. My WiFi was working perfectly, and then it suddenly stopped. What could have caused this?
- Many things, including a driver issue, a Windows update gone wrong, or a router issue. Start with a simple reboot of your laptop and router and then work your way down the checklist. A random issue may have caused the error.
2. My WiFi is connecting, but the internet is slow. What can I do?
- Check your internet speed (do an online speed test). If the speed is slow
How To Fix Wireless Adapter Missing In Windows 10 Get WiFi Adapter Back
By Sandeep Singh How To Fix Wireless Adapter Missing In Windows 10 Get WiFi Adapter Back by Sandeep Singh
How to FIX Any Missing NETWORK ADAPTER in Windows 11 BEST FIX

By Tech Gene How to FIX Any Missing NETWORK ADAPTER in Windows 11 BEST FIX by Tech Gene
How to Get Back Missing Network Adapter from Device Manager in Windows 1087
By MJ Tube How to Get Back Missing Network Adapter from Device Manager in Windows 1087 by MJ Tube

Title: Dell Laptop WiFi Not Working How to Fix Wifi Issue in Laptop tipsandtricks
Channel: MacLap IT Care - Laptop MacBook Repair Experts
Dell Laptop WiFi Not Working How to Fix Wifi Issue in Laptop tipsandtricks by MacLap IT Care - Laptop MacBook Repair Experts
Laptop Wifi Hotspot
Let's begin.
Title: Unveiling the Secrets of a Thriving Culinary Herb Garden: A Comprehensive Guide
We all dream of stepping out our back door and snipping fresh basil for a vibrant pesto, or plucking fragrant rosemary to season a Sunday roast. The reality of a thriving culinary herb garden, brimming with flavor and ready to enhance our meals, is entirely achievable. This guide unveils the secrets to cultivate your own edible oasis, transforming your kitchen into a haven of fresh, homegrown goodness. We will delve into every facet, from selecting the perfect herbs to navigating the intricacies of soil, sunlight, and successful harvesting.
Choosing Your Culinary Companions: Selecting the Right Herbs for Your Needs
The cornerstone of any successful herb garden lies in selecting the right herbs. Consider your culinary preferences. What cuisines do you enjoy? What flavors do you gravitate towards? Certain herbs thrive in specific climates and conditions, so it’s advantageous to tailor your selection to your local environment.
- The Mediterranean Marvels: Basil, oregano, rosemary, thyme, and sage are the cornerstones of Mediterranean cuisine. These herbs flourish in full sun and well-drained soil. Basil, a relatively tender annual, requires consistent watering. Oregano, rosemary, thyme, and sage are more drought-tolerant and can thrive in slightly less fertile conditions.
- The Italian Icons: Beyond basil, parsley, chives, and marjoram are essential to Italian cooking. Flat-leaf parsley provides a more robust flavor than its curly counterpart. Chives offer a mild onion flavor, perfect sprinkled over salads and potatoes. Marjoram closely resembles oregano but boasts a gentler, sweeter taste.
- French Favorites: Tarragon, chervil, and savory add a distinctive French flair. Tarragon, with its subtly anise-like flavor, is indispensable for béarnaise sauce. Chervil brings a delicate, slightly licorice flavor. Savory offers a peppery bite, often used in bean dishes.
- Asian Adventures: Cilantro, mint, and lemongrass bring vibrant flavors to Asian cuisine. Cilantro’s distinctive taste is essential in Thai and Vietnamese dishes. Mint, a vigorous grower, requires containment. Lemongrass thrives in warm climates and offers a citrusy zest.
Planning and Planting: Laying the Foundation for a Bountiful Harvest
Once you've selected your herbs, the next crucial step is planning and planting. Careful consideration of several factors is vital to success.
- Sunlight is Paramount: Most culinary herbs demand at least six hours of direct sunlight daily. Consider the sun's path across your garden and choose a location that receives ample sunlight throughout the growing season. Those less sun-demanding herbs include parsley, chives, chervil, and mint.
- Soil Preparation: The Key to Nutrient-Rich Growth: Herbs thrive in well-drained soil that is rich in organic matter. Before planting, amend your soil with compost or well-rotted manure. This improves drainage, aeration, and nutrient retention. A soil test can help you determine the existing nutrient levels and the need for any amendments.
- Container Gardening Considerations: If you have limited space, a container garden is an excellent option. Choose pots with drainage holes and use a well-draining potting mix. Container-grown herbs require more frequent watering and fertilization.
- Starting Seeds or Purchasing Seedlings? Starting herbs from seed is the most economical option. However, it requires more patience and attention. Seedlings offer a quicker start and are ideal for beginners. If starting seeds indoors, provide adequate light to prevent leggy growth.
Nurturing Your Herb Garden: Watering, Weeding, and Maintenance
Consistent care is essential to keep your herb garden flourishing.
- Watering Wisely: Overwatering is a common pitfall. Water deeply but infrequently, allowing the soil to dry out slightly between waterings. The frequency of watering will depend on the climate, the specific herbs, and the soil type. Container-grown herbs require more frequent watering than those planted in the ground.
- Weeding Vigilance: Weeds compete with herbs for nutrients, water, and sunlight. Regular weeding is crucial to maintain a healthy herb garden. Mulching with organic matter, such as shredded bark or straw, helps to suppress weeds and retain moisture.
- Fertilizing for Optimal Growth: Herbs generally don't require heavy fertilization. However, feeding them occasionally with a balanced organic fertilizer can promote healthy growth. Avoid over-fertilizing, as this can diminish the flavor of the herbs.
- Pruning and Pinching: Encouraging Bushy Growth: Regular pruning and pinching encourage bushier growth and prevent herbs from becoming leggy. Pinch off the tips of young plants to encourage branching. Regularly prune back older plants to maintain their shape and promote new growth.
Harvesting and Preserving: Savoring the Fruits of Your Labor
The greatest reward of a culinary herb garden is the ability to harvest fresh herbs for your culinary creations.
- The Art of Harvesting: Harvest herbs in the morning, after the dew has dried but before the day's heat sets in. This is when the essential oils are at their peak. Use sharp scissors or a knife to cut stems, leaving some foliage behind to encourage new growth.
- Fresh is Best (But Preservation is Key): Use fresh herbs as soon as possible for the most intense flavor. However, preserving herbs allows you to enjoy them throughout the year.
- Drying Herbs: A Simple Method: Drying is the simplest method of preservation. Hang herb stems in a dry, well-ventilated location until they are completely dry. Alternatively, dry herbs in a food dehydrator or oven at a low temperature. Once dry, store the herbs in airtight containers away from light and heat.
- Freezing Herbs: Preserving Flavor Through Cold: Freezing is an excellent way to preserve the flavor of herbs. Chop or finely chop fresh herbs and freeze them in ice cube trays with water or olive oil. Once frozen, transfer the cubes to freezer bags.
- Making Herb-Infused Oils and Vinegars: Herb-infused oils and vinegars add a burst of flavor to your cooking. Infuse olive oil or vinegar with fresh herbs for several weeks, and then strain the oil or vinegar before storing it.
Common Challenges and Solutions: Troubleshooting Your Herb Garden
Even the most experienced gardeners encounter challenges. Here's how to address some common issues:
- Pest Problems: Aphids, spider mites, and other pests can plague herb gardens. Inspect your plants regularly for signs of infestation. Control pests organically with insecticidal soap, neem oil, or companion planting.
- Disease Dilemmas: Powdery mildew and fungal diseases can affect herbs. Ensure adequate air circulation, avoid overwatering, and remove any infected leaves or plants.
- Yellowing Leaves: Pinpointing the Culprit: Yellowing leaves often indicate a problem with watering, nutrient deficiency, or pest infestation. Assess your watering schedule, check for pests, and amend the soil accordingly.
- Leggy Growth: Addressing the Elongation: Leggy growth occurs when herbs don't receive enough sunlight. Move your plants to a sunnier location or provide supplemental lighting. Pinch off the tips of the plants to encourage bushier growth.
Embrace the Journey: From Seed to Supper
Cultivating a culinary herb garden is a rewarding experience. It allows you to connect with nature, enhance your culinary creations, and enjoy the simple pleasure of fresh, homegrown flavor. By following these guidelines and embracing the joy of experimentation, you can create a thriving herb garden that will delight your senses and elevate your cooking. Remember that gardening is a learning process. Don't be discouraged by setbacks. Embrace the journey, learn from your experiences, and savor the delicious rewards of your efforts. Your culinary adventures await!
